More Work With Studio D, Part 4
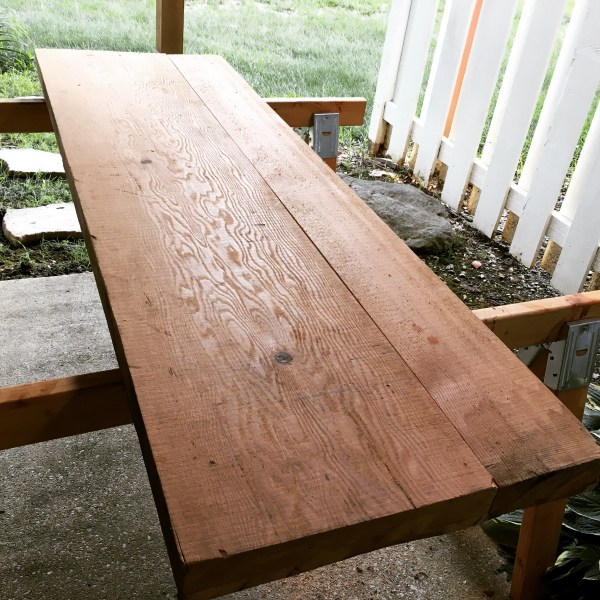
A few weeks ago, I borrowed a friend’s Festool AFT-55 (circular saw) and tracks so I could make some exact cuts on the hall table and end table. I love the precision of the Festool, but don’t yet use it enough to justify such a purchase. I would consider picking up something, though, if I continue with making large-ish things, like live edge tables. At $650+ for the new track saws, however, I might get more versatility from the Carvex jigsaw.
The only real problem I encountered with the AFT-55 was the depth of cut. The walnut planks were over 8/4 thick and the Festool could only cut about 1 7/8″. So I had to finish the rest with my Disston 26″ rip saw that was cleaned up and sharpened by Wentzloff & Sons (I got it, along with a crosscut, from Jon Zimmer , who still carries saws that are cleaned up and sharpened by Wentzloff).

This is the underside. I did that so it looked like I was a ripping beast.
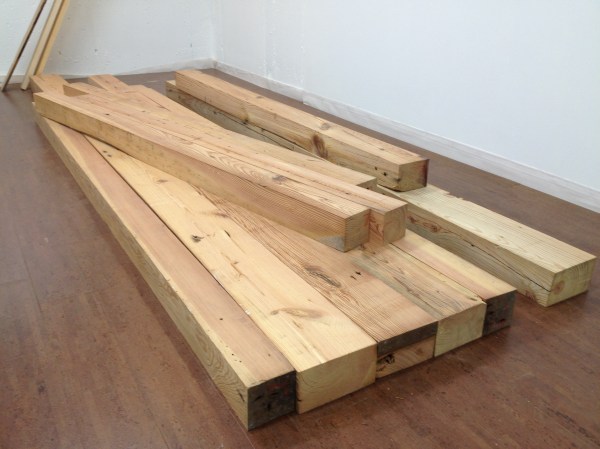
While I had the Festool saw in my possession, I decided to rip two of the reclaimed Checkerdome douglas fir planks to proper size so I can make some headway on the workbench, as well. Those beams are almost 3″ thick. That meant ripping over 1″ with the rip saw. It might not seem like a lot, but those old beams are very dense and heavy and it took a lot of effort to saw through them.

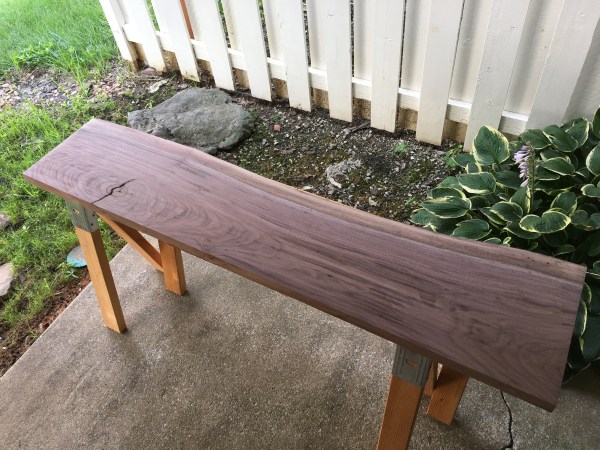
Although I’d be a lot happier with a longer top, say something more like 8′, having a proper bench of even 6′ long will be a welcomed change. This is a good idea of how it will look, about 6′ long, 22″ wide, and just under 3″ thick.
The top of the new bench…
With the tops cut to size, I went to my friend Scott’s shop Saturday morning to put some time in on his 52″ “friend maker” (wide belt sander). I spent more time with the end table top than the other three because it had so much cup. I was able to get it perfectly flat and still retain 1 3/8″ thickness. The hall table was a lot straighter and I was able to keep it to 1 5/8″ thick. I’m not at all worried about this; I think the end table needed to be a little thinner than the hall table, anyway. If it was too thick, it would look chunky.

Douglas fir after a few trips through the 52″ sander…
End table top after many trips through the sander…
Hall table top after several trips through the sander…
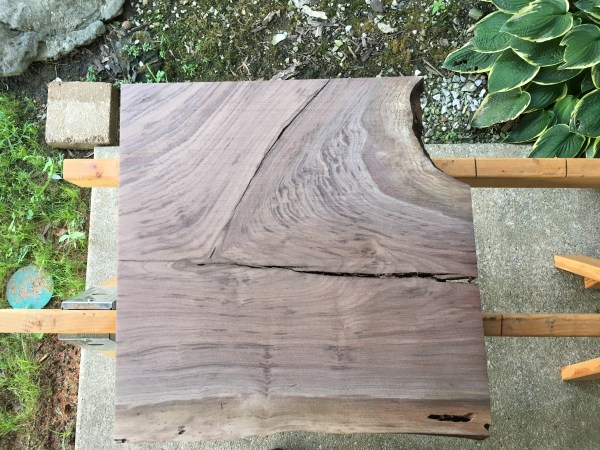
Some of you might recall I talked about saving the cut-offs from the bog oak butterfly keys I inlaid into the conference table I made last year. Turns out, they came in very handy (once I was finally able to locate them, after sorting through many boxes of stuff)! I was able to lay them out on the tables, not to use as actual templates for inlay (because each one is individually scribed and inlaid), but just to give me some idea as to what it would look like.
Using these, I can easily adjust positions and determine the best design layout and evaluate what I need to make.
I still have some spare bog oak keys left over from last year – one large one and three smaller ones – so I’ll make up a few more and maybe even make some medium-sized off-cuts using two of the larger ones to see if having three sizes might show better.

Proposed butterfly inlays for hall table…
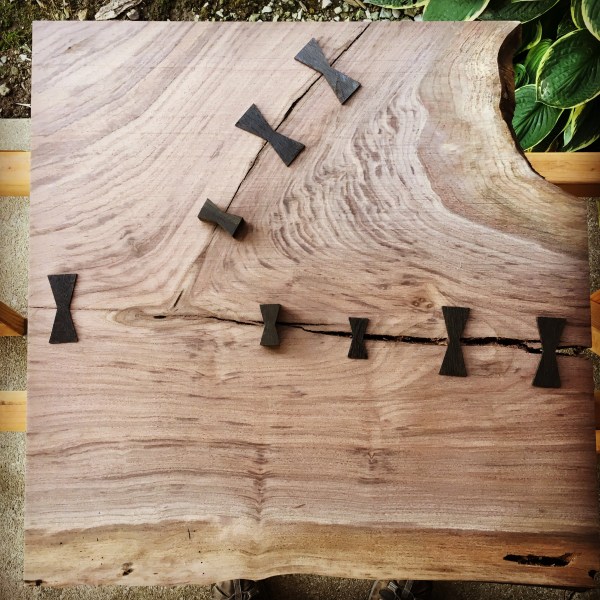
Not bad, but I want to see how it looks with a transitional size between the two…
More to come later…
TKW
More Work With Studio D, Part 3
Over the years, I’ve learned that my initial gut instinct is usually right. This was no exception.
After spending a half hour cutting cardboard and using blue tape, it didn’t take two seconds for me to realize I needed to trim the end table on the crotch side and not the straight live edge side when I set it up against the slab.
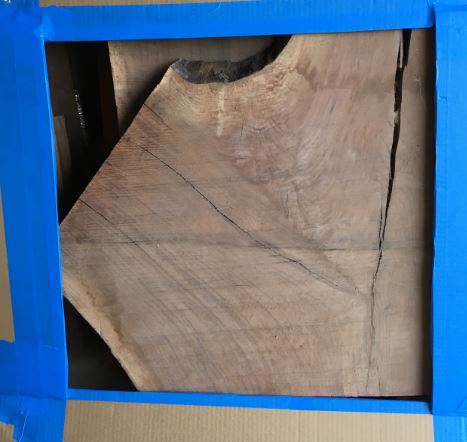
If it was trimmed on the straight live edge…

If it was trimmed on the branch live edge…
Trimming the branch side off will still leave me with plenty of awesome grain in the crotchal region while allowing me to create a usable table top.
I did not have a strong initial impression of whether or not 12″ was enough depth for the hall table. This gives something of an idea of what it might be, though I would probably keep all of the live edge and not chop it like that. Or maybe I could make the live edge more of a straight-line reference for the front of the table for consistency.

I did not have time this morning to adjust the frame to 15″ to see what a deeper hall table might look like. I will do that this evening, though, as I think it is important to see. Looking at it framed out the way it is, I’m afraid I’m not getting enough depth. Also, I need to check with the photos of where the table will go again. If the hall table ends up with one end being deeper, because of the live edge, I need to know which end it should be as I can control that based on which side of the plank I take the waste from.
Oh, I updated the last post, but wanted to mention here as well that my wood supplier in Evansville, IN is Joe Schneider. His website is The Wood Slab King. If you’re in need of large pieces of wood at a great price and you’re within 4 hours of Evansville, he’s definitely worth checking out.
More to come…
TKW
More Work With Studio D, Part 2
Over the holiday weekend, I took a trip to Evansville, IN, to visit one of my wood suppliers, Joe Schneider. He has a great selection of wood and the price is better than anything I can find within 50 miles of the Greater Saint Louis area, so it’s worth the trip.
This time I was after an 8/4 plank of walnut that was 98″ long, about 20″ wide for most of its length and then about 30″ wide at the crotch. There were several slabs to choose from, so I picked the one I felt was best suited for the project.
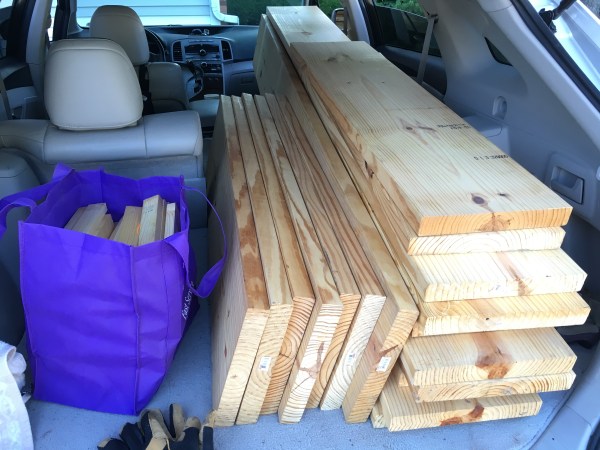
Once again, there were those who doubted I would be able to fit the wood into my Toyota Venza…

Not even the German Shepherd had faith in my car!
Since I knew the rough dimensions I needed, however, we just cut it into two pieces there and I only had to drop down half of the back seat.

Before we left town, we were directed to a place called “Carrie Jen’s” (which seemed an odd name until we realized it was an Amish-based restaurant called the Carriage Inn) for some delicious fried chicken and bumbleberry pie with ice cream. I think the beard suits me. I’m amazed it has taken me so long to get around to growing one.

The beard isn’t too bad; the pie was delicious.
Now that I have the pieces home, I’ll make some cardboard frames of the table dimensions (5’6″ long by 12″ deep for the hall table and 24″ x 24″ for the end table) and figure out the best place to make my cuts. Having the visual reference always helps me to determine how to make such important cuts. I will take the opportunity to get the client’s opinion, as well, in this case.
I think they might want the hall table to be a bit deeper than the indicated 12″ and the crotch is about 30″ wide, so I’ll have to trim off 6″ from one of the live edges. But do I trim it from the left side, with the relatively straight live edge? Or from the right side, where there is some nice crotch figure? My initial instinct is from the right, because I think it will look better with the straighter live edge on the front of it, even though it will mean losing some of that beautiful figure, but I’ll have a better idea when I frame it out. This must be decided first; there is a bit of cup to the end table section, so I’m going to cut it to size before I flatten it to retain as much thickness as possible.
I’m not at all worried about the split, even though it looks rough. I will be stabilizing it with several bog oak butterfly keys and it is still quite solid on the far end. This table will be a first for me in that some of the keys will be exposed in the gap. This means I will treat at least part of each bog oak key as if it is a finished surface (planed smooth) and will need to figure out how to clean out the inside of the crevice (I’m thinking pressurized air for starters).
Stay tuned for more…
TKW
More Work With Studio D, Part 1
Funny how life works. You think you have a plan set up, at least short term, to get something done (in this case, organizing my tools and shop space and making some much-needed shop storage and a workbench) and something comes up that is terribly difficult to turn away.
Just as I was moving back into my old condo last month, I got an email from the owner of the marketing design firm I made the conference table for last year. They have need of a long sofa table and an end table. They want them in a way that is congruent with the conference table (walnut, live edge, some bog oak butterflies, fabricated legs) and wanted to know if I was interested in making them.
Jeeze, I can hardly say no to such an offer, right? Yes, of course I will!
After some negotiating, I have the commission. After some design conversations back and forth and another email off to my wood supplier in Evansville, IN, I have some ideas in place and a few large slabs of wood waiting for me to peruse after a 3 hour drive.
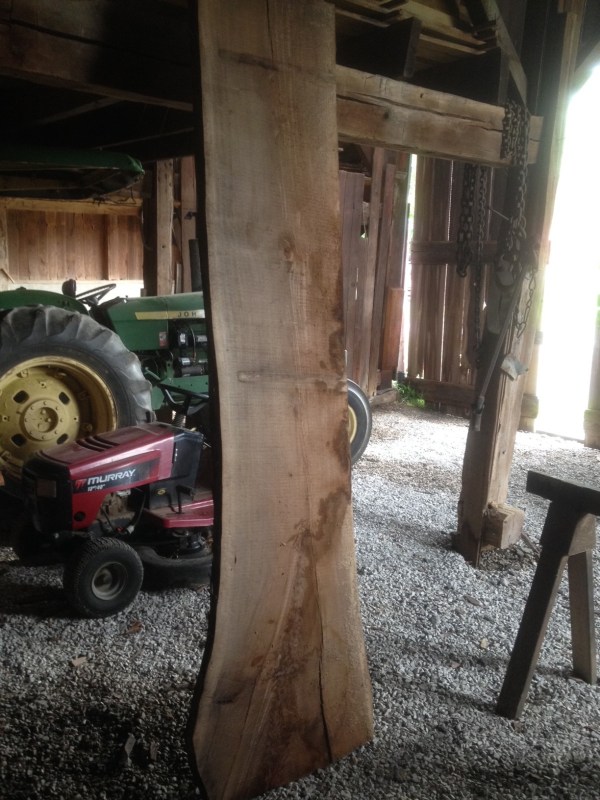
Rough now, but I get to make it look good!
And I get to add some more pictures to the Shit-I-Can-Put-In-My-Venza photo album! What fun!
Now I just need to figure out where I can get all of this work done…
Cheers,
TKW
Making Space, Part 2
I spent about three hours throwing around boxes of tools and lumber the other night. It didn’t feel like I made much progress, unfortunately, but I have to remind myself it will feel like that at first and I just need to keep plugging away.
I’ve decided the first order of business is to get a proper workbench made. The workbench will be the foundation upon which everything else is built, both literally and figuratively speaking. As previously mentioned, I have acquired lumber for several different benches (now down to two). One group of lumber consists of reclaimed heart pine from a local barn. The beams have been planed to even thicknesses, but they aren’t jointed well so it will take some work to get them to glue-up point. These were the pieces I’d set aside for my workbench.
An old picture of the barn beams in my now-gone workshop.
The other bench is one I was planning on making for my son. But what I might do is make his first and then after I’ve organized the shop spaces a bit more and have the room to maneuver the unwieldy barn beams, I’ll build the second one. One of the reasons I want to build the smaller one first is because the top is mostly done; it will be just two pieces of wood that are already mostly flat and surfaced on one face. With limited shop time, the more I can do to save time, the better.

Three slabs of old growth Douglas Fir courtesy of the Checkerdome!
If you haven’t figured it out yet, I love wood with character and history. I love wood that can tell me a story. These are sections of Douglas Fir ceiling joists from the old St. Louis Checkerdome. My friend (Scott Wunder, of Wunderwoods, by the way) who secured the reclaimed heart pine beams for me is the same one who had these sections of Douglas Fir in his lumberyard (he mills lumber as part of his woodworking business). I saw them and immediately visualized a bench top. The only problem is they are just 6’ long, which is a bit shorter than what I wanted for my workbench. But it would make a great bench for my budding woodworker son.

A little short, but look at that tight grain!
Built in 1929, the Checkerdome’s original purpose was as a livestock hall. But over the years it had been home to the St. Louis Blues and the St. Louis Steamers (soccer or, rather, proper football) and hosted monster truck shows, circuses, and figure skaters. And concerts. Lots of concerts. About 500 or so, between 1967 and 1994, including Performances by Prince, Queen, The Who, Van Halen, and so on. Billy Joel reported that the acoustics were pretty terrible in the place. I don’t doubt it! It was a livestock hall; sheep don’t need to hear their own bleating!

Unfortunately, it’s time had passed. Leaking expense and upkeep costs like a sieve, a series of 70 explosive charges rocketed through the Checkerdome on February 27th, 1999, bringing it down on itself. I’m not really sure if the beams were removed prior to the explosion in order to help bring it down or if they were removed from the rubble (and maybe that’s why they are only six feet long). The long edges on them are not parallel, so they will need some slight trimming to square them up.

But with just a few cuts of a (borrowed) Festool circular saw, I’ll be able to join one of the larger pieces, at 15” wide, with a 6” wide section of the smaller one, giving me a 21” wide top. Keeping with the recycled theme, the legs and stretchers will come from some old Kubota tractor pallets I salvaged many (15?) years ago. They are some unknown species of pine, 3.5″ square, and averaging about 5′ long.

I should be able to cut around the bad parts and have enough for legs and stretchers.
I’m not sure what I’ll do with the other pieces from the Checkerdome. Technically, I guess I could make a second workbench top. Or the top for a joinery bench. Or I guess if I really wanted to, I could double it all up and have a top that is just a little narrower (20”) but 6” thick!
Now there’s an idea…
Making Space, Part 1
It’s interesting to see just how much material stuff you’ve collected over the years when you have to examine it in great detail (or when you have to move it). It’s also interesting to note just how unimportant much of it suddenly becomes when you find yourself running out of room and trying to organize it better!
I don’t need help in organizing my stuff. I need to reduce the amount of stuff I have.
With that in mind, I examined the lumber I hauled over from the house to the new condo (old? New-Old? Ummm… it’s a little confusing since I’ve lived there before. Apparently confusing to the utility company, as well, since they keep messing up my account). I realized I had three groupings of lumber that were all destined for workbenches.
1-of-3 masses of workbench lumber
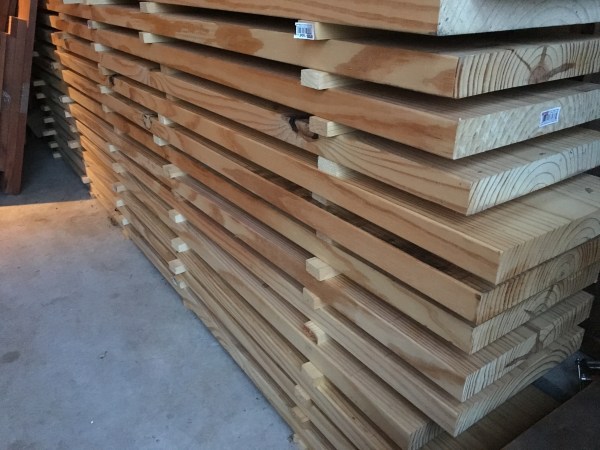
I’m not sure how I got to that point, but I’m there. And “there” includes a large stack of very wonderfully garage-kiln dried (you know, when you have lumber in your improperly vented garage for several summers, properly stacked and stickered, and it gets supremely dry because of the cycles of heating it goes through) southern yellow pine. It wasn’t a big deal in an oversize two-car garage. But in a standard-size one-car garage, it takes up a lot of space.
Last weekend, that lumber was delivered to Jon, a chap from England who has lived in St. Louis for several years and recently got the woodworking bug. He has shop space in the old Lemp Brewery (jealous!) and needs a workbench.

Space! Well, a little bit, anyway…
For a reduced price on what I paid for it, he got ready-to-go lumber delivered to his shop. I got some space back in the garage. And I got to take another picture for my album called, “Shit I Can Put In My Car”. Oh, and a little bit of cash to throw towards a future woodworking project.
232bf of SYP
I’m also a big believer in paying it forward. I’ve had so much good come to me over the years, especially the last six months, and I feel it is only proper to put “good” back out there for others.
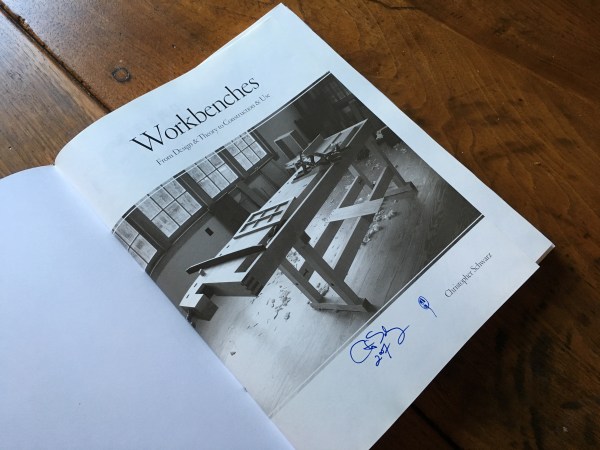
1st Edition, Double-Signed Workbenches book
I recently picked up the revised edition of Workbenches by Chris Schwarz. My original copy was special to me because it had a rare signature drawing by a then-7 Katy Schwarz right next to her dad’s signature. But… I don’t need two copies of the same book. And I figured Jon would get some good use out of one of them. So I gifted him my prized first edition double-signed book.
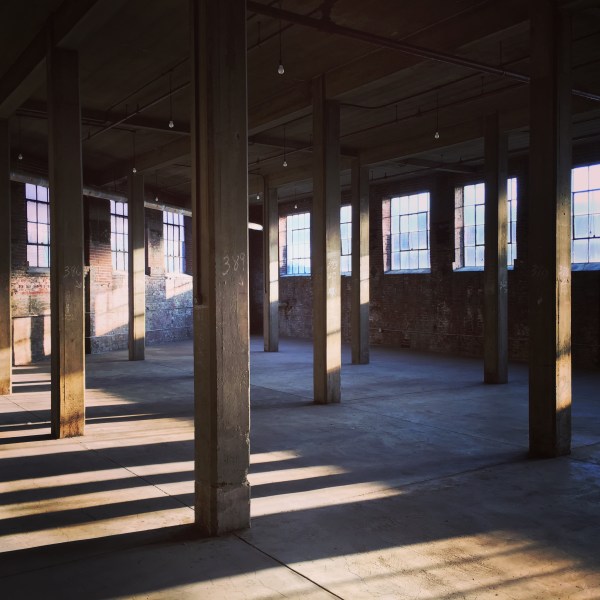
He more than made up for the gift by giving me a quick tour of just two floors of the old Lemp Brewery. Man, oh man, I could spend hours there, snooping around and taking pictures of things like original track doors that are perfectly balanced with counterweights and metal spiral stairs.


And hopefully I’ve started a good friendship with a new woodworker in the area.
TKW
Dusting Off The Blog…
Life.
To paraphrase LR Knost, it can be amazing and awful and ordinary at times. Sometimes it hits you hard and knocks you on your arse. And it can take a while to gather yourself. But that’s what you have to do – stand back up, dust yourself off, get back to it.
I won’t go into any sordid details, but I will say I’ve taken some solid body blows from Life the last eight months or so. It had me against the ropes for a while, but I think I’ve pulled through. That round, anyway.
Not unscathed, though. My marriage didn’t survive the ordeal. So… there was a lot of awful for a while, to be honest.
I’ve tried to spin as many positives out of the situation as I could, though. I picked up my yoga activities. I started exercising more (mostly for an outlet of stress). I even signed up for a 5k training program and ran my first 5k race in April – a kilted 5k, if you can imagine! It wasn’t a huge race – 33 participants in all – but I managed to come in 3rd place overall and take 1st in my particular age group. And I ran a personal best 5k time of 25:46, which is pretty good, considering I’d not run more than a total of 30 minutes in my entire life before January of 2016.

Celebratory pint of the good stuff!
I’ve been trying to do fun things with my Tiny Human to bring as much positive to him, as well. Last weekend we did some camping on the family farm with his cousin. And yeah, I have a beard now. Kind of weird seeing so much white, but it’s growing on me (both literally and figuratively speaking).

Tiny Human, his cousin, and an older-looking Kilted Woodworker.
In a weird twist of fate, I’m back in my old condo – the condo I sold to a friend of mine in 2007 – though I’m just renting it for the time being. It at least offers me some comfort of familiarity.
The other thing that took a hit was my woodworking. It might be noted I lost my workshop in the process of everything that has happened. Right now, it is all in boxes split between an attached garage and a walk-out basement. I’ve resigned myself to the fact that I likely won’t be parking in the garage any time soon. Also, I apparently have a lumber gathering problem.

I have a 12’x10′ space to work with; but also a bathroom with utility sink!
So I’m trying to come up with a plan of action for the part of picking up my life that involves the kilted woodworker. I have no idea how long I will be in the condo, so I can’t count on using the walls for any sort of permanent storage. That means I’m brushing off my notes for tool storage options – saw tills, tool chests, and storage boxes. But also it means paring down my tools so I don’t build storage for tools I don’t need or use.
In the near future, you might see some postings of tools for sale before I put them up on the popular auction site. I won’t ever try to get anything out of them past what I have in them. In some cases, they have been cleaned up and used, but there might also be some tools I bought and never got around to cleaning up and using.
You should also see posts building up to and involving bench and tool storage builds. Oh, and remember that conference table I build last year? The people I made it for asked me if I was interested in making two more tables for them – a hall/console table and an end table – and that might be in the works, as well.
Anyway… apologies for the extended hiatus. I hope to get back in the groove of things shortly. Thanks for bearing with me.
TKW
A Review Of Handworks 2015
I don’t think I mentioned yet how my trip to Handworks 2015 went! I mean, I chatted it up a bit before the event, but I never wrote about it once I got back, did I? Let’s put a slight delay on the continuation of the beading tool collection and get that out of the way then, shall we?

Handworks 2013
To properly begin, I need to go back about two years to Handworks 2013. I showed up in Amana for two days of hand tool immersion at the first Handworks, but after spending a few hours chatting with people and buying the few bits of woodworking contrivances, I was… well, I was bored. I spent some time exploring Amana and eating some great food, but for some reason I didn’t hit on the social vibe of it all very well. Maybe I was having an off week or something.
To that end, when I heard that my friend Phil Edwards was going to fly over from jolly ol’ England to set up a booth at Handworks 2015 for Philly Planes, I contacted him and told him I wanted to help. This was partially because I genuinely wanted to help my friend; it was also because of my experience at Handworks 2013. I wanted to go back to Amana, but I wanted to have something to do there, as well! I wanted to be a part of the experience, not someone looking at it through the storefront window.
So a few weeks before the show, I received several boxes of marketing materials, planes, and marking gauges from England. I asked Phil if he wanted me to open them and sort through everything to make sure it had all arrived safely, but for some reason he thought that wouldn’t be necessary. I pleaded, but he was persistent with his reply. I managed to not accidentally open even one of the boxes, much to my own surprise.
On the Thursday before the event, I drove up with a car load of Phil’s wares and met him and his assistant, Steve, at the exhibitor’s barn. Er… actually, I showed up at the barn and found out where the booth was supposed to be, but Phil was nowhere to be found. And apparently Steve was with him.
Instead, I chatted up David Barron, who had the booth next to us, and Dave Jeske, who was on the other side of David Barron. And I watched Patrick Leach unload box after box (after box after box) of tools on the other side of Phil’s booth location. (Going home with any money in my pocket was going to be a true test of willpower this time around.)
Eventually (two hours later?), Phil did show up. They’d gotten lost driving from Chicago. They had a GPS, but apparently someone set it to a Southern accent and they couldn’t understand a word she was saying.
Ok, I might have made that up.
But what else could it have been? I mean, how can you get lost in Iowa? You basically have four directions you can travel, right? Every road is either North/South or East/West. And you can see your destination from miles away, so you know which one of those directions you should take!
I suspect it was really just culture shock (sunny weather and straight roads) caused them to require extra refreshments.

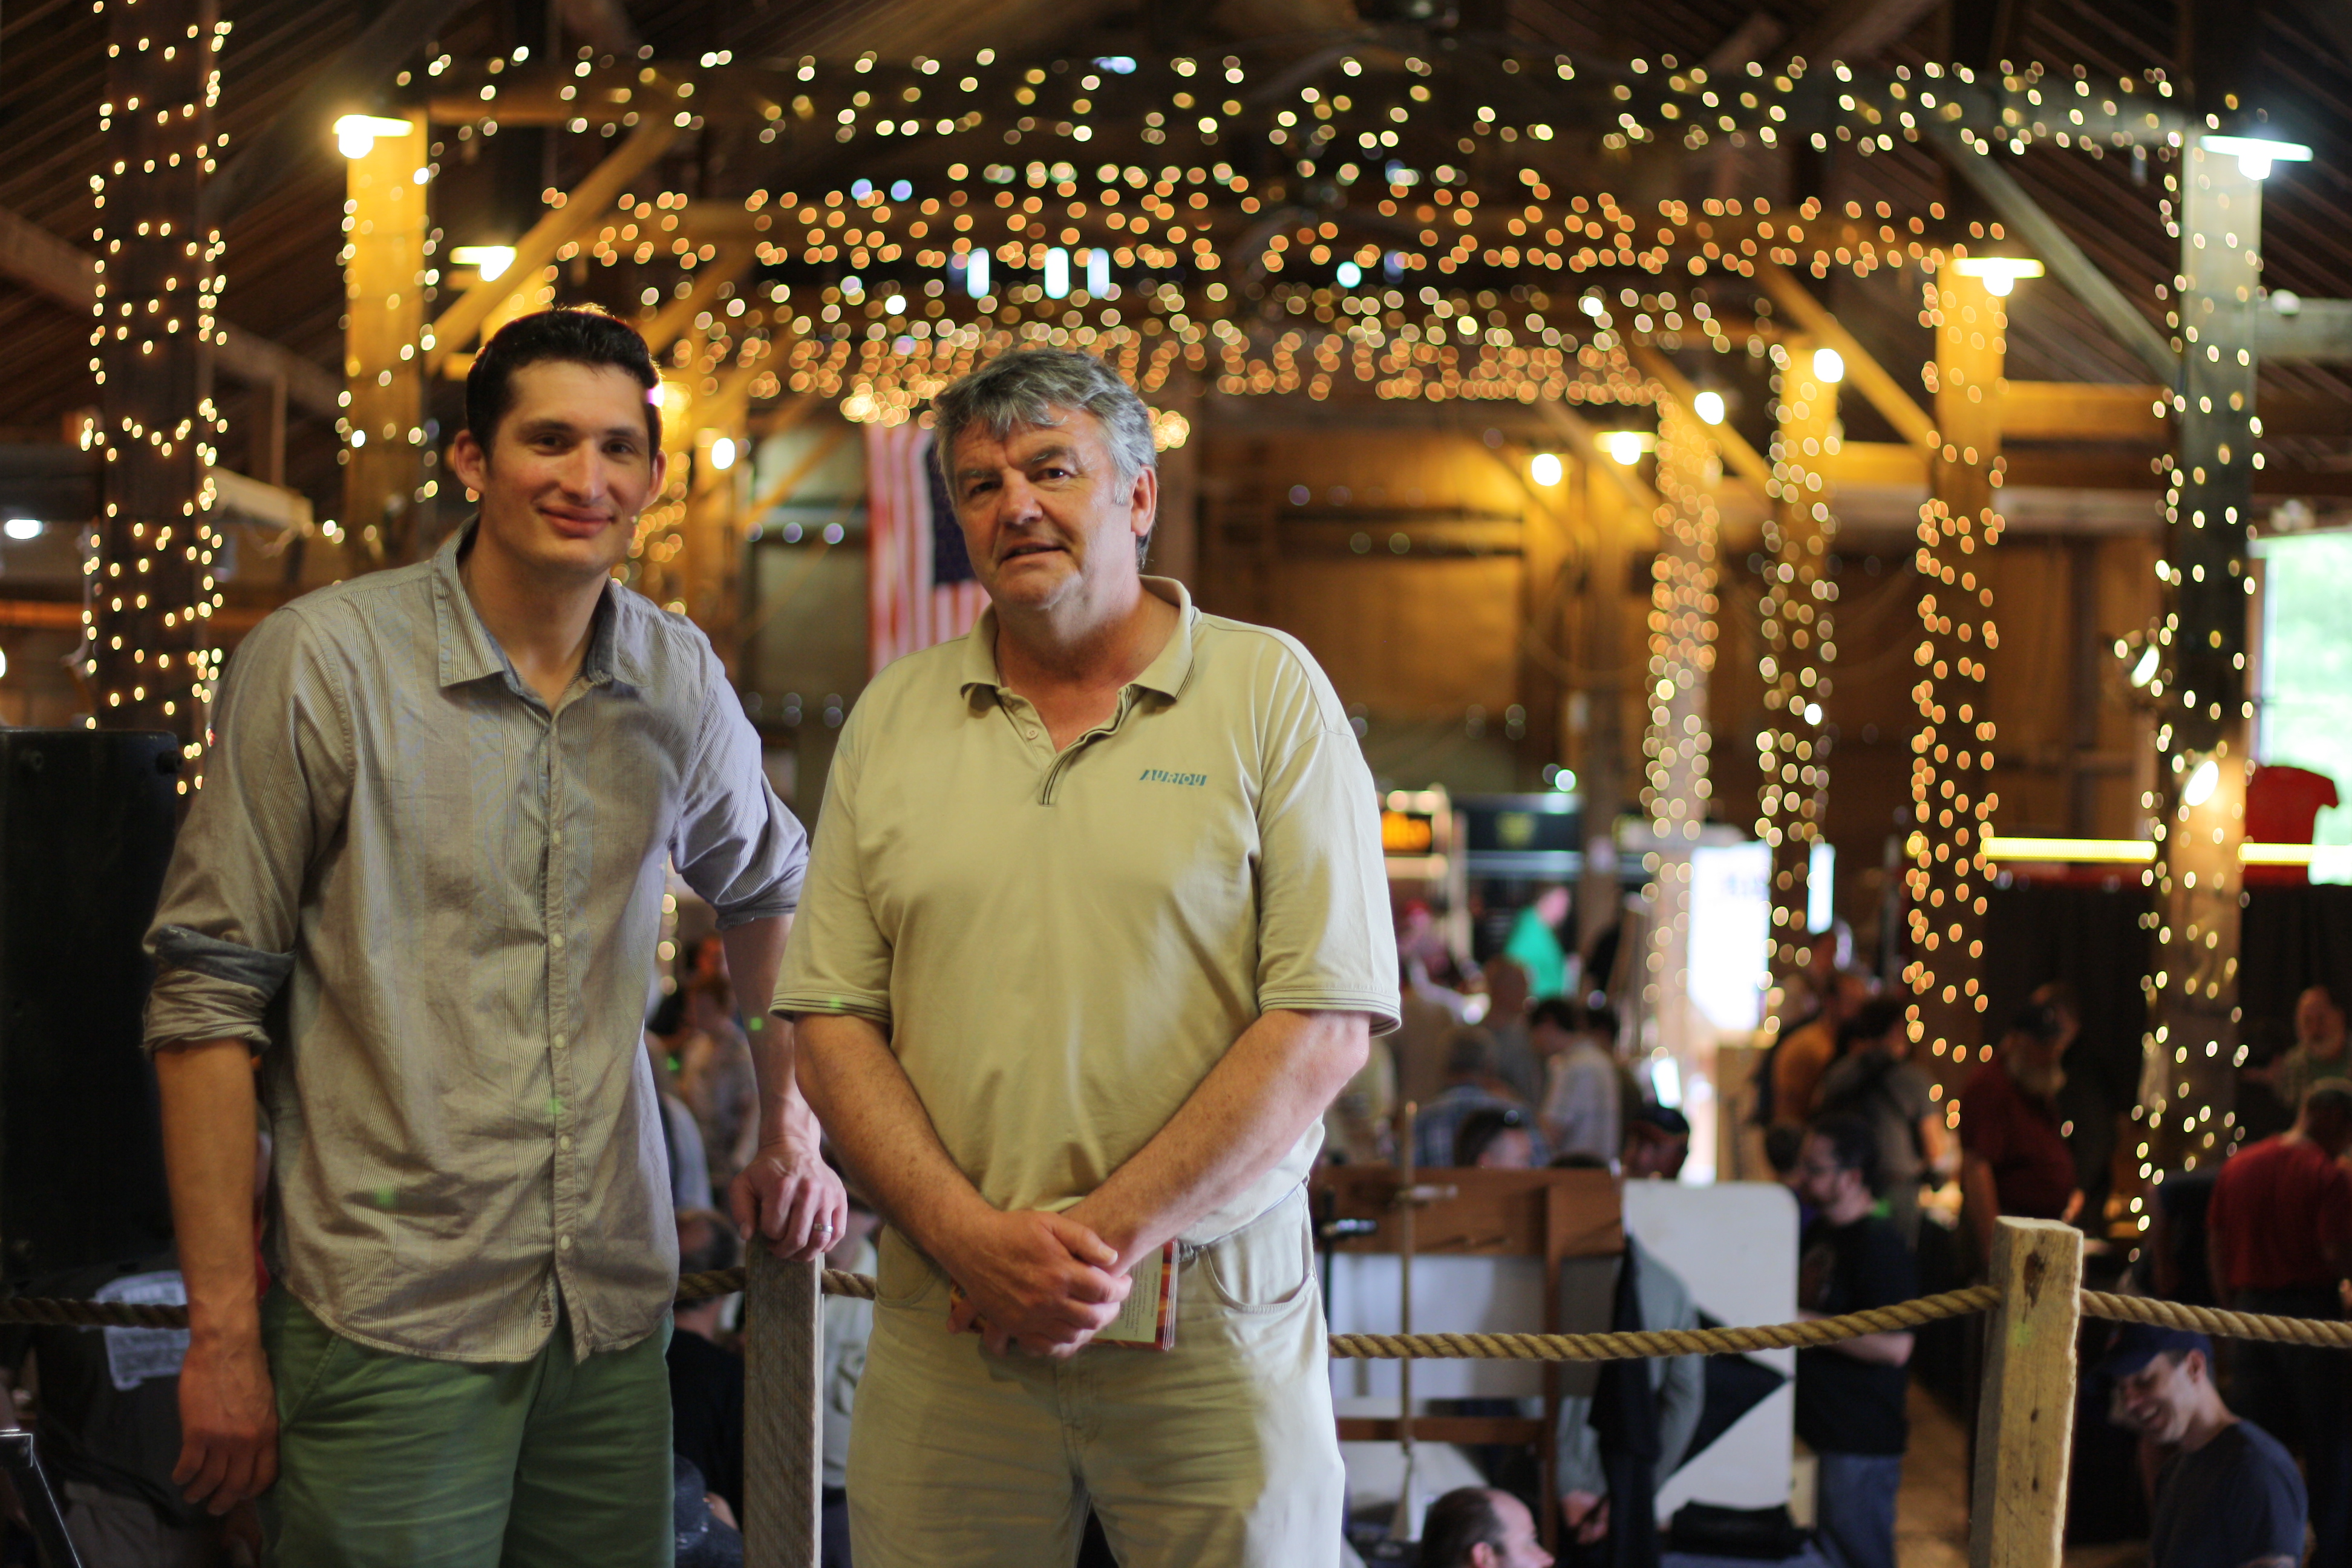
The Philly Planes Crew – Phil, Ethan, and Steve
In any case, they eventually made it and we set up shop, preparing the tools for the show and hanging up a banner of sorts where it was guaranteed to hurt someone, should it ever fall. I even got an official name badge to wear! Later that evening, we got to attend a vendors-only viewing of that one tool chest everyone was so excited about.
I didn’t take any pictures of the Studley chest, myself. I bought the book. And the print (13 of 100, for anyone keeping score). Narayan takes much better pictures than me. Instead, I started taking pictures of “the Studley stepladder” over in the corner.
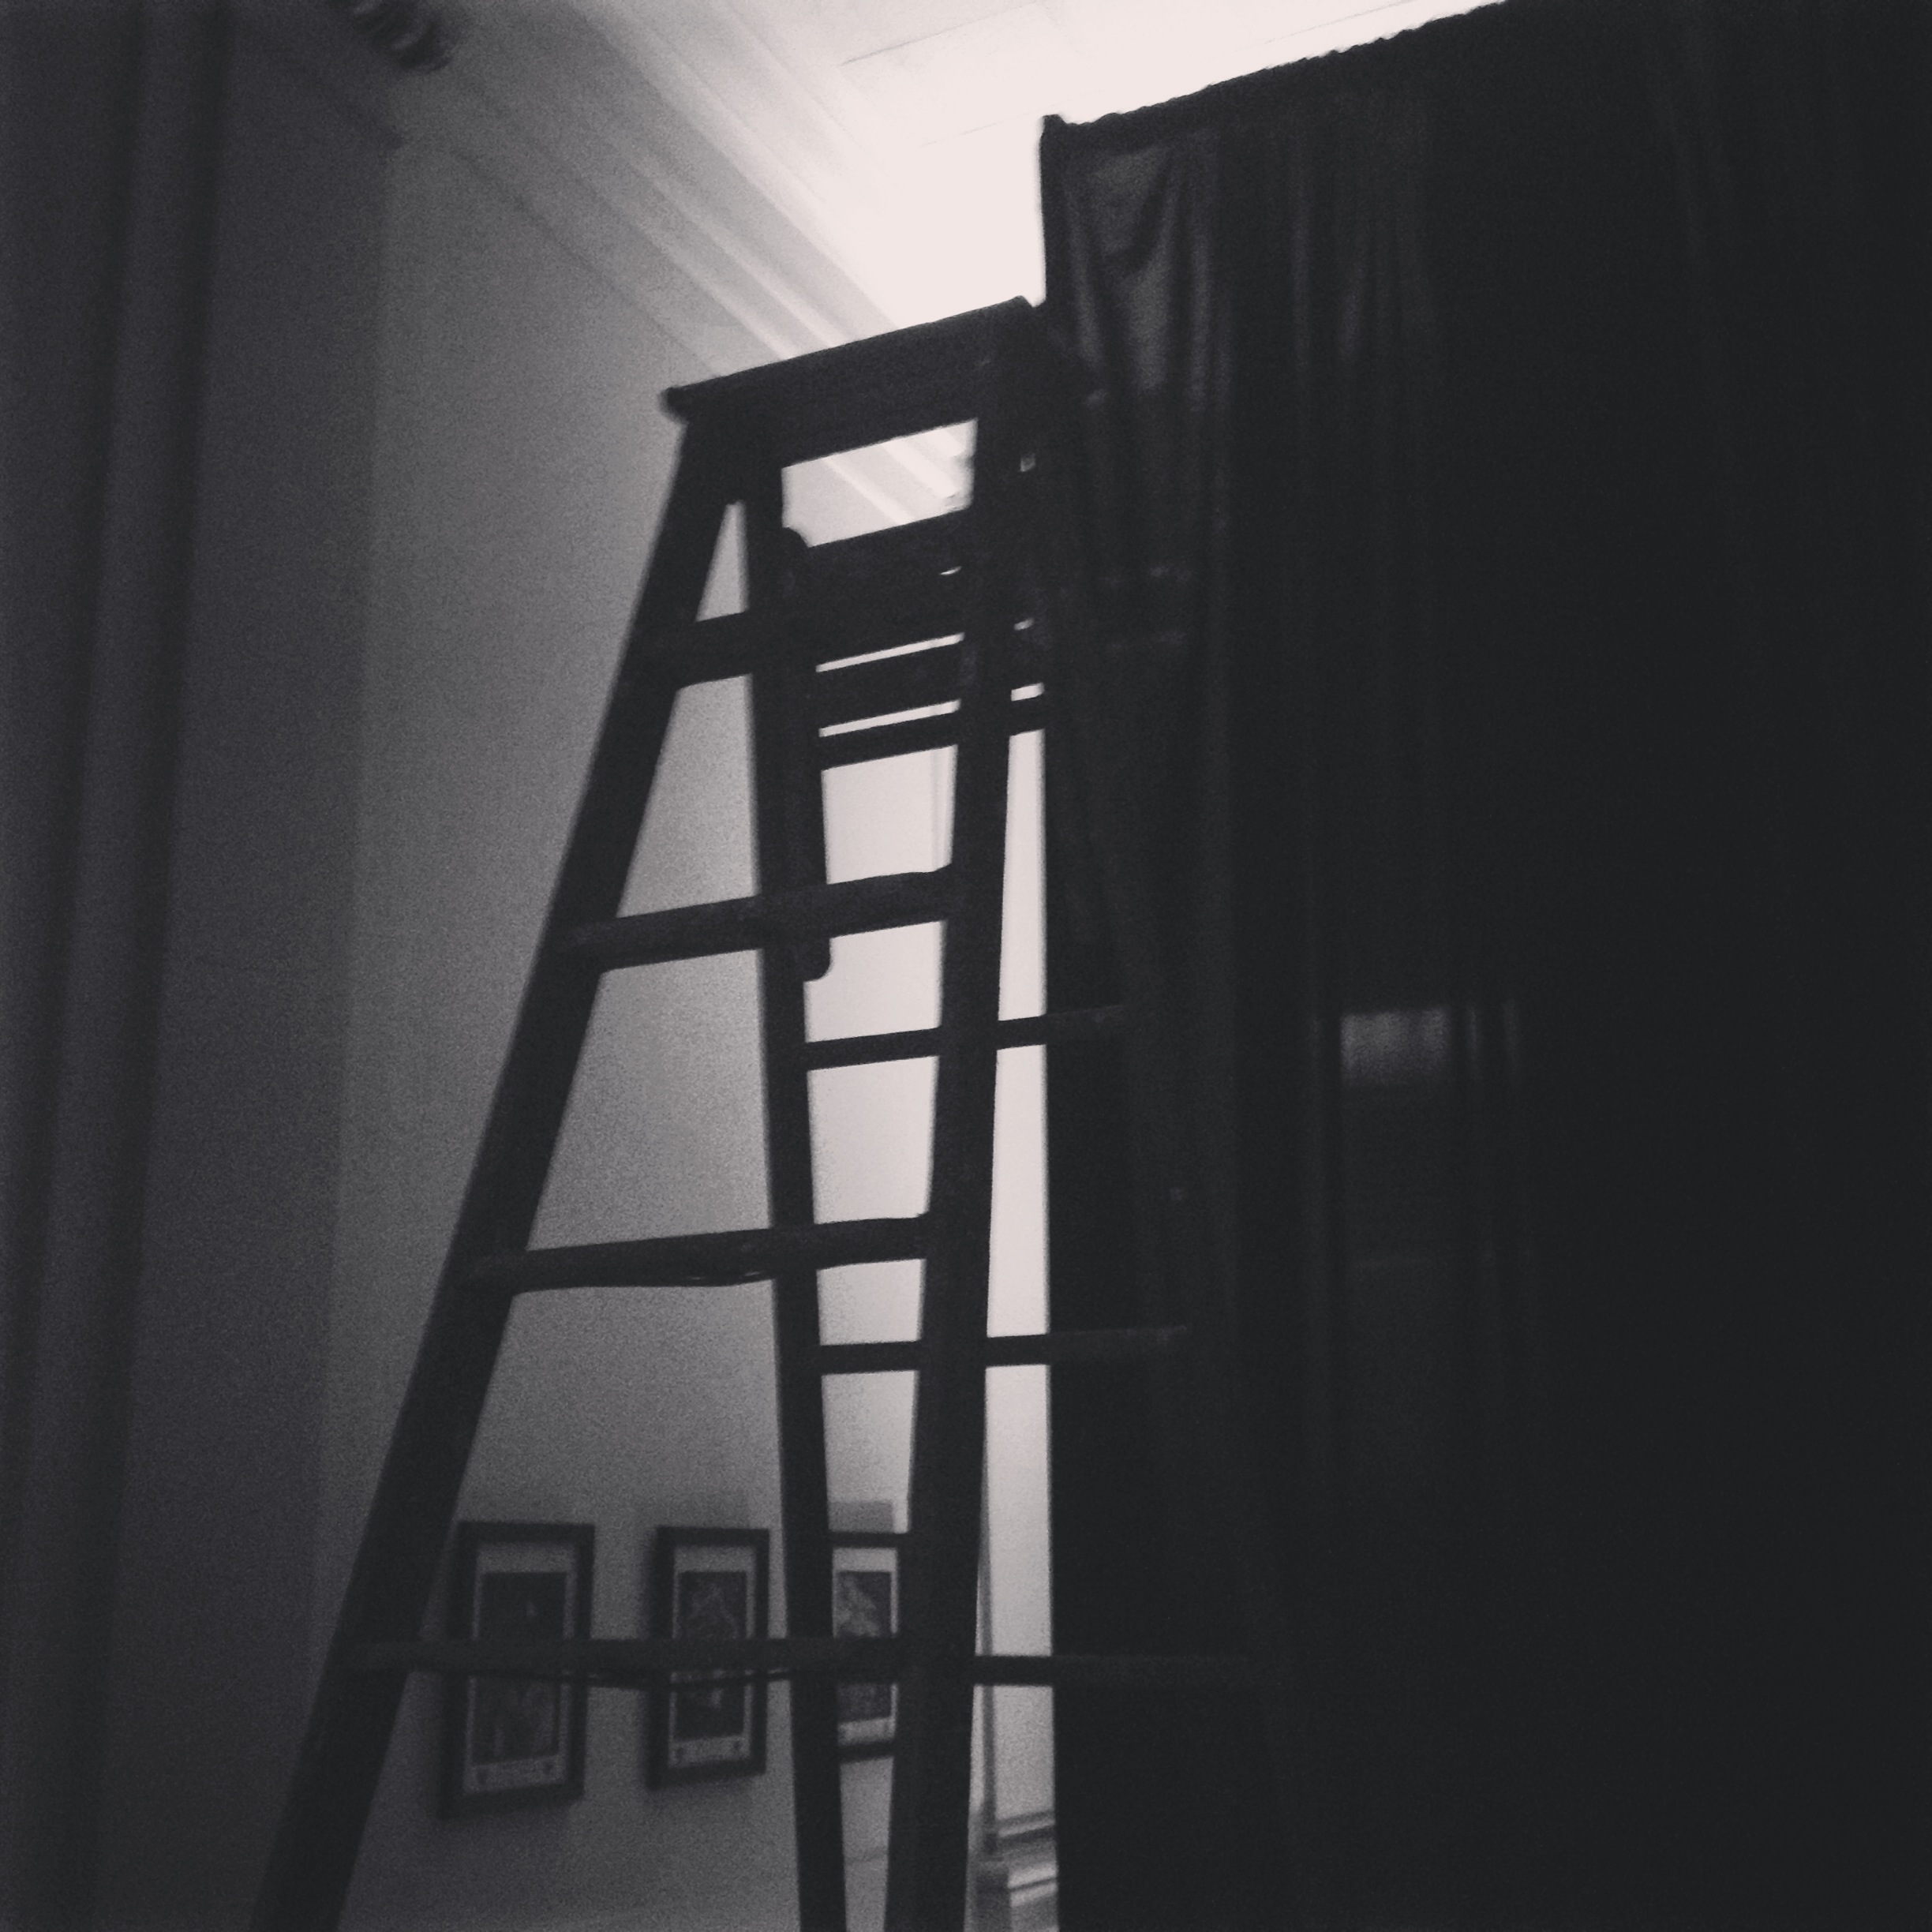
The Studley Stepladder
I had four people ask me what I was taking pictures of. “The Studley stepladder, of course,” was my response. It always took them a moment to realize I was joking.
A little bit later, I was talking to Raney Nelson and mentioned taking the pictures of the stepladder and the response I got from people. He said, “Dammit. That’s so good _I_ should have done it.” I’ll take that compliment, Raney.
The next morning, prepping for the woodworking masses, Phil handed me a 1cmx2cm piece of wax-saturated cloth and a can of Renaissance Wax and asked me to polish the smoothing planes. I stared at the “wax applicator” and cocked an eyebrow in disbelief, but since he didn’t appear to be joking, I did my best with his British version of “micro” fiber cloth. Then I used the shoe polishing cloth from my hotel room (yay for free hotel stuff!) to buff them out until they shined. I was so fond of his minimalist wax applicator that when I got home, I threw out the (apparently incredibly large) 12”x12” cotton cloth I’d been using for 10 years and replaced it with a bit of scrap flannel from some old pajamas…

My tiny British wax applicator on its premier voyage…
At 10:00 on Friday morning, the doors opened and woodworkers of all shapes and sizes poured in. Right away, I began taking questions about Phil’s marking gauges. And I answered them. Correctly, even. And made some sales! Phil and Steve were amazed at how comfortable I was at selling his wares. Knowing the product is part of it; the other part is being able to comfortably chat with complete strangers – I had both things going for me.
Occasionally Phil would unlock my chain and let me wander around. I suspect it was so he and Steve could download pirated movies using my Hotspot access I’d set up for him to handle credit card transactions. They both feigned ignorance on that account.
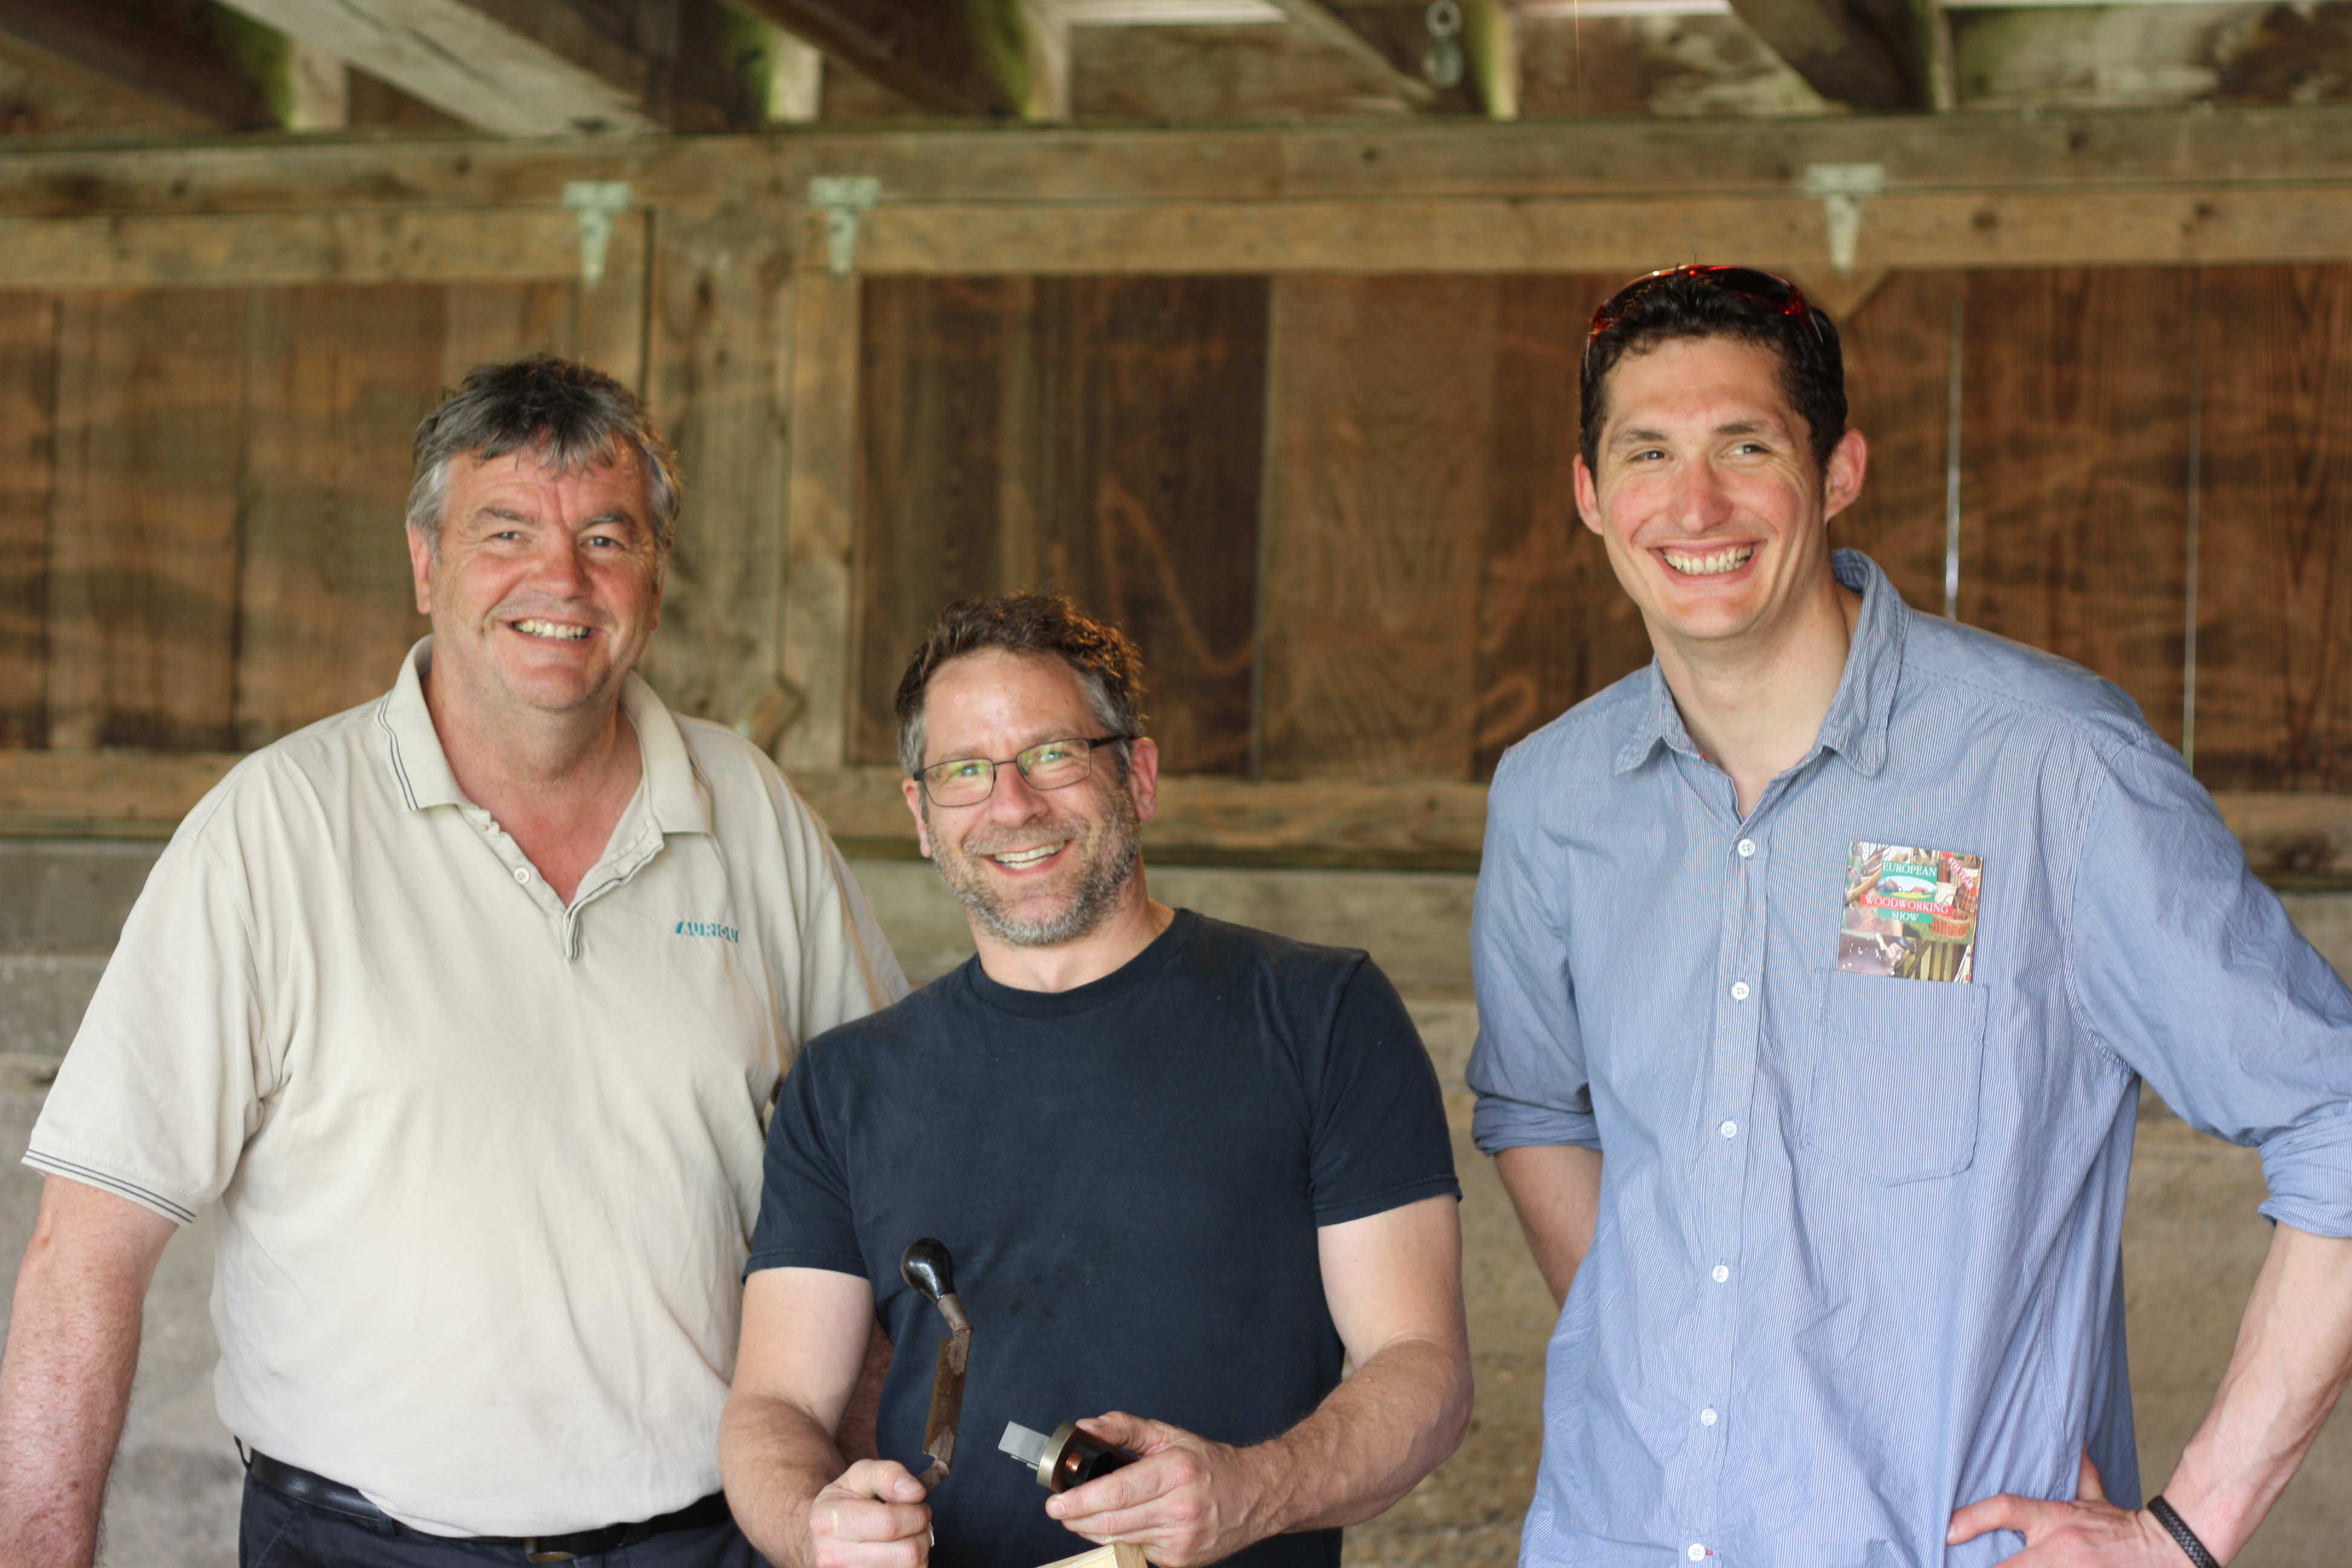
There were so many great hand tool makers there, and I tried to get pictures of them all, but… these two English blokes kept jumping into frame at the last moment, acting like they were buddy buddy with everyone…

Two English Guys With Robin Lee
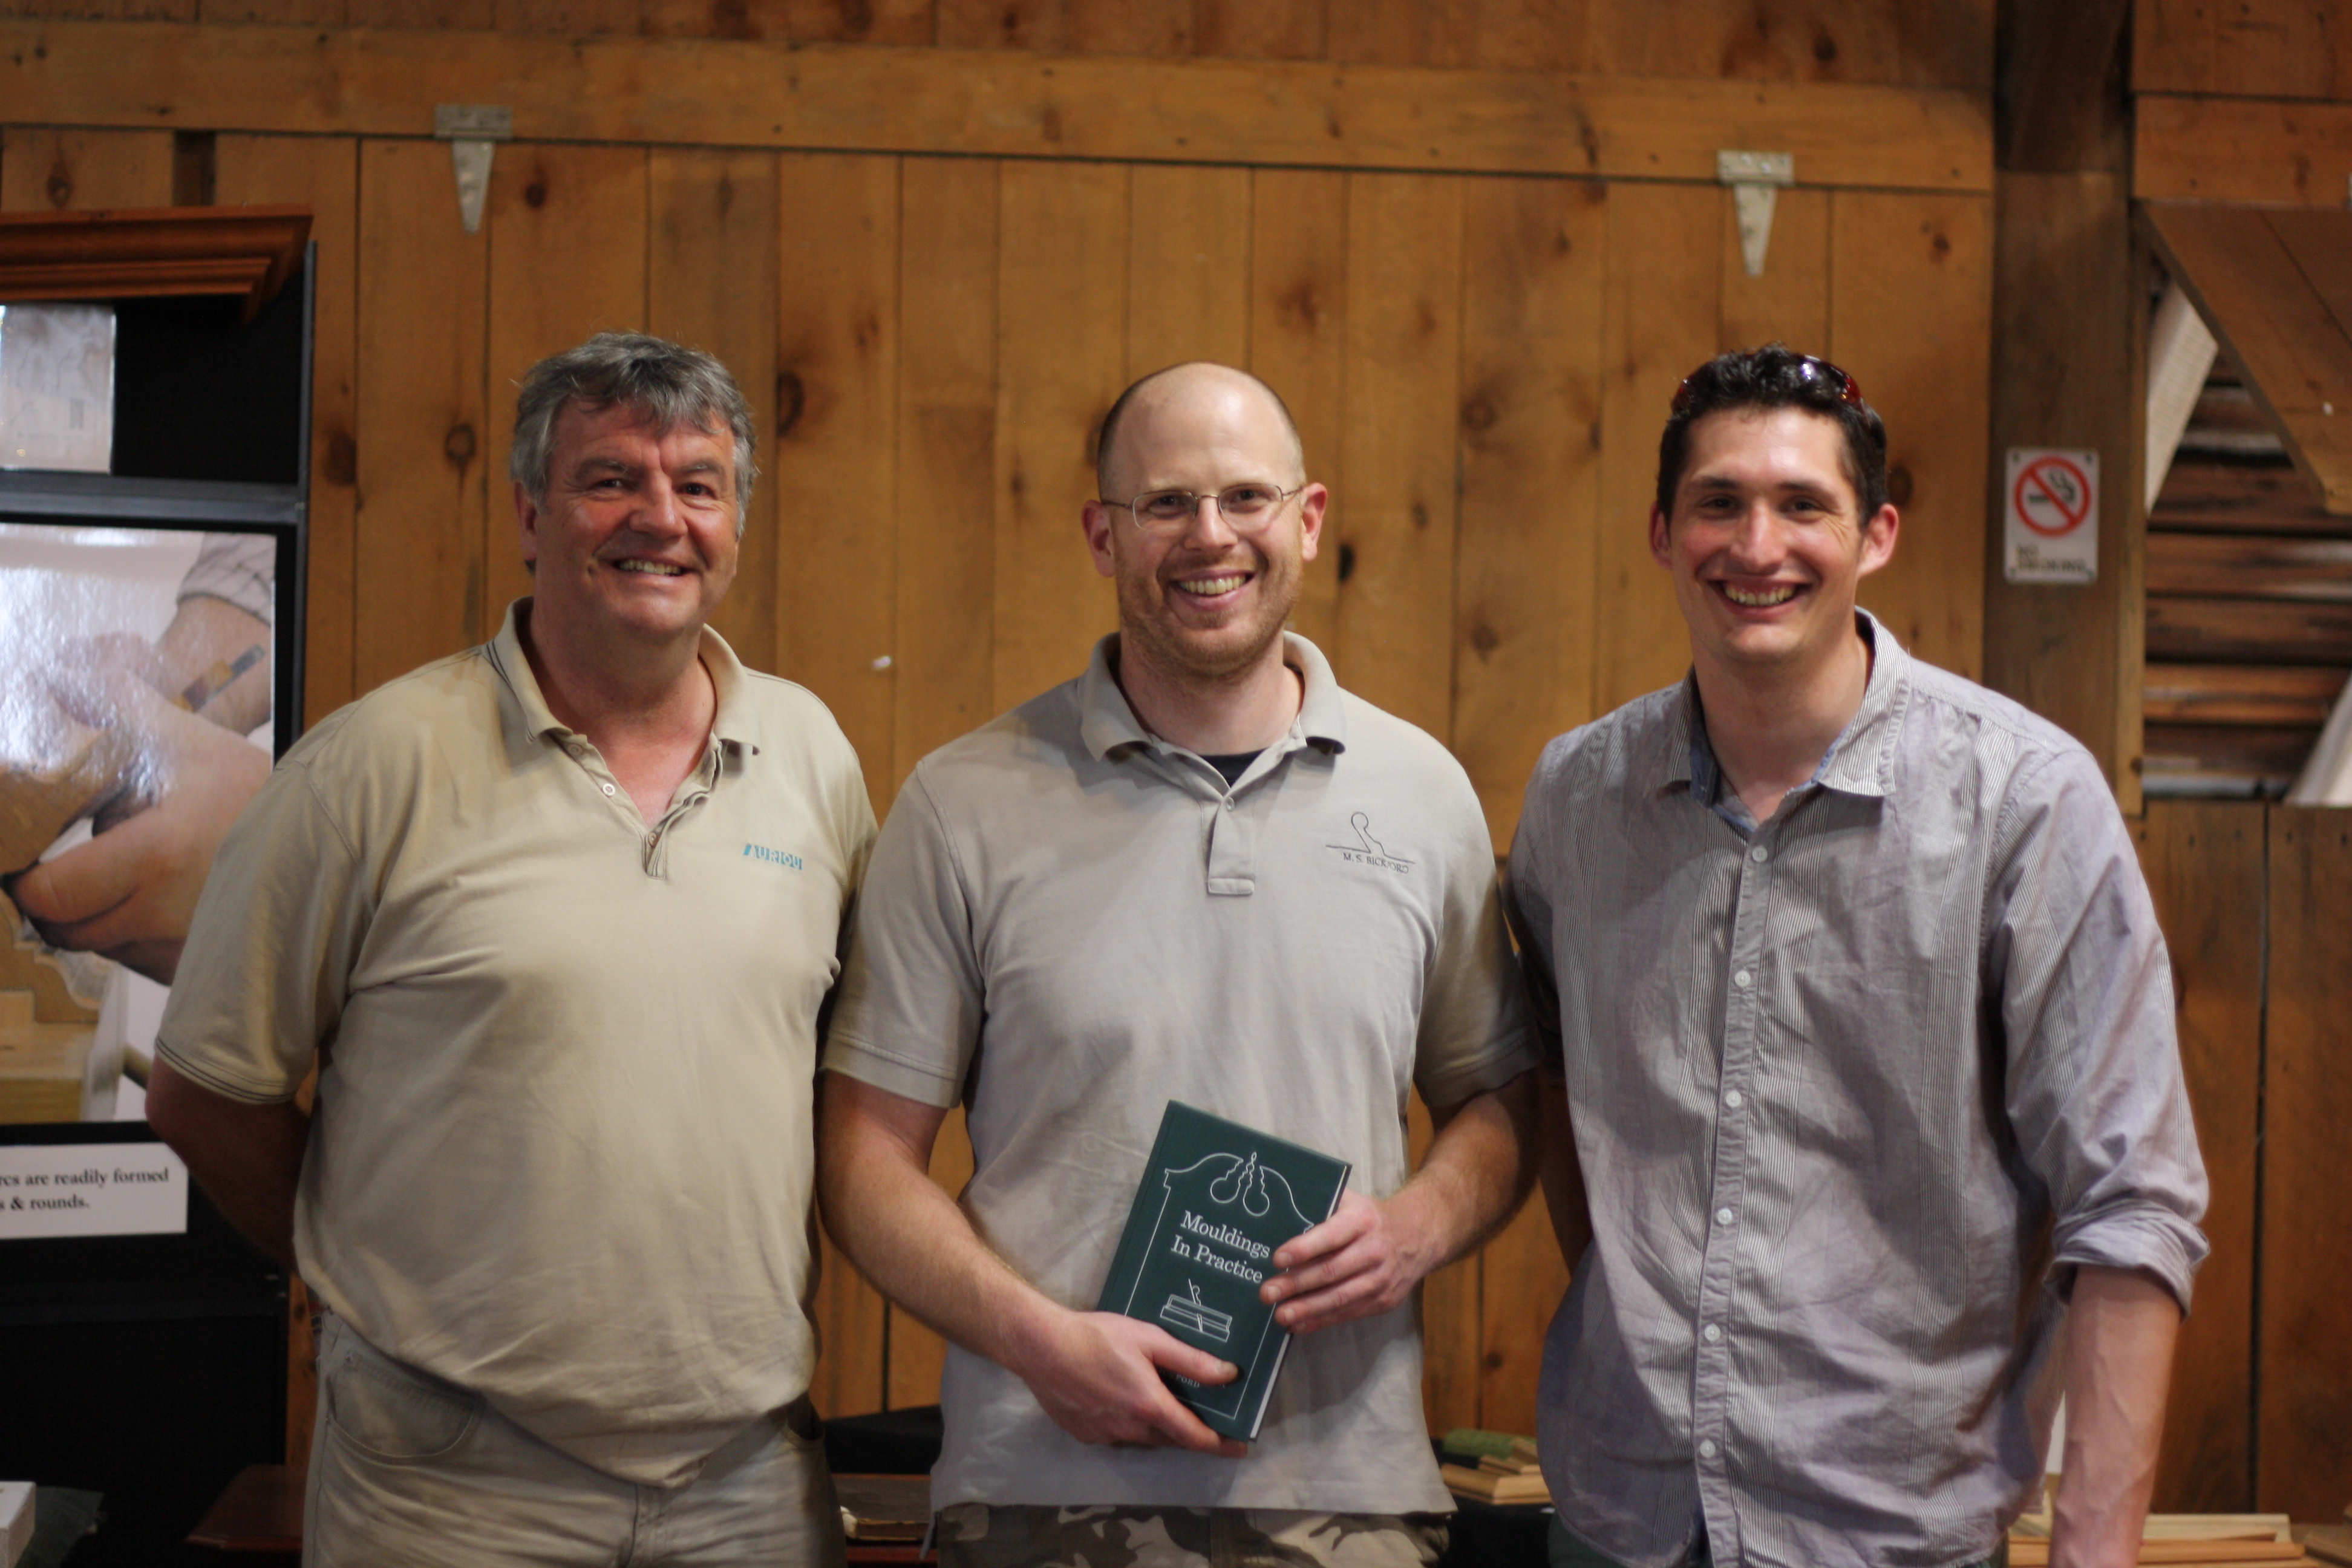
Two English Guys With Matt Bickford
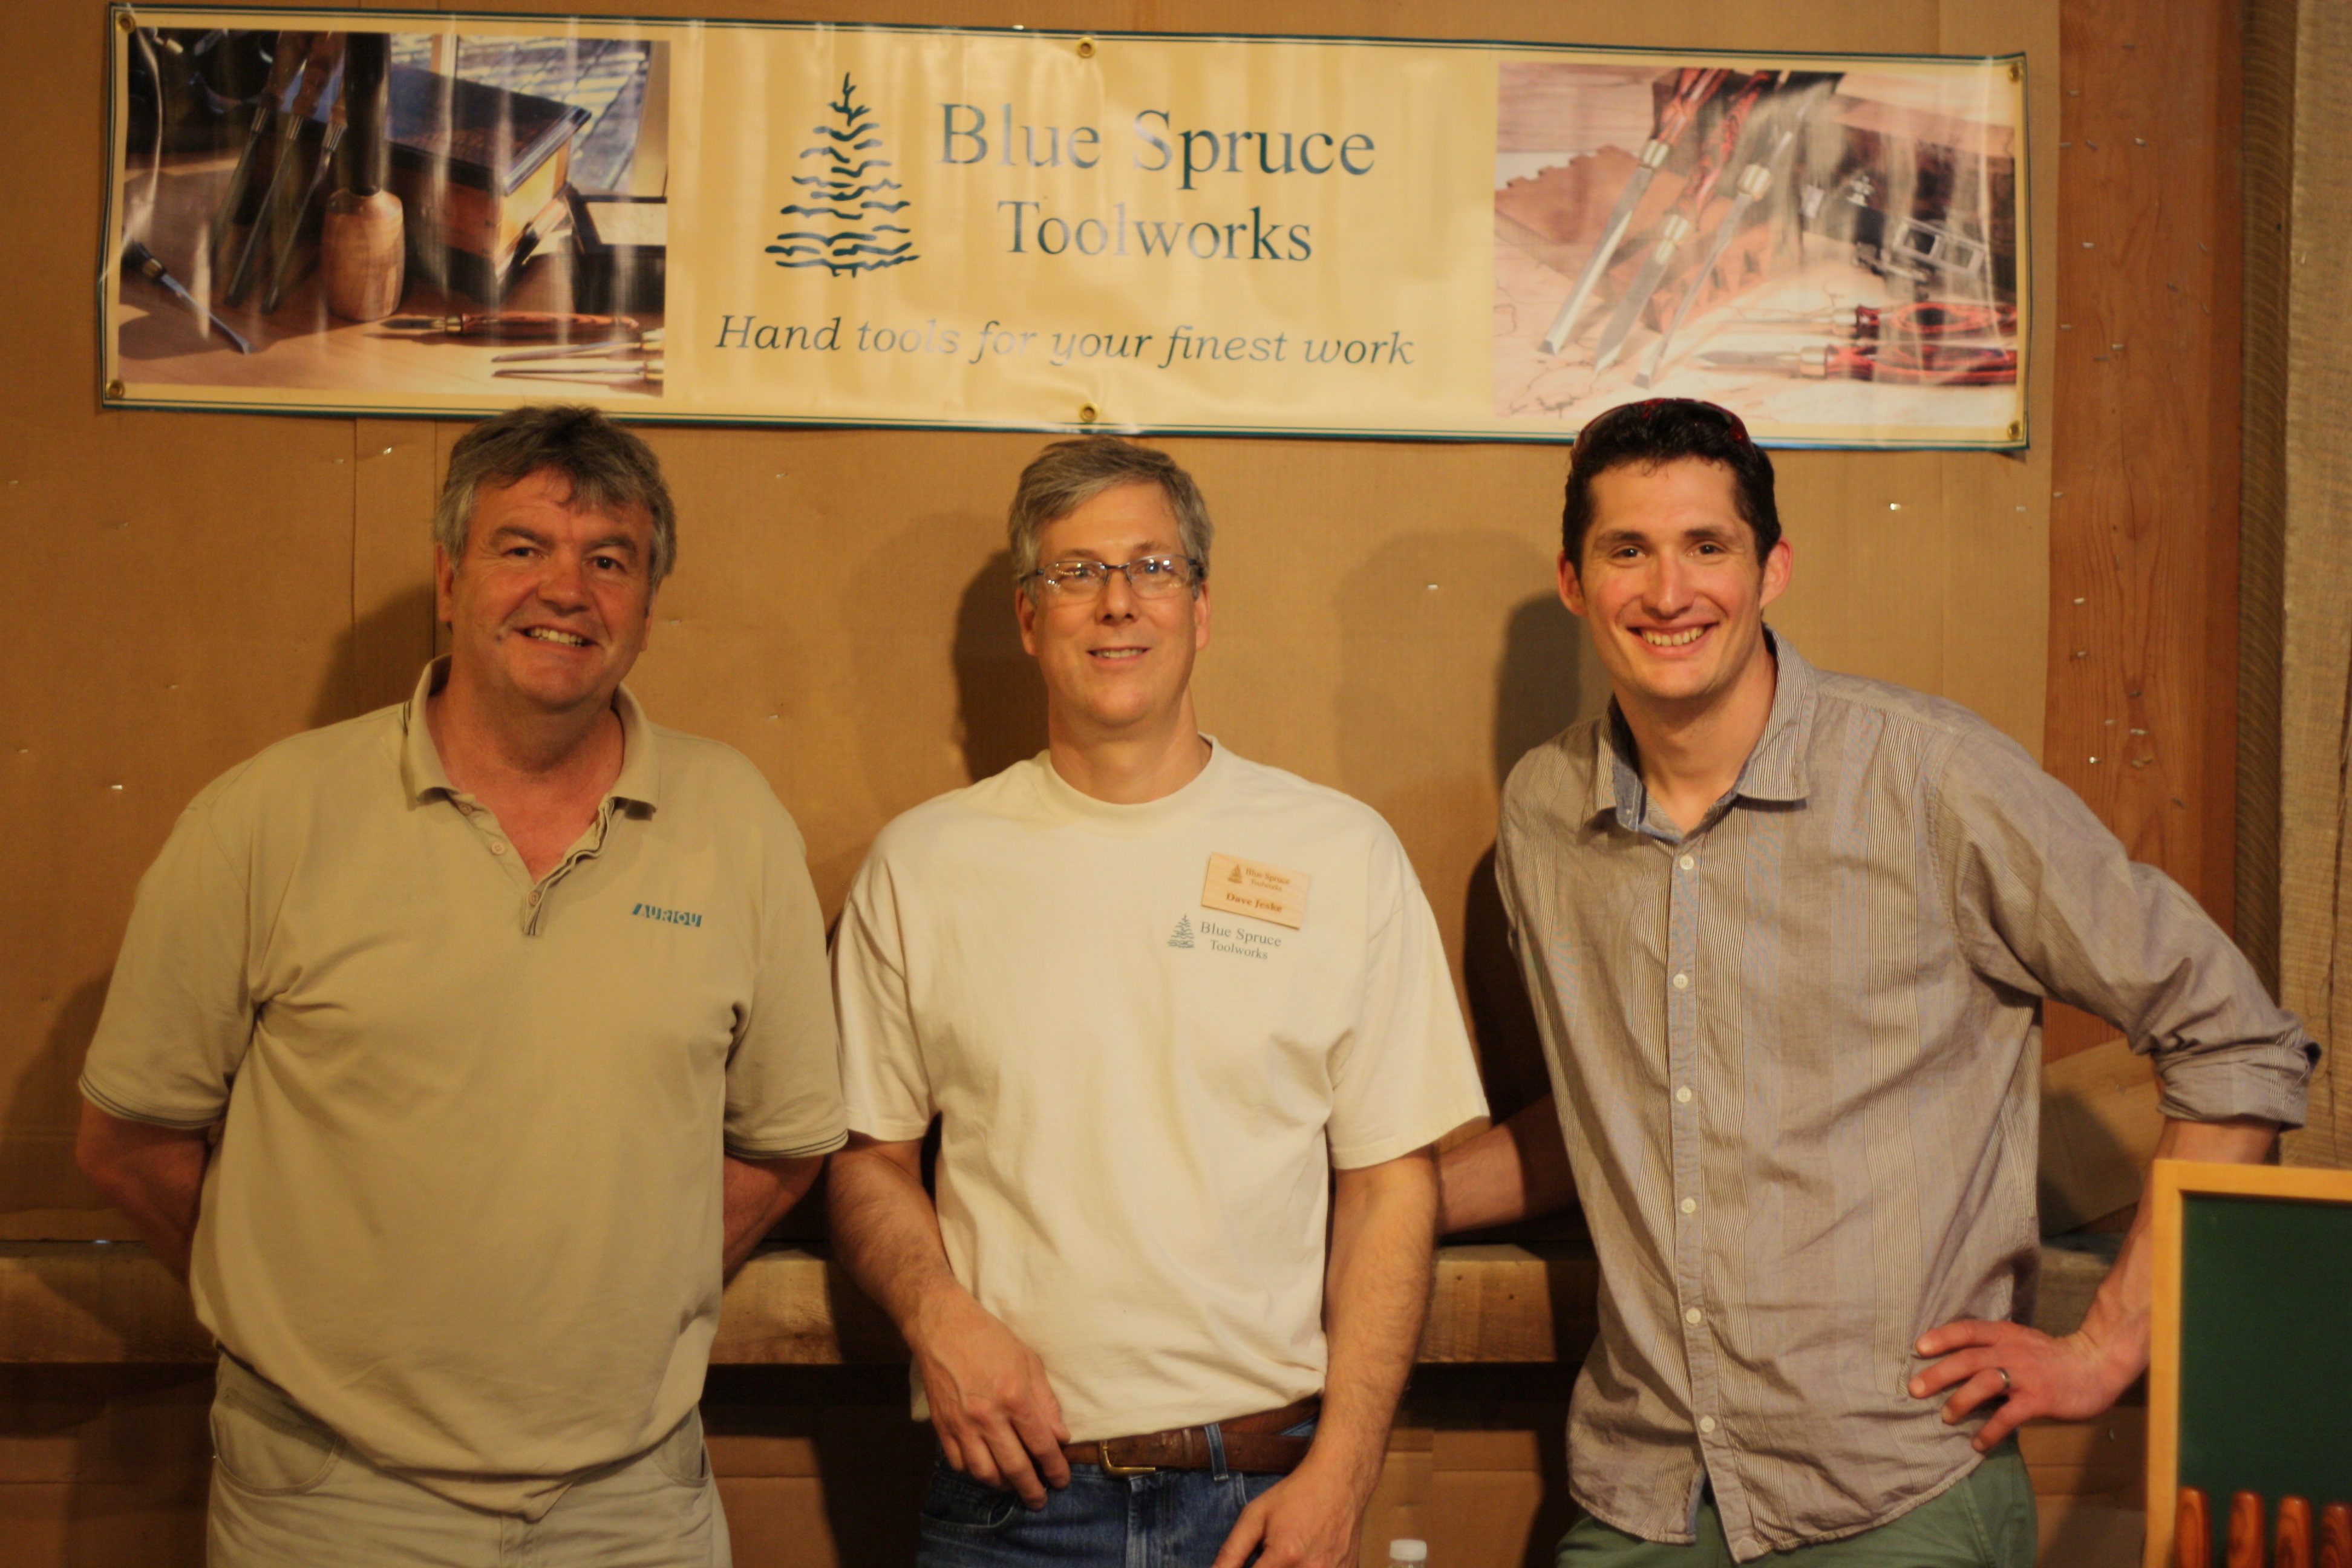
Two English Guys With Dave Jeske
Two English Guys With Peter Galbert (they even followed me to the green woodworking tent apparently)

Seriously, guys? I just wanted a picture of the Hoff!
Couldn’t even get a picture of the crowd without these two guys jumping into the picture…
I kid, of course. That is Mike Hancock and Alex Primmer from Classic Hand Tools, a UK on-line purveyor of woodworking tools of the finest quality. They came to Handworks to experience the event and to meet face-to-face with all of the US vendors whose tools they sell in the UK. Mike asked me if I would follow them around and try and take some piccies of them with the tool makers and I was happy to assist. If you ever see Mike at a show, be sure and buy him a beer, as he is the reason why we can buy Auriou rasps again. Better yet, buy him three…
While on our photo-taking tour, Mike claimed he had a thirst of the most urgent nature, so we made our way to Amana’s only brewhouse for a pint. Or three. They poked fun at me when I balked at the third beer. But it was in their best interest as I was the only staff photographer! So I took one for the team and drank it. If the last pictures of the day are a bit blurry or not quite framed right, you can blame the Brits.
At the end of the second day, we packed up shop and went down the street for drinks. Knowing the Lie-Nielsen crew was going to show up at some point for dinner, we graciously held a table in reserve for them. After they showed up, we left. But before exiting the parking lot, one or more British citizens in our party smeared melted chocolate candy bars all over Deneb’s rental car, laughing hysterically as they did it.
Deneb, before the chocolate incident
Having driven very far away at that point, to go to dinner in Cedar Rapids at a then-undisclosed location (for fear of LN Retaliation), we waited for the call. True to form, Deneb called and shouted the joys of finding said chocolate through Alex’s mobile (on speaker). A bit later, I got dropped off at my hotel and packed my bags to leave early the next day.
As I was leaving the hotel on Sunday morning, I climbed into the elevator, holding an unrolled Print #13 from Narayan’s limited edition run, with none other than Roy Underhill.

Roy Underhill being Roy Underhill…
I’ve met and bumped into Roy several times over the years, so I don’t quite have the star-struck eyes that some seem to have when meeting him. We chatted a bit.
Roy (nodding at the print): Thou shalt have no idols…
Me: Oh, I’m putting this up in the shop with that blue poster tack stuff.
Roy chuckled.
Me: The plan is to try and hit it with kickback from the tablesaw.
Roy laughed.
Me: Actually, I lied. I sold my tablesaw in January. So I’m just going to throw offcuts from my benchhook at it.
Roy (laughing again as he stepped off the elevator): Take care.
I made Roy laugh, so I consider that a successful conversation. Hopefully he appreciated having a quick chat with someone who didn’t ask him to sign something or ask him a woodworking question or go on with the adoration one does as they meet their idol.
After loading my luggage and print (that I won’t REALLY throw offcuts at or hang in the shop with blue poster tack, Narayan), I went to get in the front of my car, only to find melted Twix bar all over my door handle. And on the windshield.
Oh, those funny Brits. But no worries, mates. I have a four year old. I travel with wet wipes at all times.
If you want to read Mike’s Review of Handworks 2015, you can check it out here. If you have any sort of appreciation for proper English humour, you should definitely check it out. He had me in tears. And once I got over the pain of the “lily white legs” comment, I saw there were some funny bits in there, too.

The Brits – Steve, Alex, Phil, and Mike
Now don’t get me wrong, I loved being able to see the Studley Tool Chest in person. It was the experience of a life time. But the most important things I’ll take away from Handworks 2015 are the new friendships I made and the friendships that became RL (instead of just being digital). At the forefront of this list is the people I spent the most time with all weekend – Phil, Steve, Alex, and Mike. I had such an awesome time with these guys. Mostly, it was great to never have to explain a joke because they completely understood my humour (possibly not a good thing, come to think of it).
It felt good to be at Handworks with a purpose this time, helping Phil out at his Philly Planes booth and helping Mike and Alex get photos with their vendors. It made this trip 100 times better than Handworks 2013. Hopefully I can work with all of them again in the future in some capacity. Maybe as the US liaison of Classic Hand Tools, yay, Alex and Mike?
TKW
(P.S. By the way, Steve and Alex… we redheads have long memories. And, as a Taurus, I dutifully hold a grudge for life. One of these days, I’ll make it to the European show. Best hope you have wet wipes in YOUR cars when I do. Cheers!)
Eccentric Woodworker Seeks Like-Minded Clamps
If I haven’t already made that abundantly clear, I’m a sucker for odd and unusual tools, especially when they are completely useful to me in my shop. When I have smaller clamping tasks, I like to use old C-clamps – the kind with acme threads and cool details, like a shapely or interesting knob on the threaded post. I usually find them at estate sales for just $1 or $2; I never pay more than $5 for one. I have about four or five that see constant use in my shop.
But move over bacon, it’s time for something meatier! A few weeks ago, I was strolling through some eBay searches (possibly the best way to describe my relationship with eBay) when I stumbled upon this little gem…
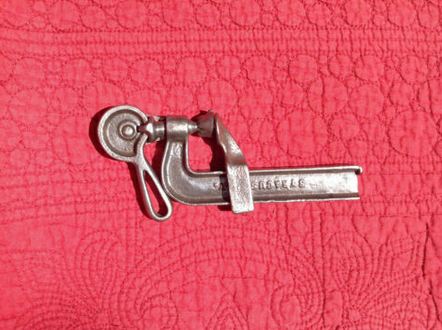
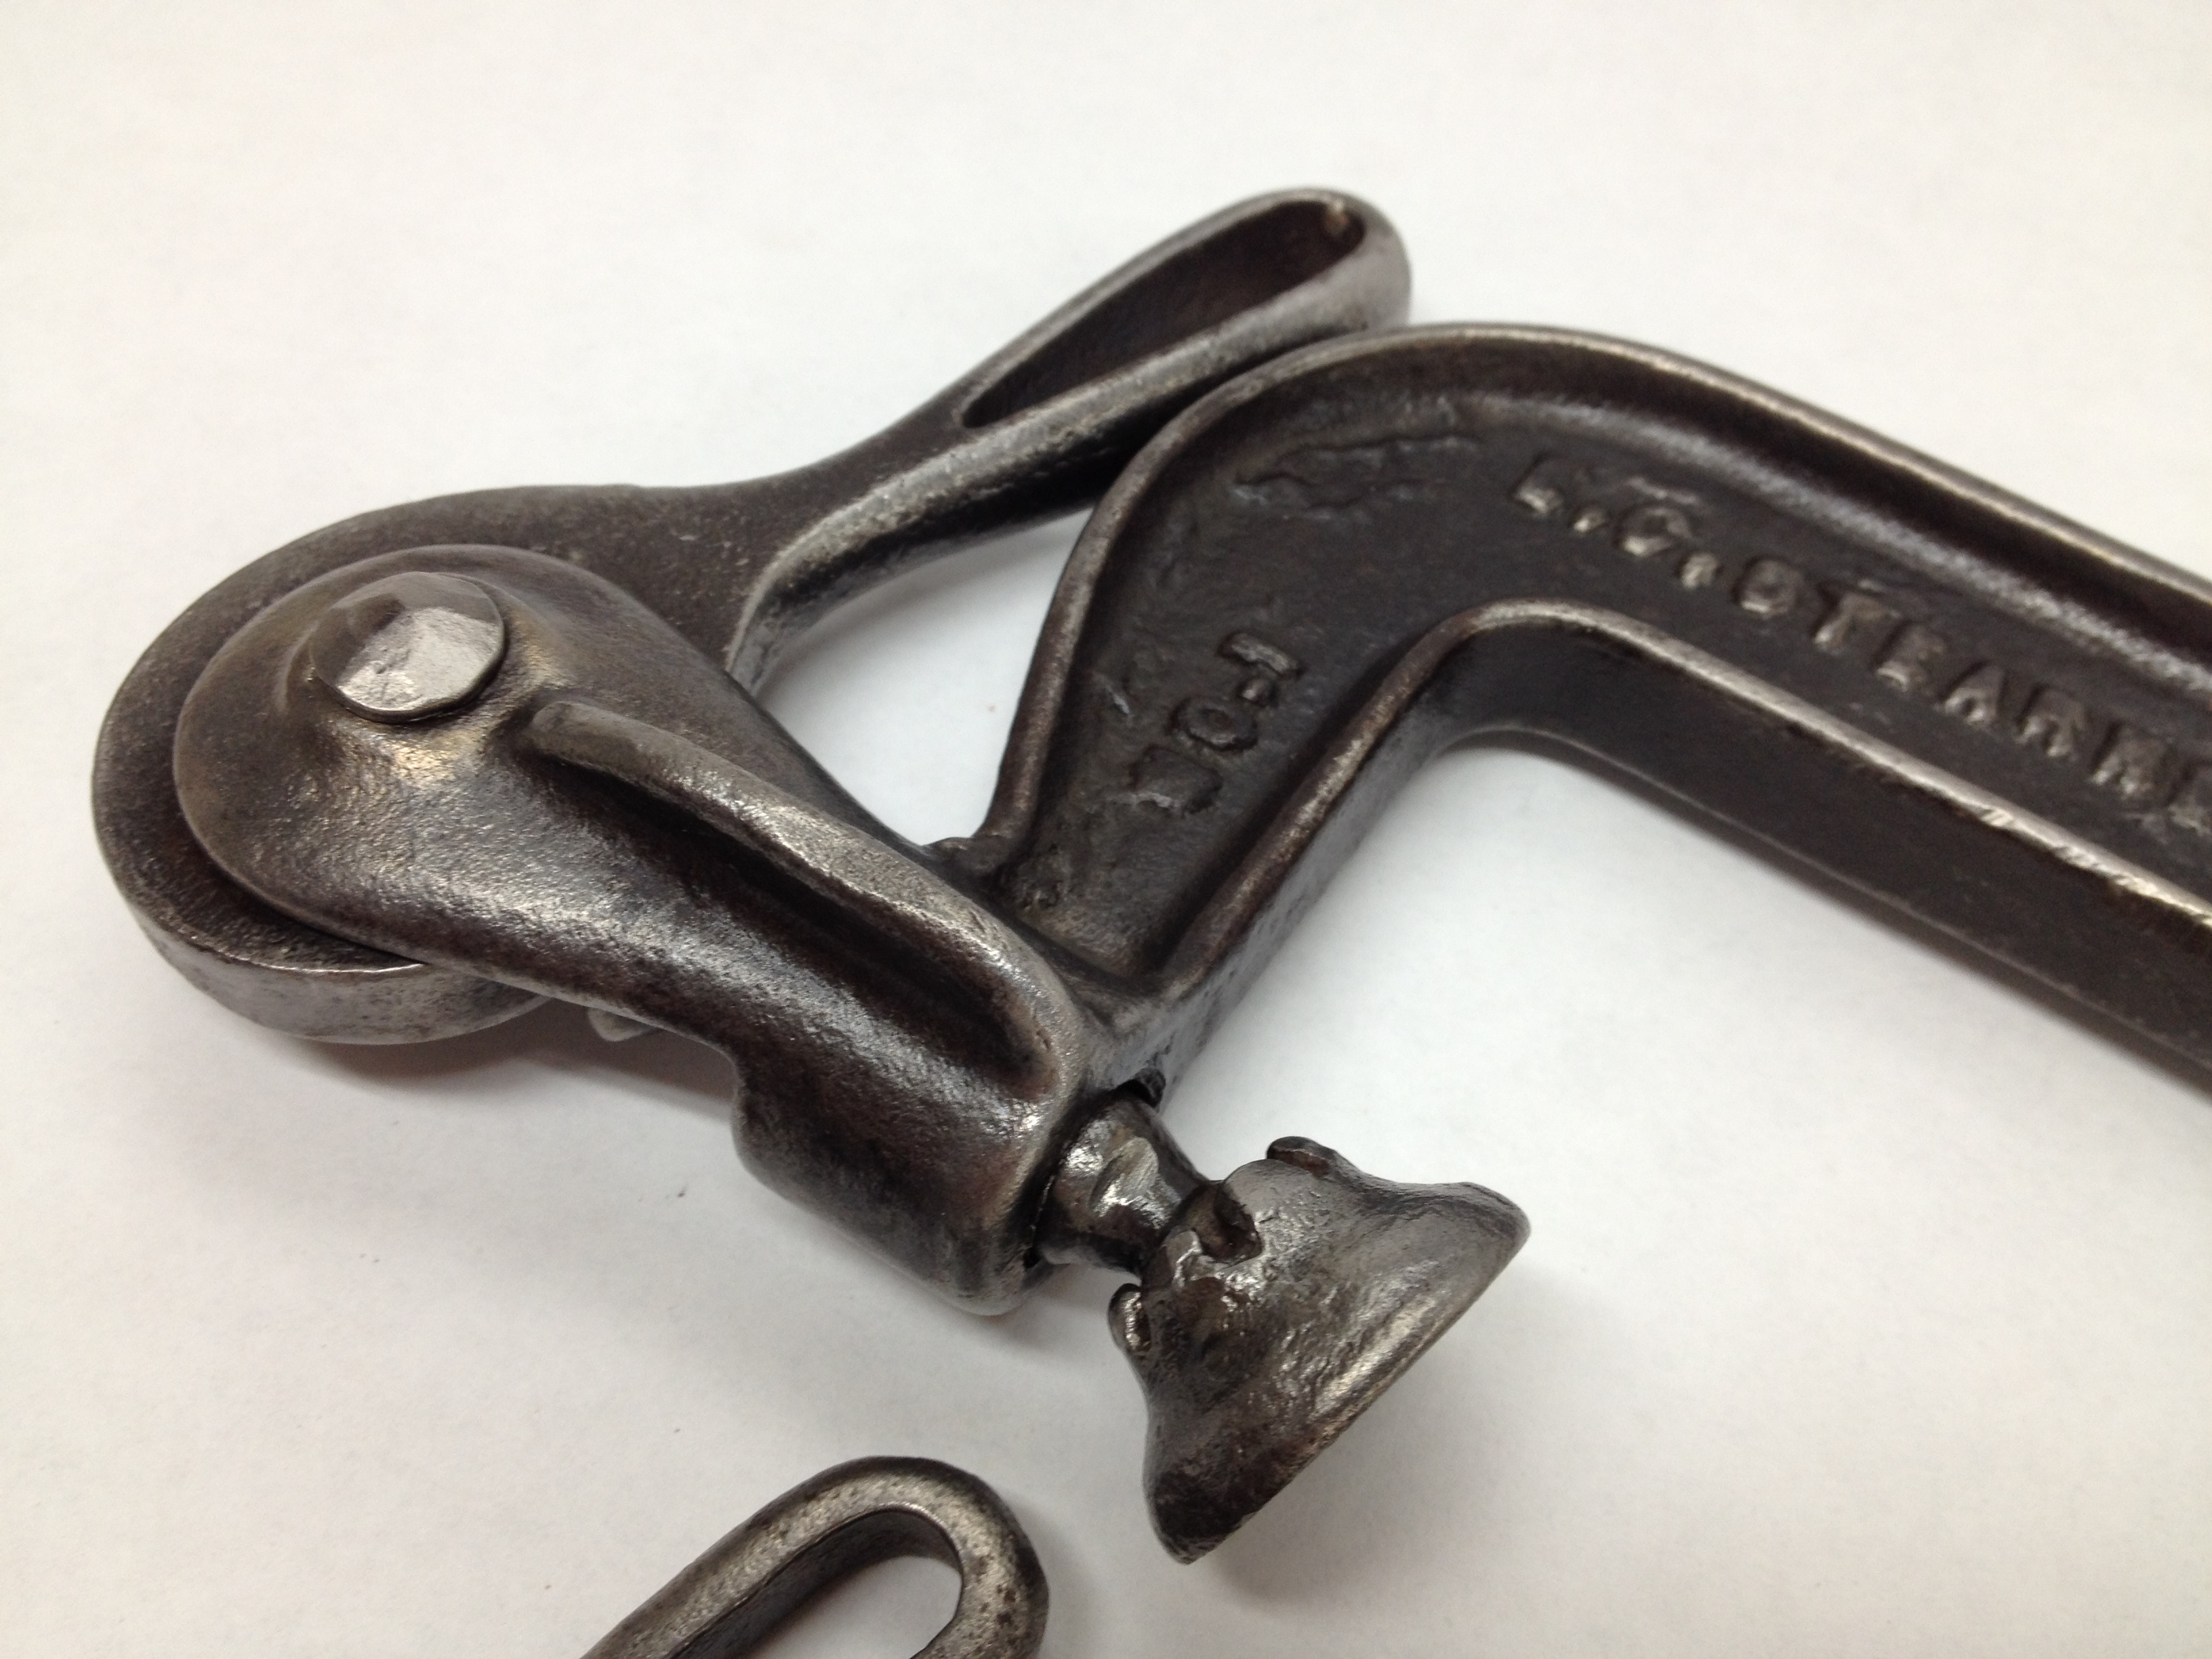
E.C. Stearns No. 0 Eccentric Clamp
What ho! What are YOU, my little metal friend, and where have you been all of my woodworking life?
In case you’ve never seen one, either, it is an eccentric (cam-action) clamp by E. C. Stearns. It is the smallest model, the No. 0, with a 2 ¼” opening, made of malleable iron. This is the “A” style, where the bar curves up to form part of the head that holds the plunger mechanism. (I KNEW that 1977 reprint of the 1924 E. C. Stearns & Co. Catalog would come in handy some day!)

Page 51 of the 1924 Stearns Hardware Catalog
The seller was in southern Missouri, so it didn’t take long to arrive. We chatted a few days after I received it; I wanted to let him know how cool the clamp was and that I was already putting it to work in the shop. Ummm… I also asked him about his method for cleaning it, because this:
Only home for a few days and he already has a rusty older brother!
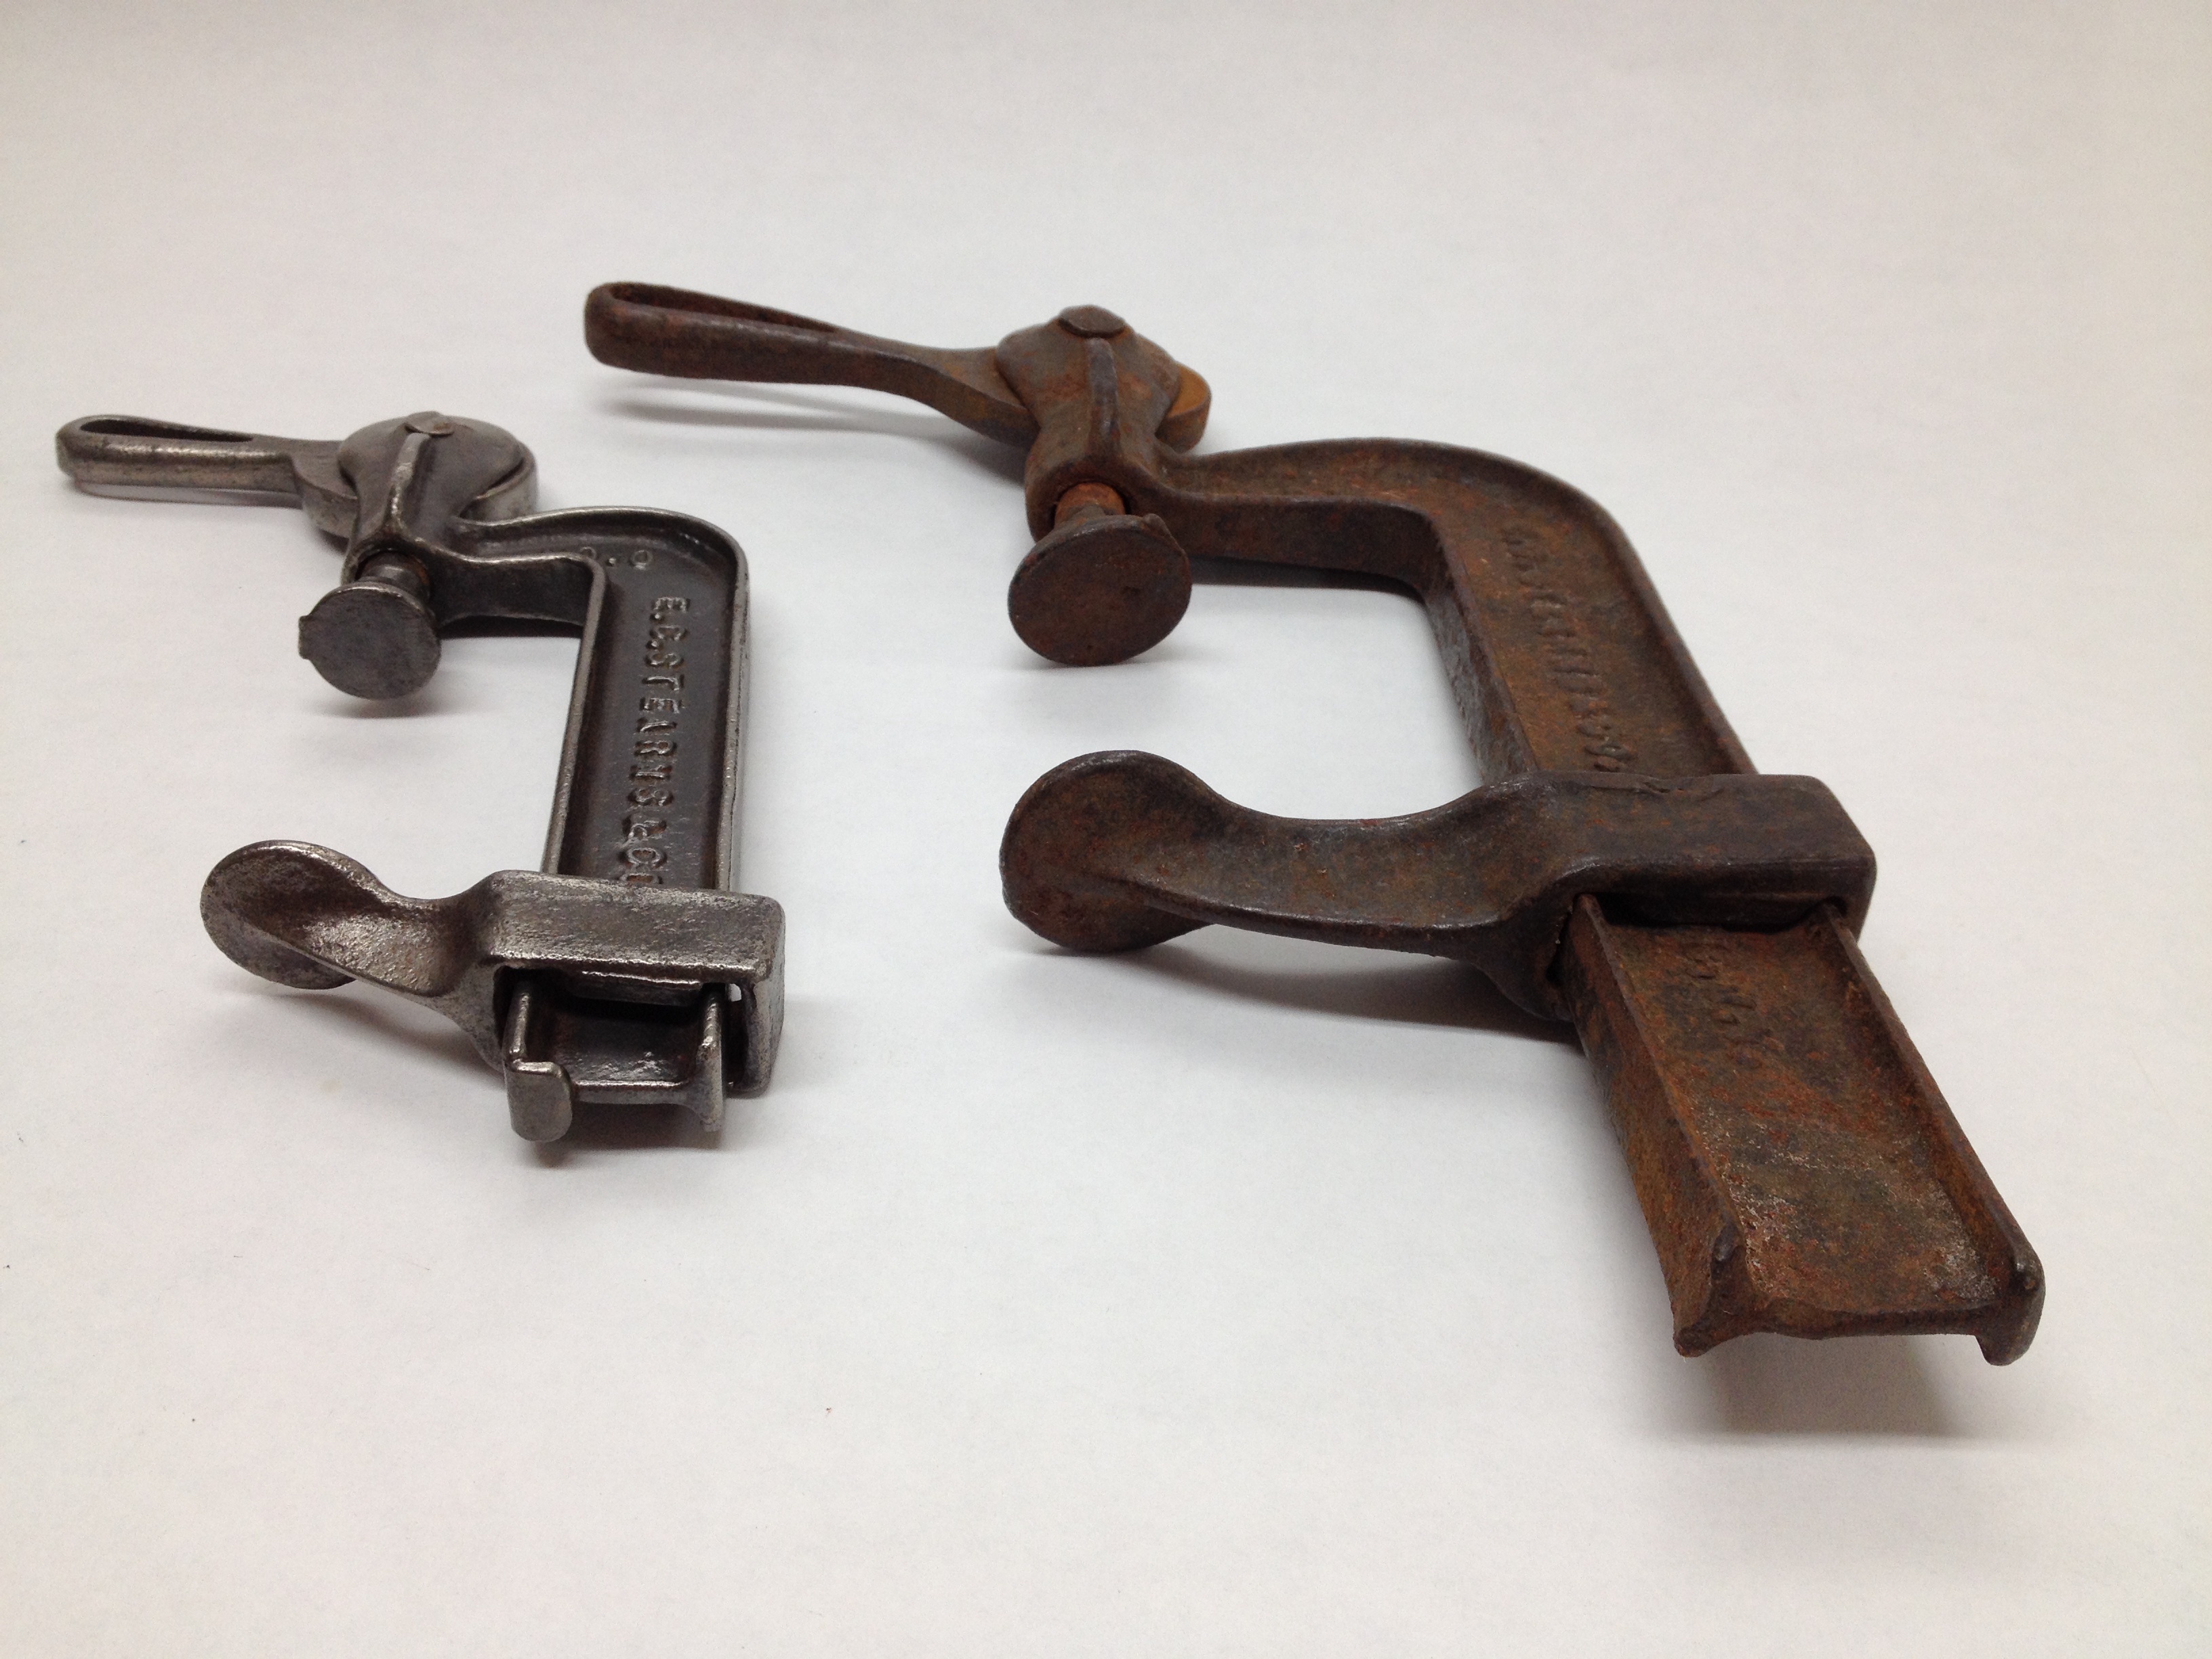
Er… I happened to find another one that listed the same day I received the first one. Fortuitous, no? It had a BIN that was reasonable and there were already several watchers after just a few hours, so I didn’t let it sit there for long. It’s also an eccentric, “A” style clamp by E. C. Stearns. This is the No. 1, with a 4″ opening. It was a bit rustier than the first one; in fact, it didn’t really work very well because of the rust on the cam and post. I had a pretty good idea of how I would clean it up, but I wanted to check with the seller of the No. 0 to see if that was what he did, as well. It was!
So last night I spent a bit of time in the garage at the slow speed grinder, using a brass wire wheel to clean up the clamp. I will probably always keep that tool in the garage, or at least outside of the shop proper, because I don’t like the idea of having bits of ground metal in the woodworking shop. After a bit of touching up with a smaller brass wheel on the Dremel, I refreshed my microfiber shop woobie with a few spritzes of camellia oil and wiped down both clamps.
Here are the fruits of my labor:

No. 0 and No. 1
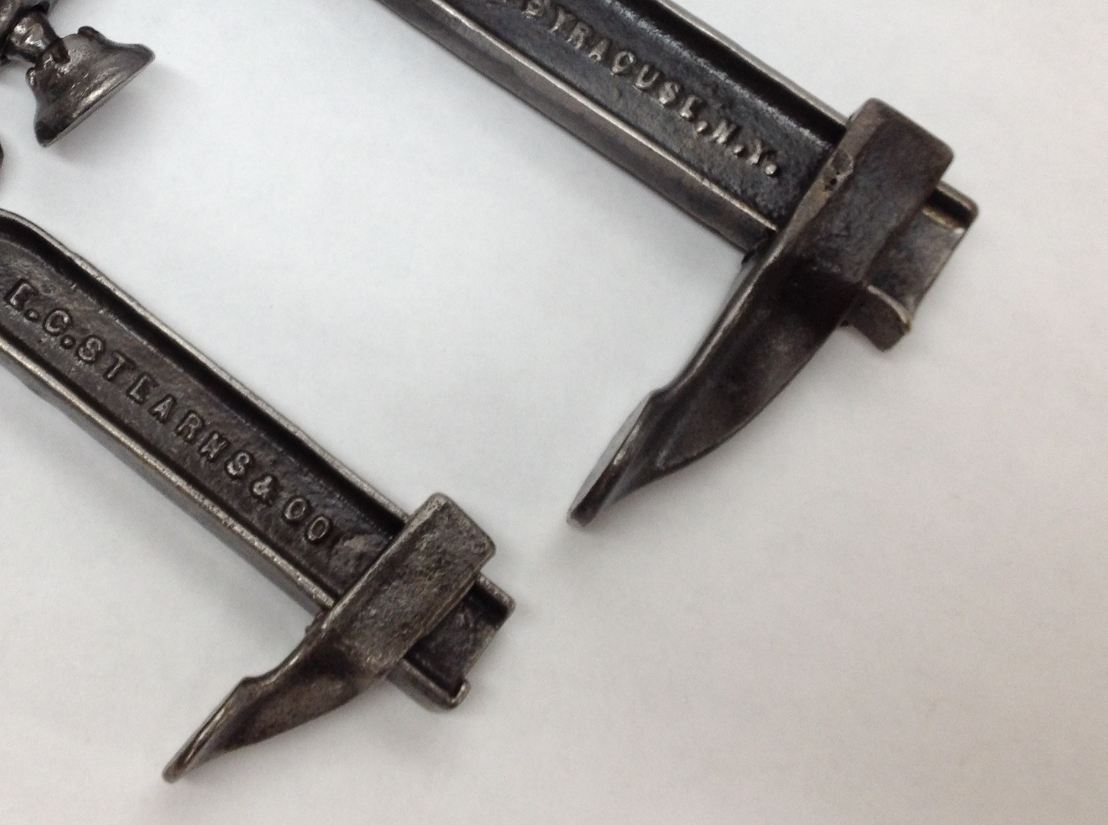
Detail of the sliding jaws…
Detail of the head of the No. 1…
These things are a joy to use! The sliding jaw on both clamps moves very easily (I won’t voluntarily admit to sometimes struggling with getting the jaws adjusted on my F-style and parallel bar clamps). There wasn’t any way to photograph it, but a spiral spring located between the jaw and the bar holds the jaw in place once you position it. Clamping pressure by the eccentric plunger causes a slight racking of the jaw, which locks it into place. Both clamps are able to exert plenty of pressure for any of the tasks I would give them, like pressing a small inlay into place or adding a stop block to my miter box fence or any of the other numerous tasks I normally use C-clamps for in the shop.
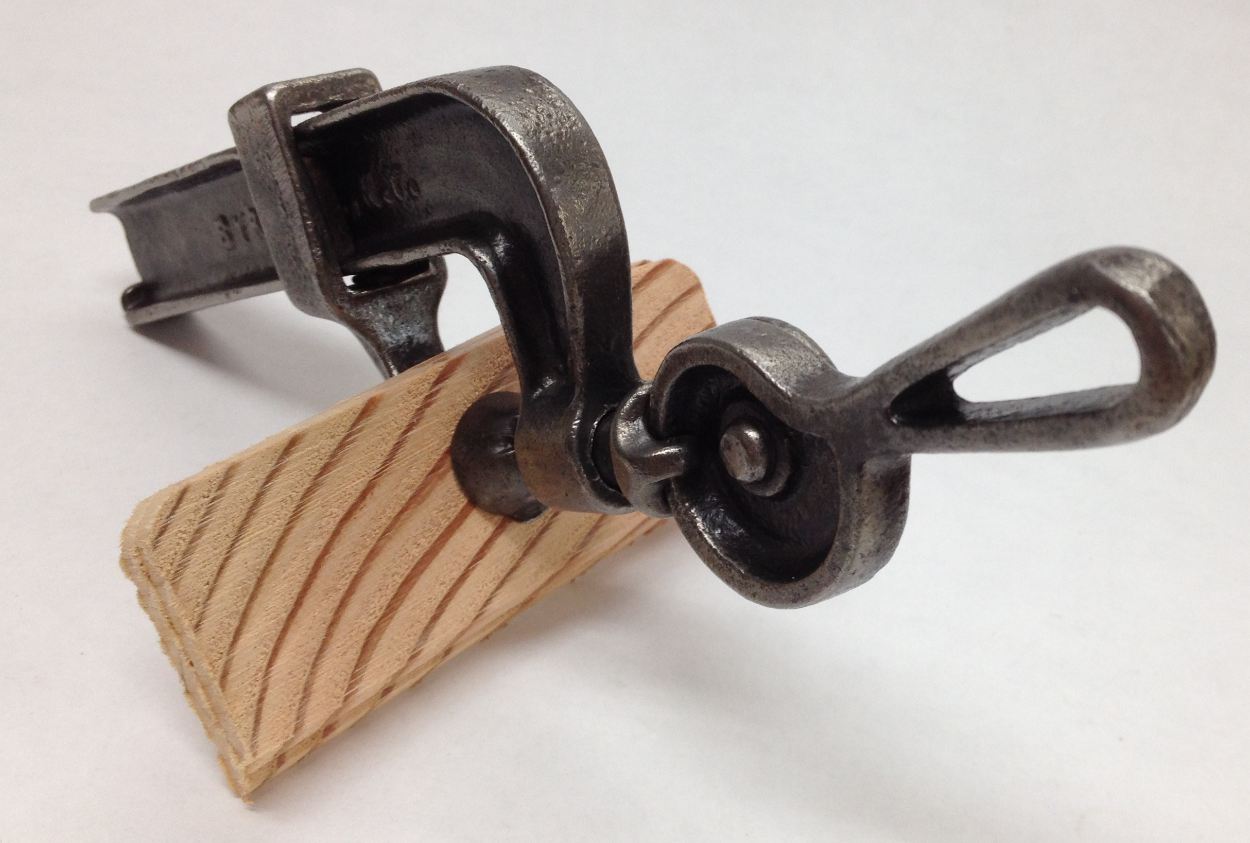
Pretend this is two really important pieces of wood…
You and I are both really lucky I don’t have any kind of “Schwarz” effect on the price of tools when I talk about them. Otherwise, my blog would be really boring, as I wouldn’t write about any of these great tools until I’m certain I don’t need to buy any more! As it stands, I’m not really afraid of writing about them while the initial excitement is still high.
For the next post, I’ll try to get back on-track with my beading tool collection. Stay tuned.
TKW
Millers Falls Langdon Star Miter Box
Before he invented the iconic Langdon Acme Miter Box, William Parsons, an employee of the Millers Falls tool company, created a light-weight “miter machine” (so called because it wasn’t very box-like). Patented in 1902, it was marketed as the Star Mitre Box.

Millers Falls Miter Machine
This early invention of Parsons was significantly smaller than the typical wooden and cast iron miter boxes commonly found in shops at that time. It was also more rugged, lacking the fragile legs you often find broken (and then brazed) on older miter boxes. Millers Falls promoted this combination of durability and portability in their marketing, claiming you could even use it to cut cornice moulding while standing atop a ladder!
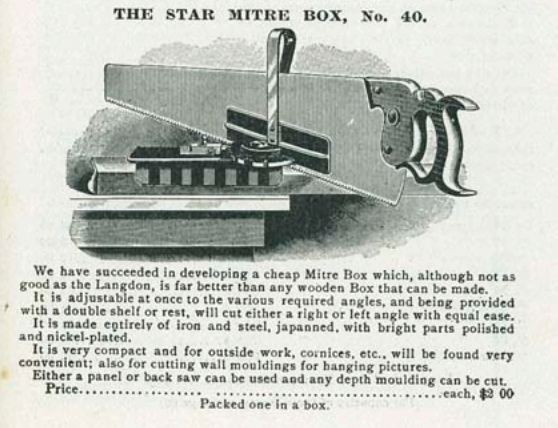
1904 Advertisement of the Star Mitre Box No 40
In 1907, they released an upgraded version of the tool. This newer version featured a tilting saw guide, giving you the ability to make compound miter cuts. The earlier version is referred to as the Star Mitre Box No. 40 in old tool catalogs I’ve seen, while the latter version is referred to as the No. 41.

Star Mitre Box No. 41 Advertisement
I recently acquired my example of this tool while searching for who-knows-what on my favourite auction site. At first, I passed over it without a second thought, my mind on other things. But five minutes later, I had a “wait a second…’ moment as my brain finally kicked in and I’d realized what it was.
Langdon Millers Falls Logo
Having read about it before on OldToolHeaven (which is also where I got some of the information used in this post), I knew it was the precursor to the Langdon Miter Box. I also knew I’d never seen one before, either in a collection or for sale. Frantically, I retraced my searches (not always an easy thing) and, finding it once more, took a longer look.

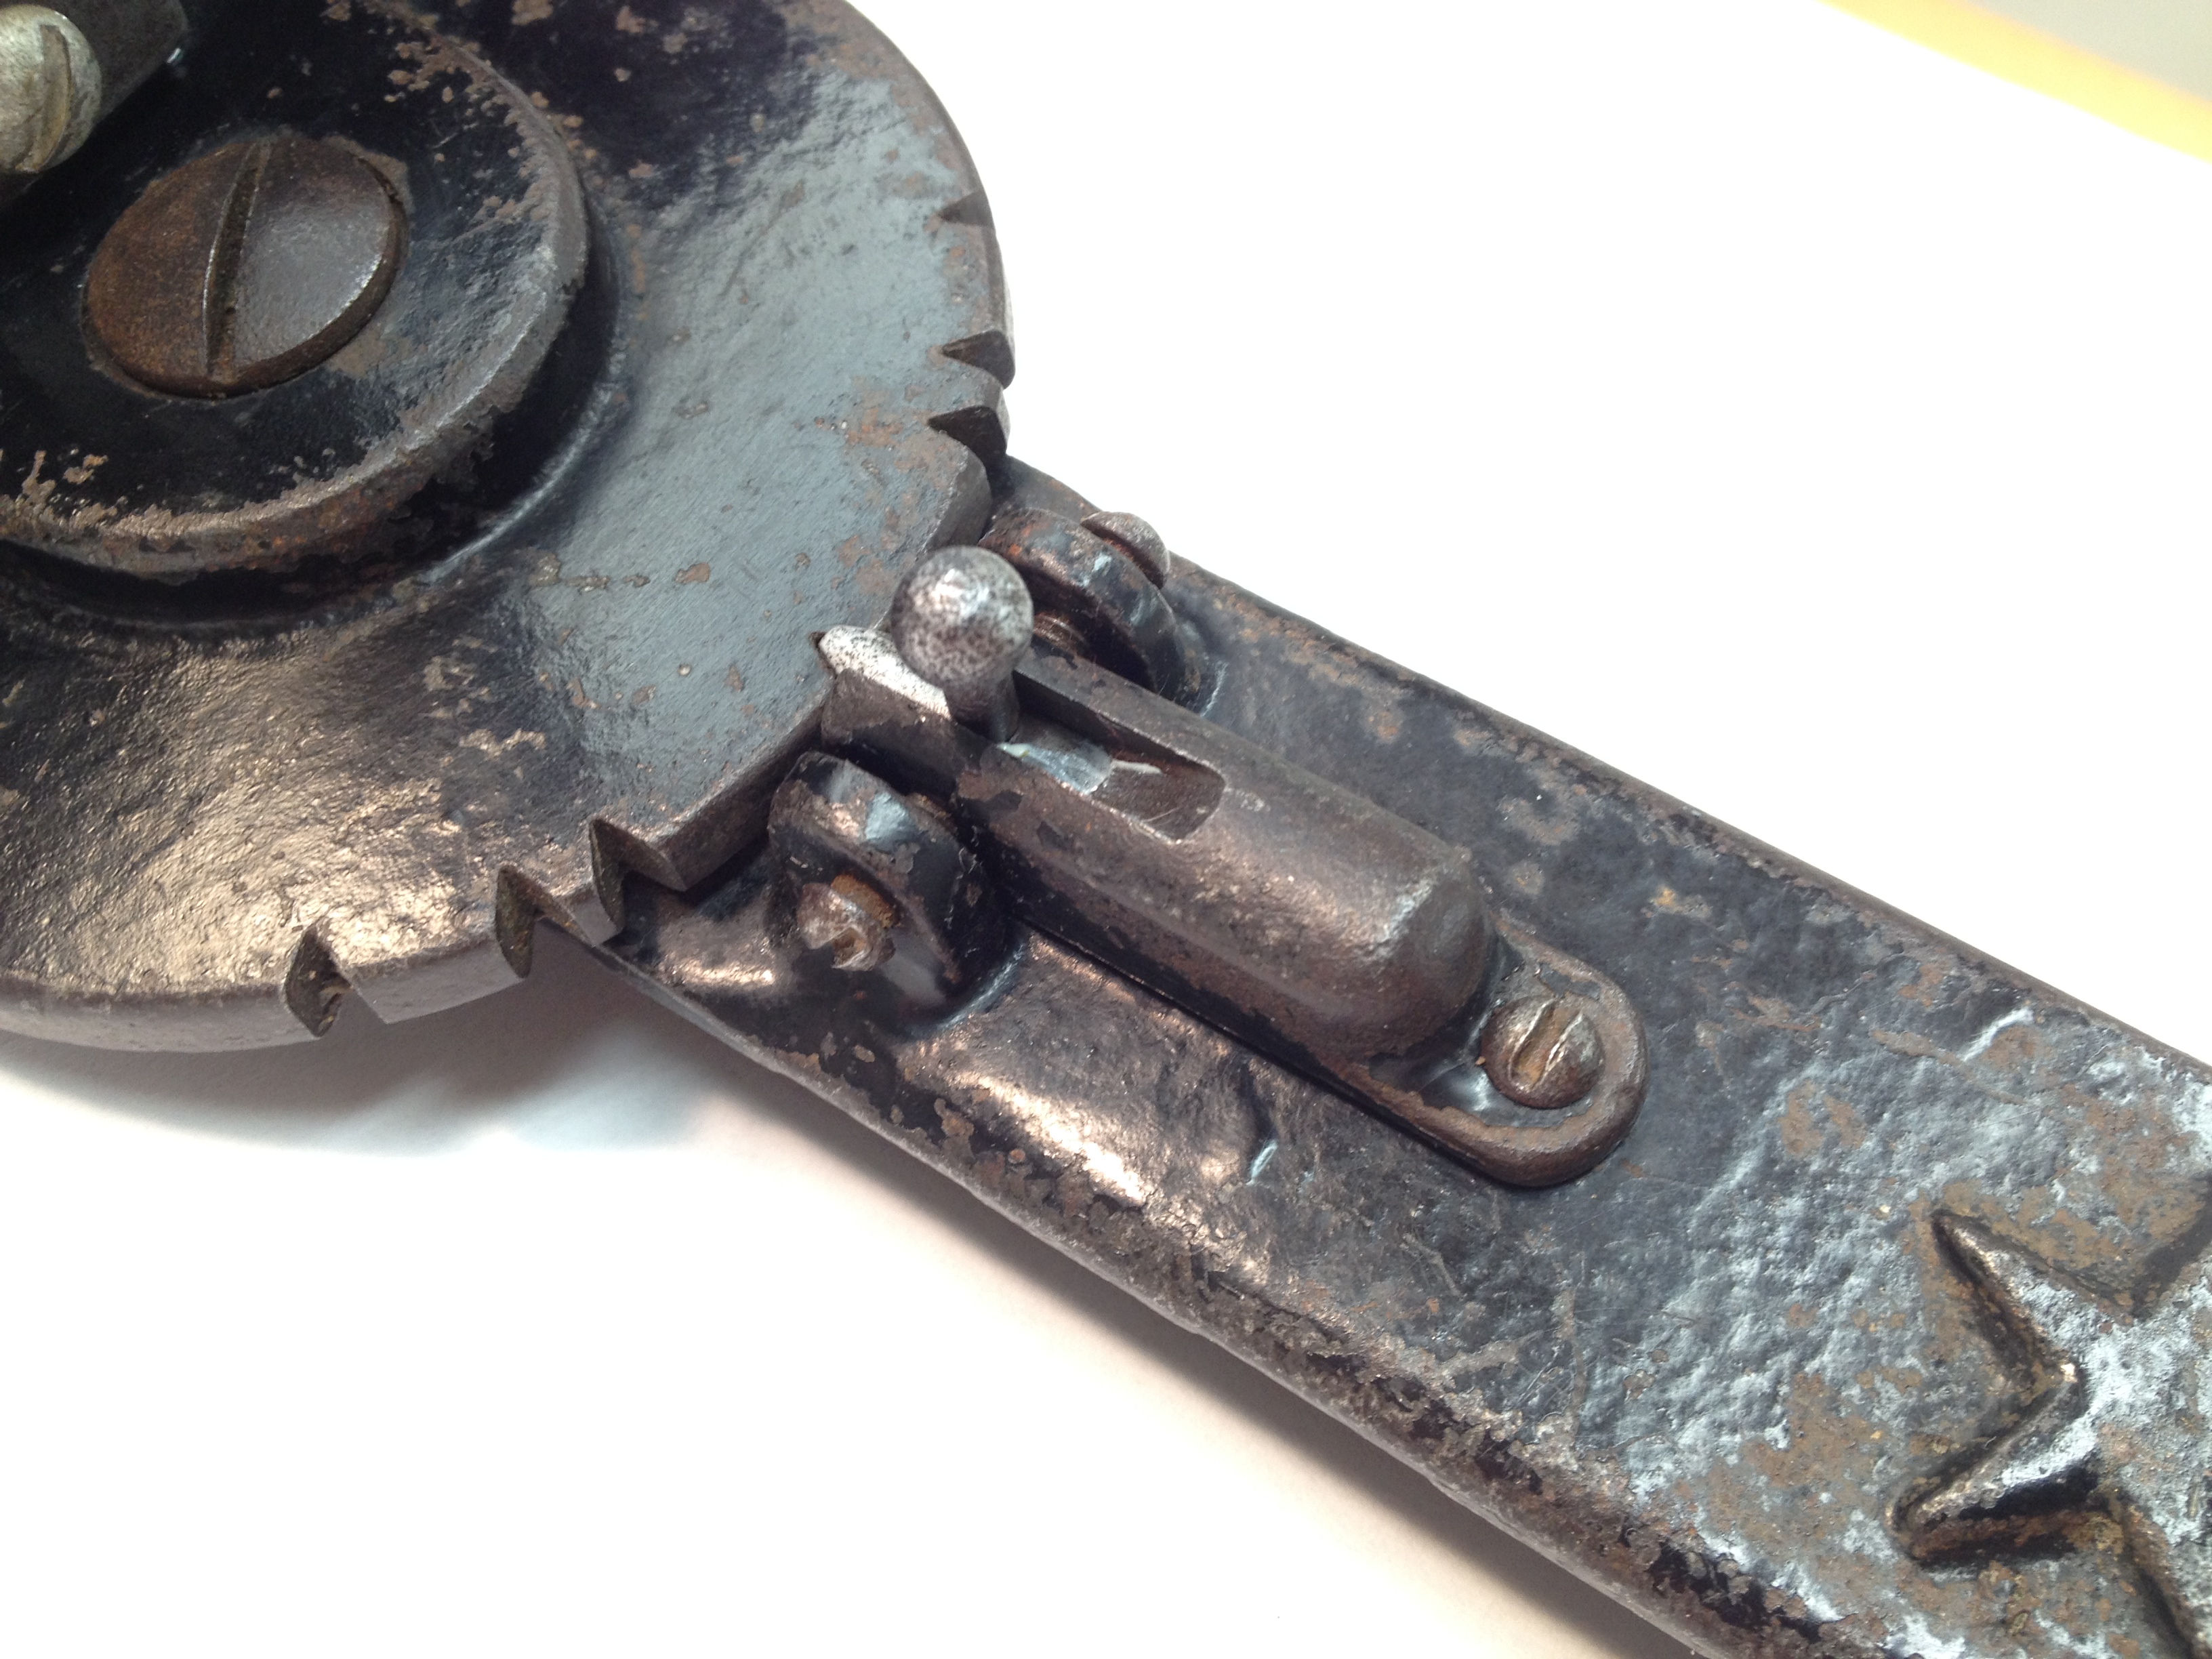
The Star of the Star Miter Box
It didn’t take another five minutes for me to decide the seller didn’t really know what they were selling (the BIN was under $30, with free shipping) or to conclude that I wanted to get it and study it more closely. Honestly, I also thought it might prove useful in my shop. I seem to do just as much work with construction-grade lumber as I do with dimensional lumber, but I hate lugging my miter box around the house and garage and I hate carrying the lumber down to the shop to use the miter box. I don’t think I’ll ever find myself cutting cornice moulding while standing atop a ladder, but I could see it earning its keep.
It arrived in the post in short order and the next time I was able to get into the shop, I disassembled it and began removing 100+ years of grime and gunk. There was a fair amount of japanning loss, but it still looked to retain maybe 75%; not bad for a tool designed to see use outside the shop.

The Millers Falls Langdon Mitre Box No. 40
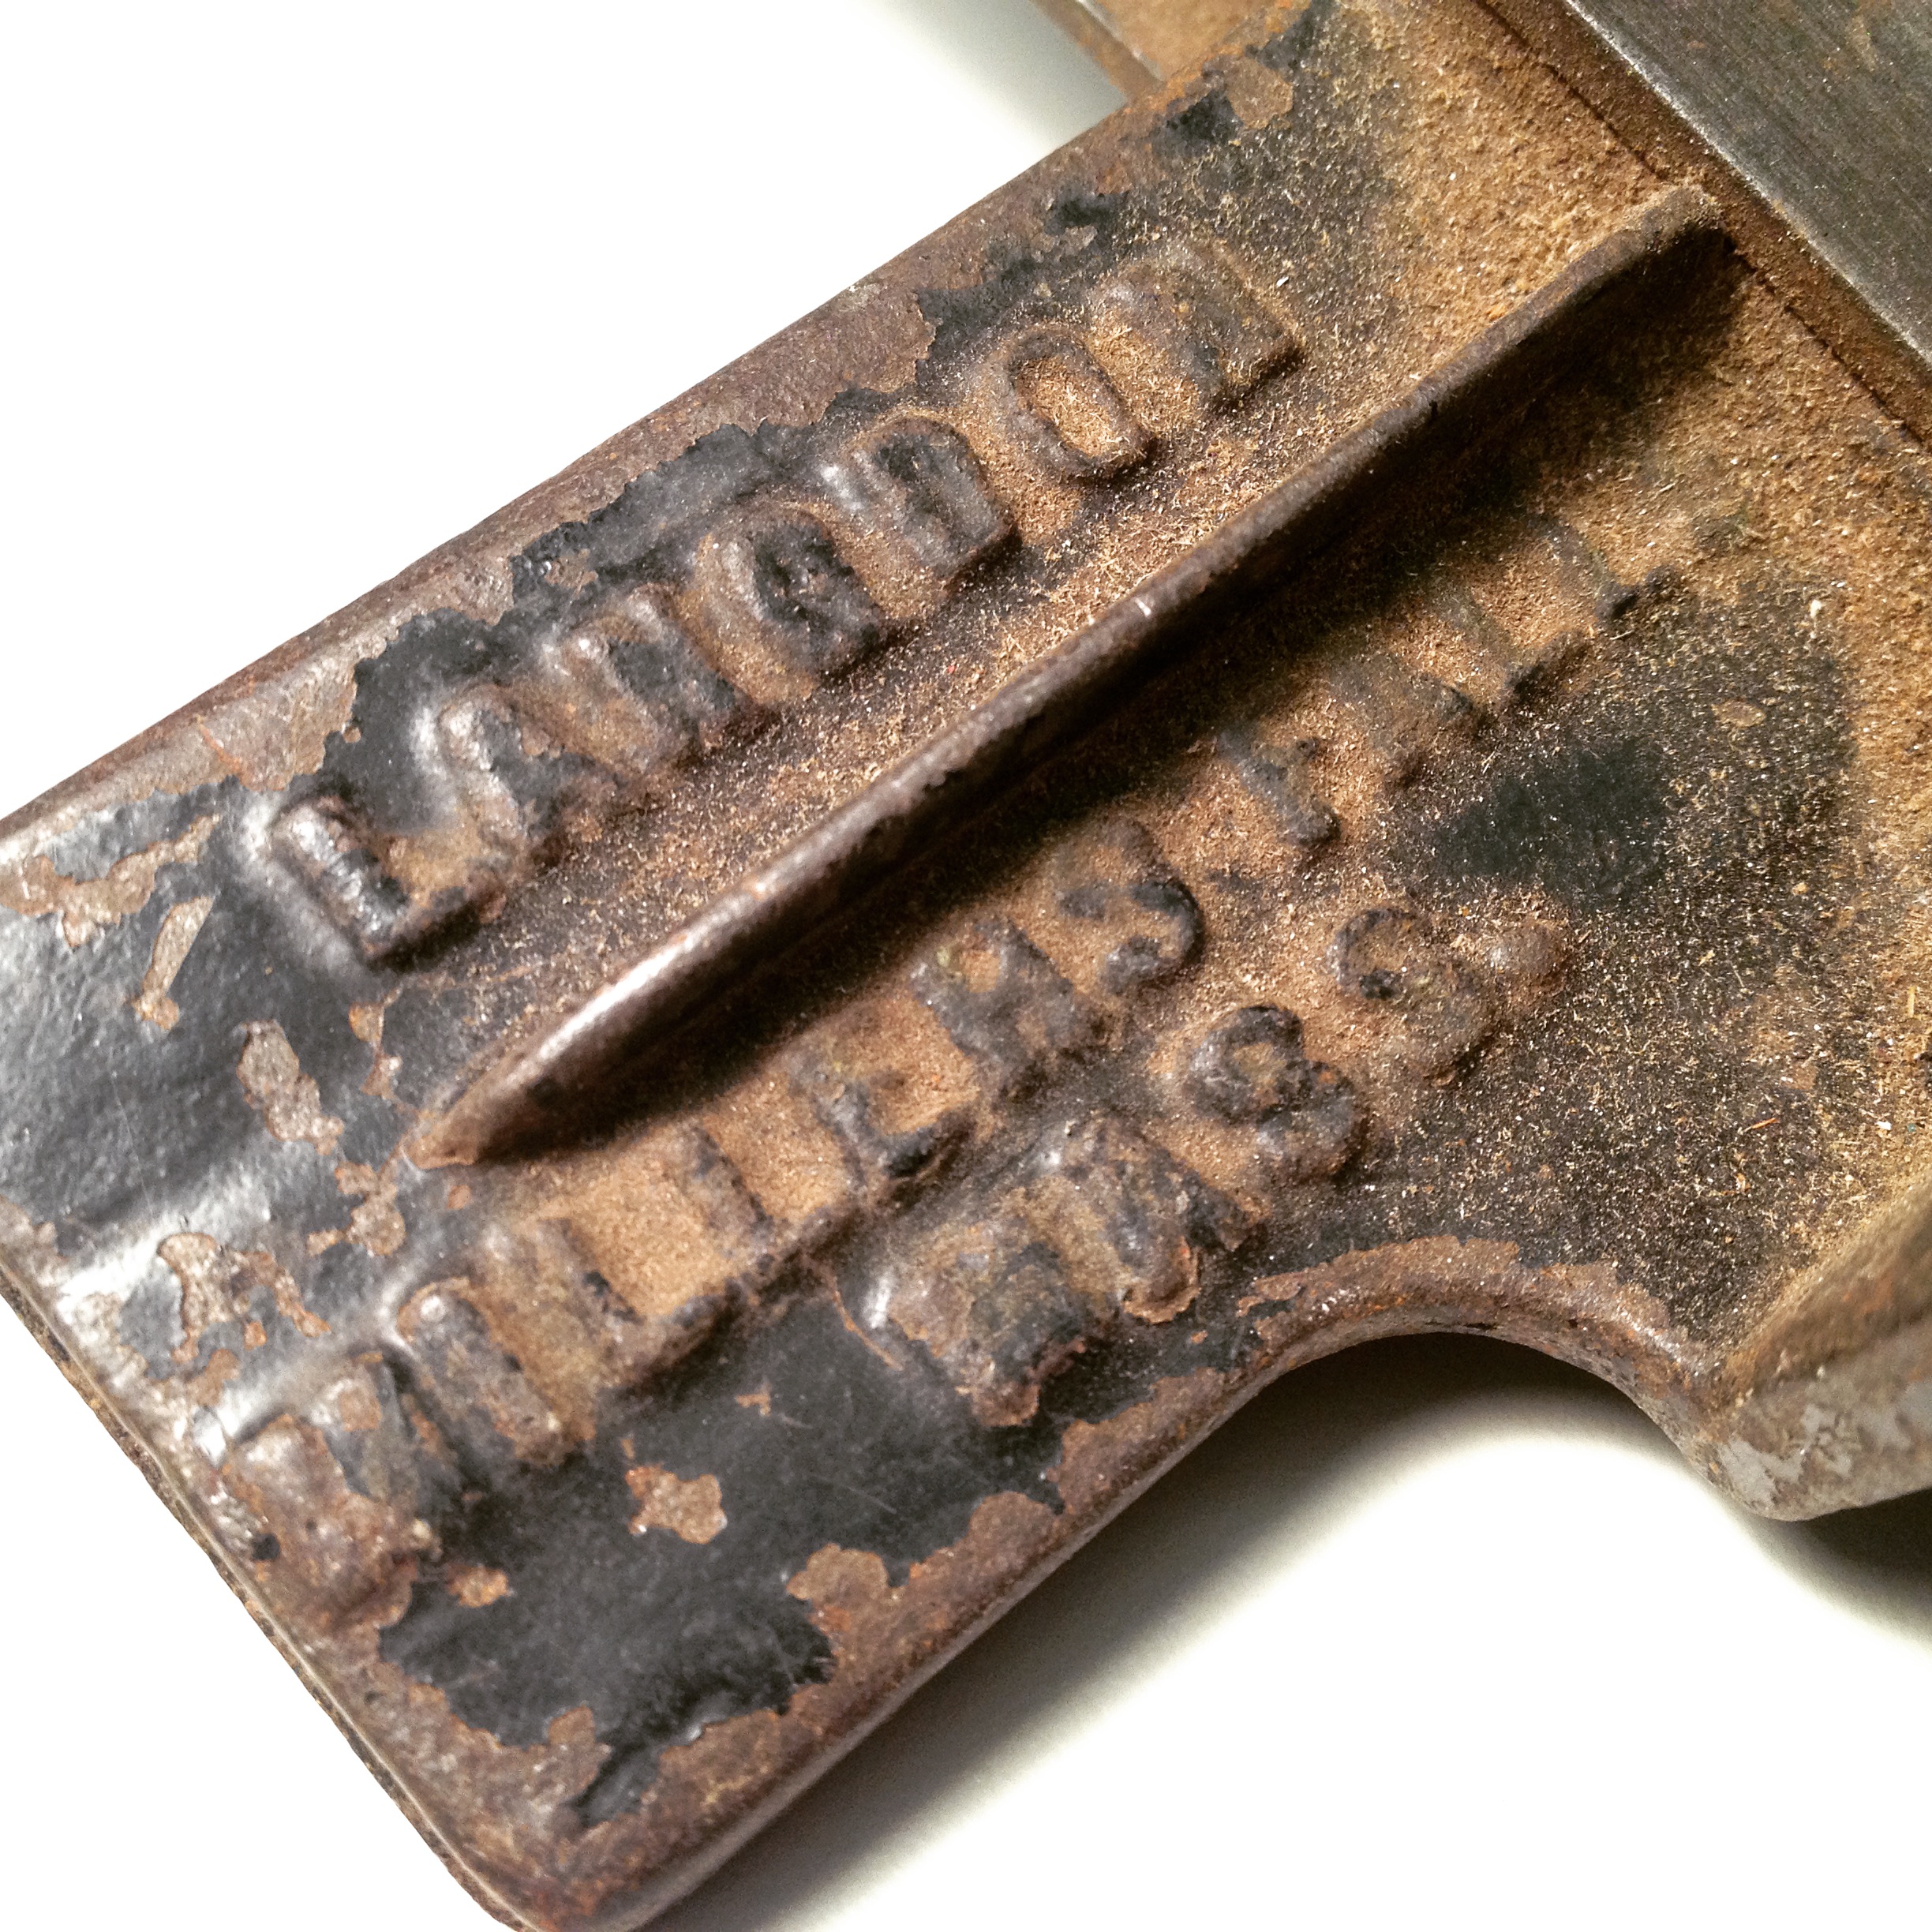
In disassembling it, I quickly discovered it was adjustable! Of course it is! You can’t rely on a factory setting to remain true for the life of the tool, can you? The two screws on either side of the sliding pin that locks the fence in position can be adjusted with great precision. A notch in the fence plate allows you to set the fence to 90 degrees. Additional notches on either side of the center notch are presets for 22.5, 30, and 45 degree cuts.
Detail of Presets
The guide that holds the plate is designed to work with full-sized, panel, and back saws. As long as you have a big enough saw plate that it can stay in the guide and still cut to the depth you need, it should work. I made test cuts with a full-sized D-8, a D-8 panel saw, and my Bad Axe 20’ miter saw; all performed well, though of course my Bad Axe miter saw excelled at the task.

Using the No 40
The Star Miter Box isn’t perfectly balanced that it would sit on its own, so I chanced using some double-sided tape on the back of the fence with the lighter panel saw for the stand-alone pictures. I didn’t want to risk the miter box falling with the heavier saws; even just a few feet off of a cork floor, I’d rather not drop and damage it before owning it less than a month. And, of course, I didn’t want to damage my saws, either!

A square cut right off the saw; tail courtesy of Oliver the Cat
As you can see, it made a perfectly square cut with almost no effort on my part. Oh, yes, I can see this being used in my house.
I spent a little time practicing my Google-fu to see who else on the interwebz had an example of one of these miter box guide thingys. Interestingly enough, I was only able to track down one other person, Mark van Roojen, who has posted anything on the internet. I sent Mark an e-mail and we exchanged some thoughts and discussion on our highly unusual items.
Whereas I have the original Star Miter Box, he has the 1907 version (which has “No. 41” cast into the main body). He had an interesting story about acquiring his – he first saw it at a flea market, but didn’t buy it. He later realized what he’d missed out on and kicked himself for an extended period of time for NOT buying it. At an MWTCA meeting four years later, he found what he suspected was the exact same miter box for sale. That time, he bought it. I’m glad it only took me five minutes to figure out what I was looking at…

Detail of the miter saw fence
Aside from a few forum hits, where it is Mark asking for any information about his No. 41 back in 2007, I couldn’t find anything else. So I figured I would document what I found, partially because I found it highly interesting. But I also thought maybe there are others out there who have one of these sitting in their shop and they don’t know anything about it. If you’re one of those people, now you do.
If you’re not one of those people, now you have something new to keep an eye out for. Sorrynotsorry.
TKW

