Studio D Conference Table, Part 5 – Wrap Up
Editor’s Note: This last post on the conference table will be fairly low on pictures, as it just covers the finish and delivery of the piece and some final thoughts. Taking pictures of the finishing process is about as exciting as watching the finish cure. And I didn’t go overboard on the pictures after I delivered it because my plan is to go back in a few months and do some better photographs (for a reason I’ll go into later).
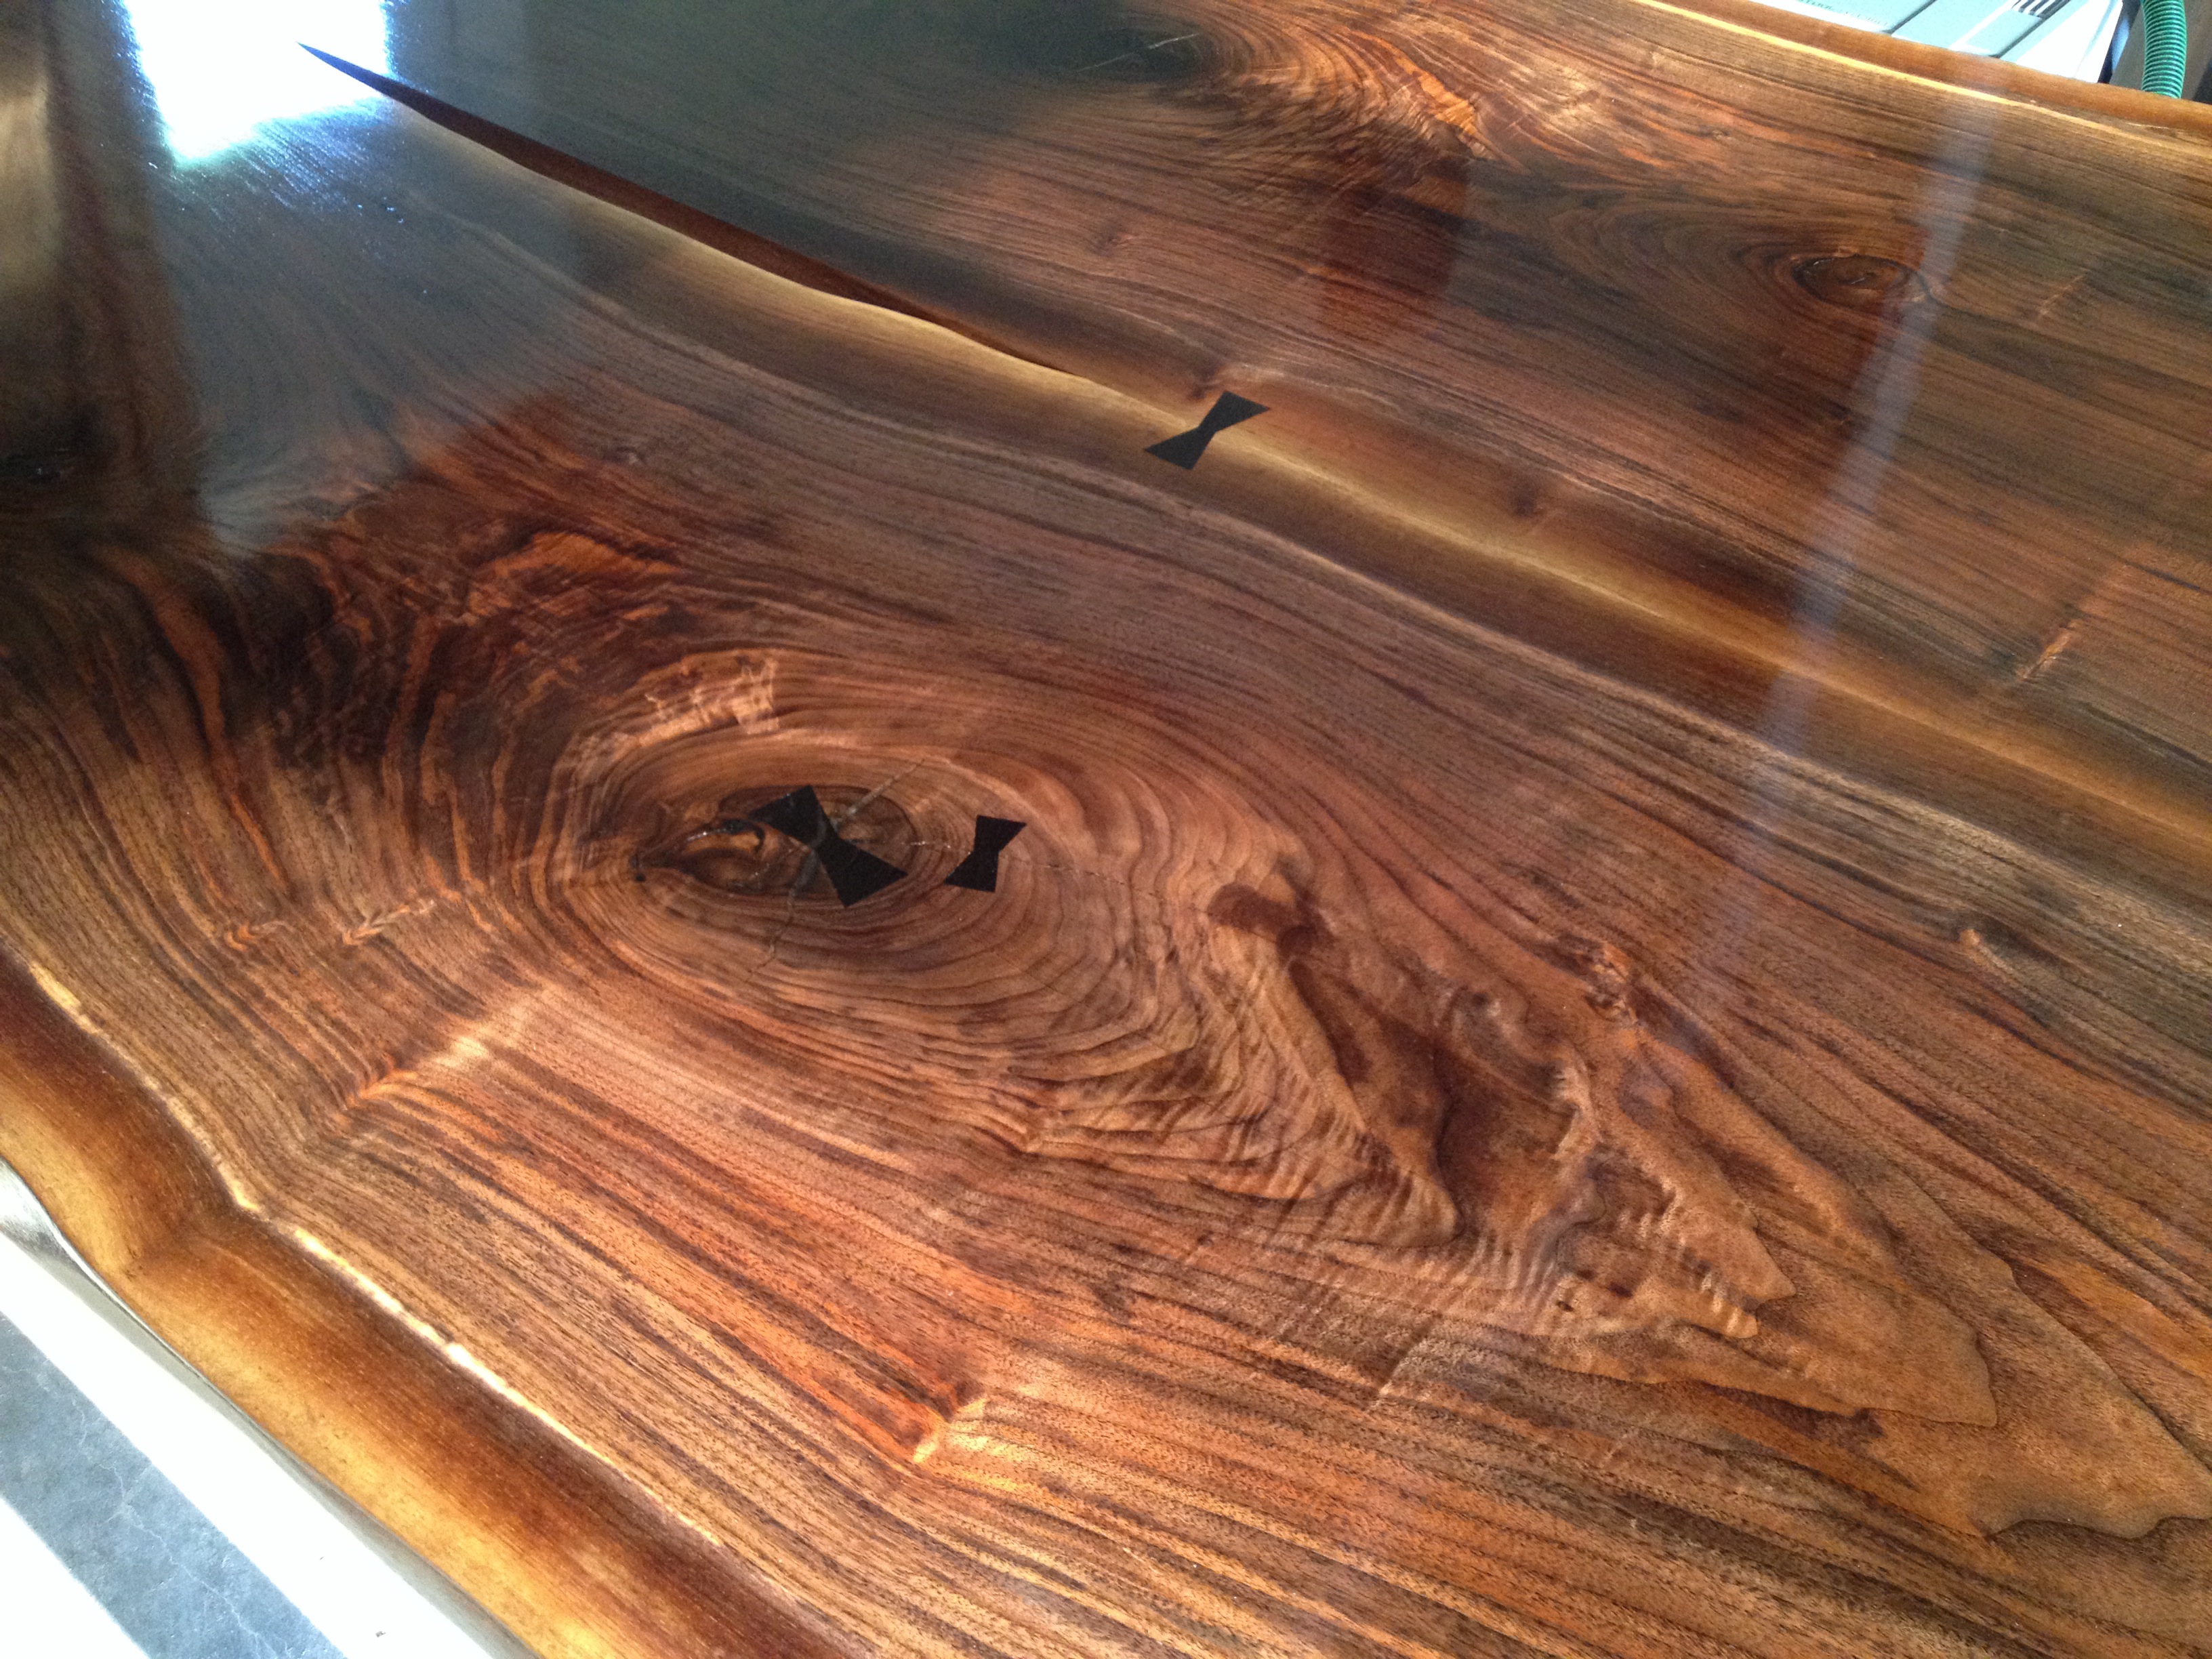
After all of the butterfly inlays were completed, I began prepping the top and edges for finish with a combination of planes, scrapers, and sand paper. I’ll be the first to admit I did not work the top with just planes. I did use traditional hand tools for a lot of the work up to this point, doing such things as smoothing transitions in the edges and between the two planks and leveling the butterflies, but I used my Festool ROS 125 to really get everything evened out and prepped for finish.
I decided to go with a Waterlox finish for several reasons. This was my project and I wanted to do as much of it on my own as I could; that meant using a finish I could apply myself, without spraying, and without the use of an oversized finish room (i.e. clean) environment. I also wanted something that was easily repairable. In most cases, a damaged Waterlox finish can be easily fixed with a bit of sanding and spot-application of additional finish. The newly applied finish coats will amalgamate with the old finish, leaving a seamless repair.
After Five Coats Of Finish…
There is a great series of videos on Youtube for applying a Waterlox finish by AskWoodman. Really, he offers some great finishing tips that work with most methods, like his technique for getting all of the sanding dust and particles off of the wood before finishing it. I followed his suggestion and was very impressed with the results. (Sorry, I really want to give him credit for that tip, so I think you should take the time to watch his videos to get it.)
After the surface was fully prepared, I worked my way through six full coats, using a sponge brush as an applicator. After the third and fifth coats, I smoothed the surface with a grey nylon pad. After the sixth coat, I smoothed it with a white nylon pad. Per the Waterlox White Papers, I did not apply these coats, let them sit a while, and then wipe them off. Had I done that, I would have ended up doing at least 25 coats to get the same level of protection as the six I put down.
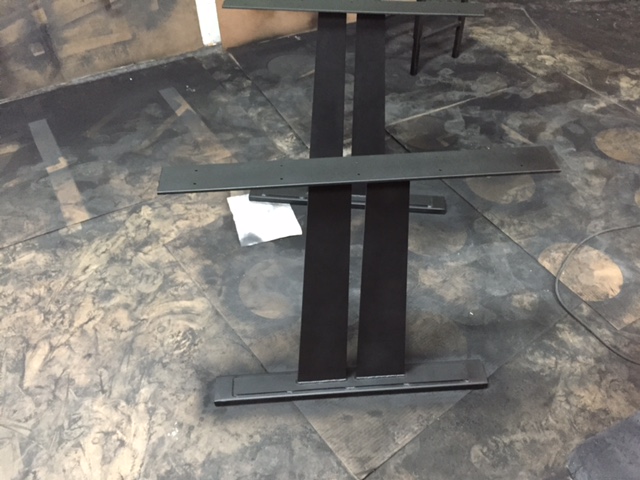
At that point, I was ready for the base. Unfortunately, I had no base! The original due date was already delayed by the seller, but there was some additional delay time because of a design element change (we decided to add a trestle support between the two legs for added stability and to prevent racking).
Legs… No Trestle
Two weeks later than the initial scheduled date, I finally received the legs and trestle. Then I spent another three evenings fixing them.
(In an early draft of this post, I detailed all of the problems I had with the base. I decided not to include them, for length concerns and for the sake of decency.)
In the end, they turned out to be quite good, but it took a lot of extra work on my end of things to make it so. Because of that, I can’t, in good conscience, recommend the company where I bought the legs. I would suggest, however, that you learn a lesson from my mistake.
If you find someone through such online sites as eBay or Etsy who offers services or goods you require, I would highly recommend you USE that online site to complete the purchase those goods or services and not buy the product directly from the seller. Yes, there are additional fees for the seller; that’s the price of doing business, isn’t it? In return, they get a good source of marketing and recourse in the event a buyer fails to hold up their end of the deal.
But you benefit from such an arrangement, as well. You have records of transactions and payments monitored by a third party. This likewise gives you easier access to recourse, should things go bad. More importantly, you also have the ability to leave proper feedback for the seller in those environments, which is often encouragement for them to ensure things do NOT go bad in the first place. By learning from my mistake, maybe you can avoid having an “invoice” sent to you that is just a cell phone picture of a flatscreen monitor showing the shipping website with the shipping costs. (Yes, that happened.)
If they balk when you tell them you do not want to complete the transaction outside the online site where they advertise their product, you might consider taking your business elsewhere. I know I will.
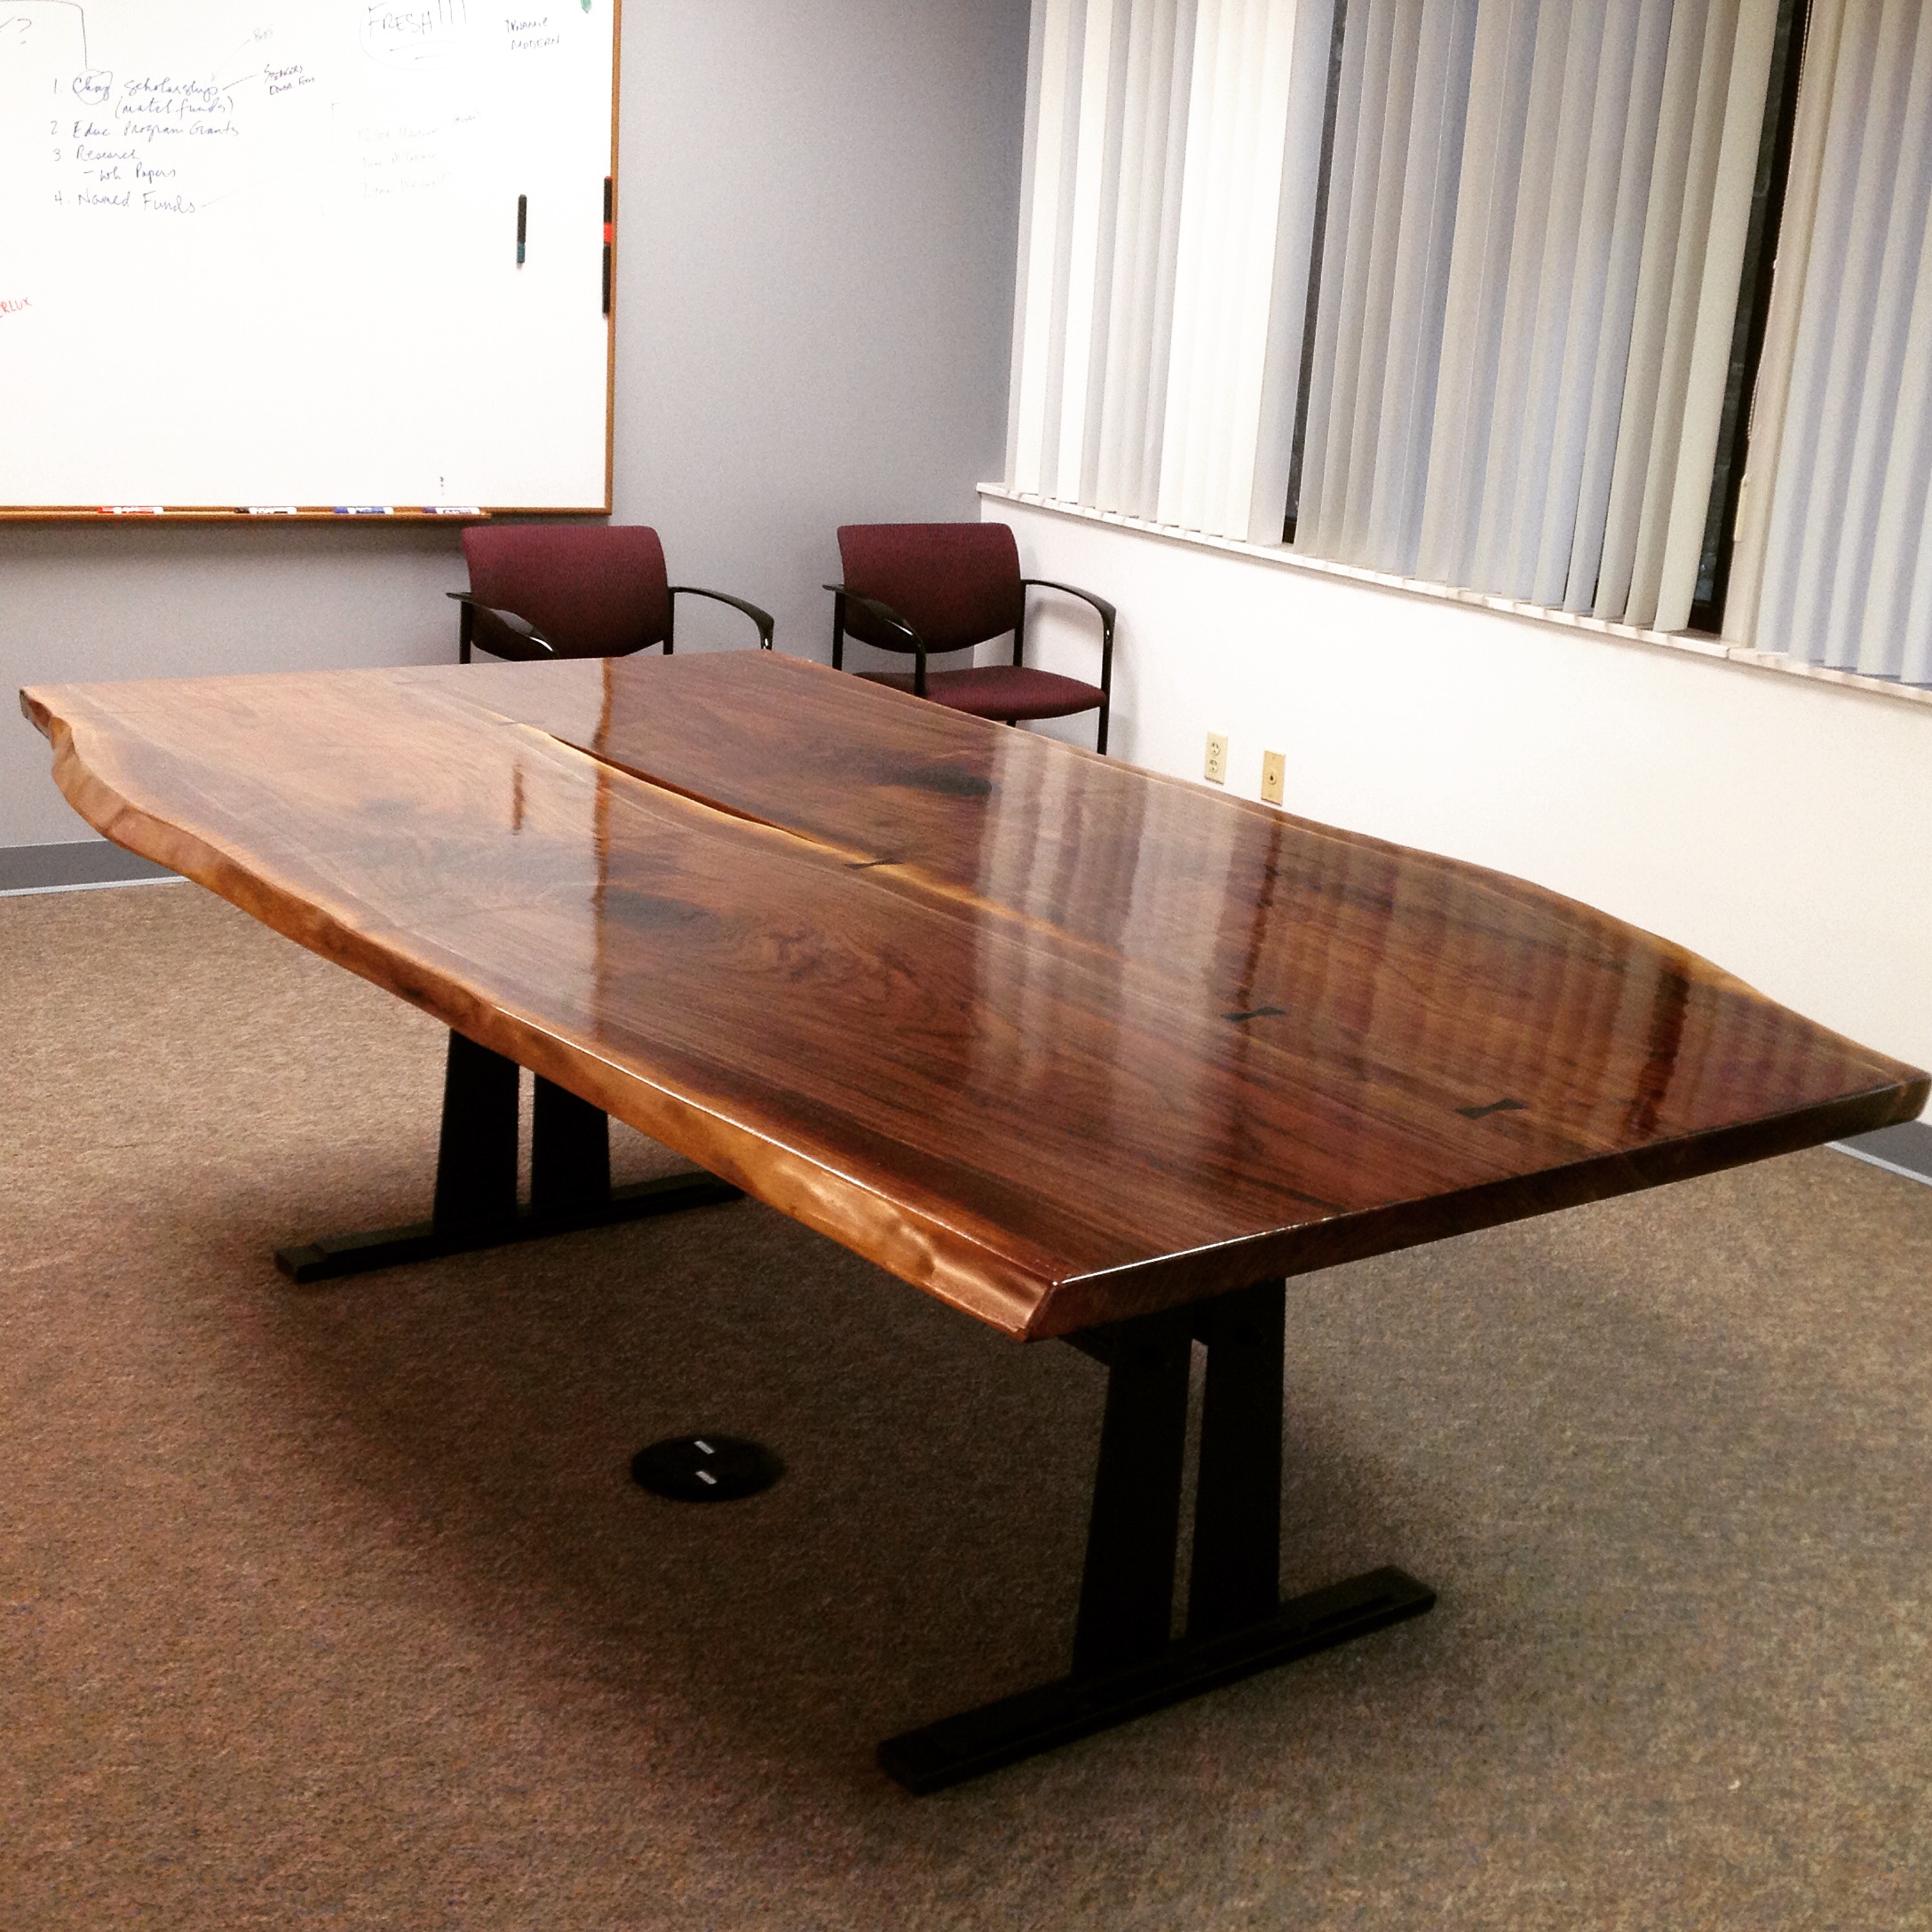
Table Delivered
Two days before I left for Handworks 2015 for a weekend of fun, friends, and… well, hand tools, I hauled a pair of legs and a trestle to the client’s office to install them on the table top, which had been delivered two days earlier. With absolute precision planning (i.e. sheer dumb luck), the table sat on the saw horses about ¼’ higher than the top of the assembled base. So I was able to slide the base under the table, mark out exactly where it needed to go, and use my drill bit to mark the locations of the holes. Then I slid the base out of the way, drilled the holes, and slid it back into place. I removed the saw horses, dropping the top into position, and attached it without any fuss.
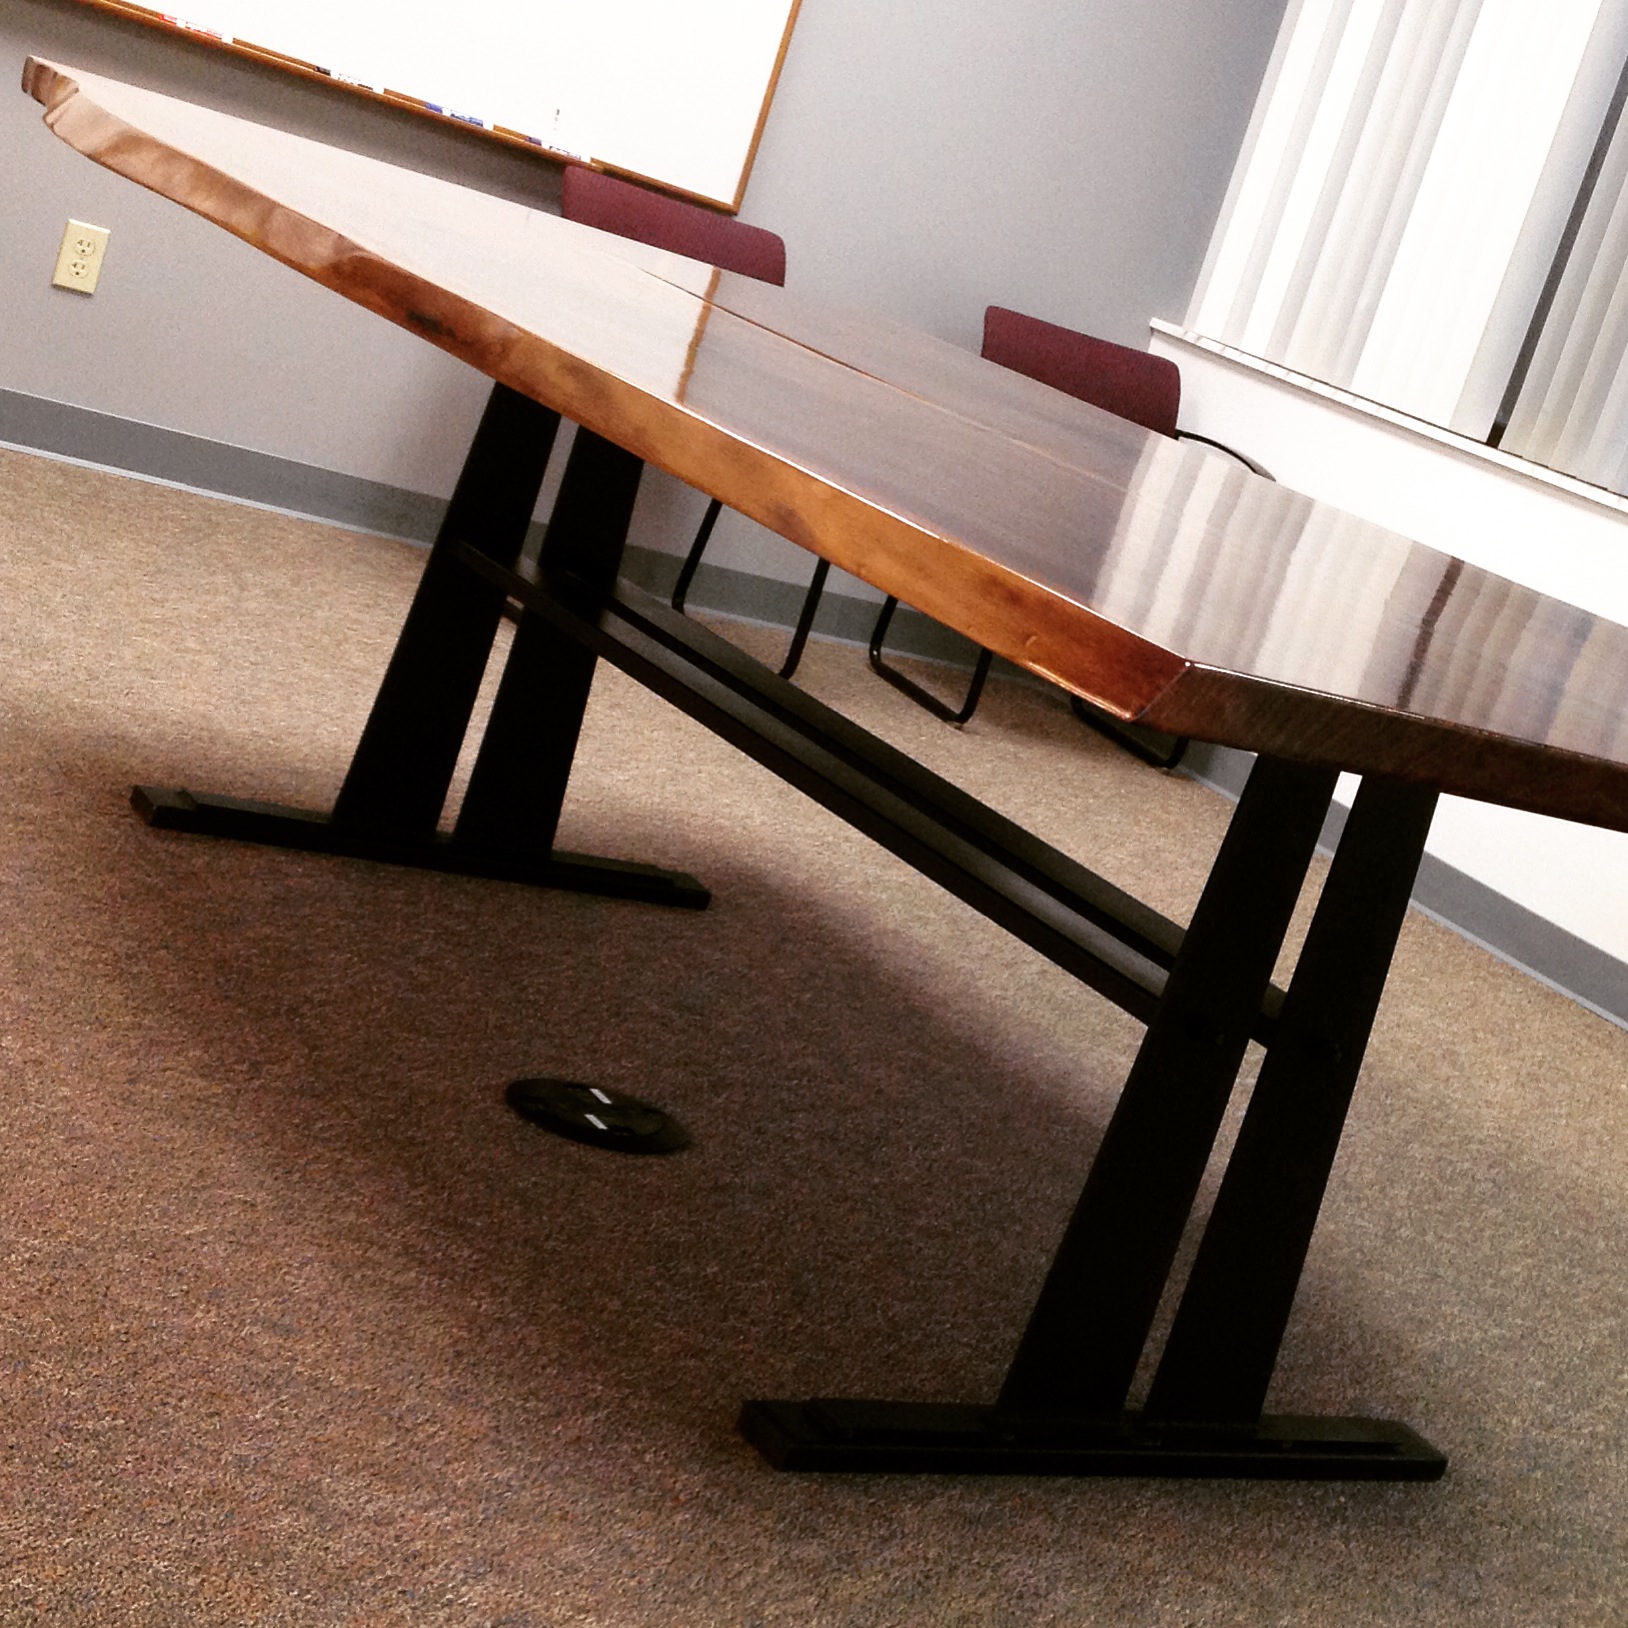
A Better Look At The Base…
I received my only injury from this build somewhere about that time. Crawling around on the synthetic office carpeting for an hour, trying to position the base properly and drill holes without eating a bunch of sawdust, I rubbed a spot on my right knee raw. I’m not complaining; I’ve seen and had worse woodworking injuries.
I snapped a few quick pictures of the table in place before I packed up my tools and headed home, with the understanding that these were not the FINAL pictures. The plan is to go back in about two months, after the finish has more fully cured, and buff it out with a coat of paste wax. By that time, the sheen will also have reduced from about 80% to something more like 50%-60% and whatever proper conference table chairs the client decides on getting should be in place. I’ll bring my photography lights and take pictures of the table with the overhead florescent lights off to further cut down on the reflection. I’ll post a few more pictures at that time.
Final Thoughts
I entered this project with quite a few reservations. I’d never worked on anything this large before. The deadline was tight. The wood was going to be hard to source. And the budget was on the low end.
But I knew it would be a good test of both my physical skills and my mental abilities. It was a great learning experience and I have absolutely no regrets in accepting the commission. That said, it might be a while before I attempt something like that again. In the meantime, I have a lot of projects I need to get back to.


Looks great. Nice job
LikeLike
Thanks! And thanks for reading!
LikeLike
Congratulations! It turned out beautiful.
Skinned knees is the price to pay for woodworking in a kilt!
LikeLike
And a small price it is, Brian!
Thanks for the kind words. It was good to meet you in person at Handworks! No problems getting that No 4 home, then?
LikeLike
Piece of cake. Although it was a near thing. Both of our suitcases were maxed out on weight.
If course, the side hatchet I picked up didn’t help things, either!
LikeLike
Great job Ethan! Looks fantastic.
LikeLike
Thanks, Kieran! Might have something for you later today! Keep an eye out for it.
LikeLike
Came out pretty darn fine, Mate! Well done 🙂
LikeLike
Thanks, Phil!
I think one of the most important things I’m taking out of this build is the fact that I have the ability to joint a full 1 11/16″ joint that is 8′ long.
So, yeah, I can joint the five sections of beam for my #reclaimedroubo I’ve been putting off because I wasn’t sure I could joint them by hand!
LikeLike
So purty! Looks just fantastic, I’m jealous of the company!
LikeLiked by 1 person
Thanks, Ron.
I’d offer to make you one, but… you know, the distance and all. 😉
LikeLike