More Work With Studio D, Part 4
A few weeks ago, I borrowed a friend’s Festool AFT-55 (circular saw) and tracks so I could make some exact cuts on the hall table and end table. I love the precision of the Festool, but don’t yet use it enough to justify such a purchase. I would consider picking up something, though, if I continue with making large-ish things, like live edge tables. At $650+ for the new track saws, however, I might get more versatility from the Carvex jigsaw.
The only real problem I encountered with the AFT-55 was the depth of cut. The walnut planks were over 8/4 thick and the Festool could only cut about 1 7/8″. So I had to finish the rest with my Disston 26″ rip saw that was cleaned up and sharpened by Wentzloff & Sons (I got it, along with a crosscut, from Jon Zimmer , who still carries saws that are cleaned up and sharpened by Wentzloff).

This is the underside. I did that so it looked like I was a ripping beast.
While I had the Festool saw in my possession, I decided to rip two of the reclaimed Checkerdome douglas fir planks to proper size so I can make some headway on the workbench, as well. Those beams are almost 3″ thick. That meant ripping over 1″ with the rip saw. It might not seem like a lot, but those old beams are very dense and heavy and it took a lot of effort to saw through them.

Although I’d be a lot happier with a longer top, say something more like 8′, having a proper bench of even 6′ long will be a welcomed change. This is a good idea of how it will look, about 6′ long, 22″ wide, and just under 3″ thick.
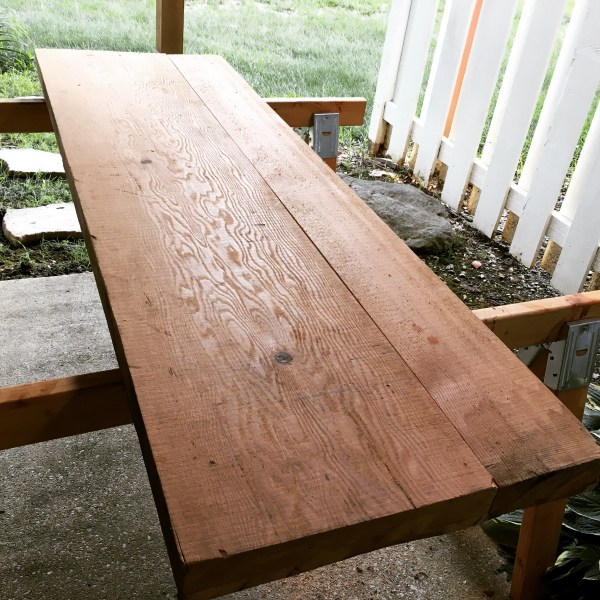
The top of the new bench…
With the tops cut to size, I went to my friend Scott’s shop Saturday morning to put some time in on his 52″ “friend maker” (wide belt sander). I spent more time with the end table top than the other three because it had so much cup. I was able to get it perfectly flat and still retain 1 3/8″ thickness. The hall table was a lot straighter and I was able to keep it to 1 5/8″ thick. I’m not at all worried about this; I think the end table needed to be a little thinner than the hall table, anyway. If it was too thick, it would look chunky.

Douglas fir after a few trips through the 52″ sander…
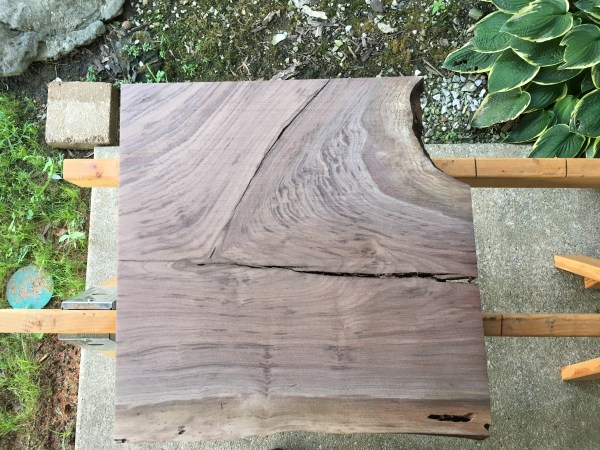
End table top after many trips through the sander…
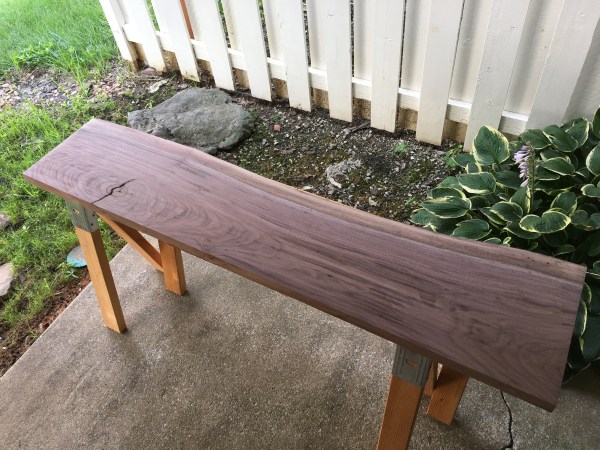
Hall table top after several trips through the sander…
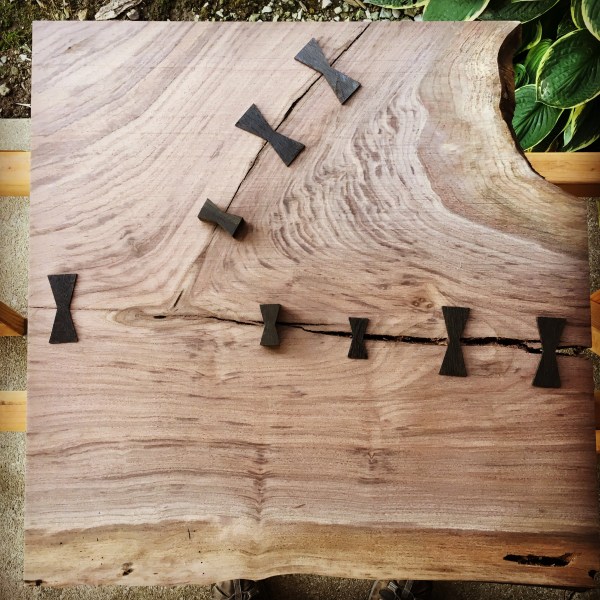
Some of you might recall I talked about saving the cut-offs from the bog oak butterfly keys I inlaid into the conference table I made last year. Turns out, they came in very handy (once I was finally able to locate them, after sorting through many boxes of stuff)! I was able to lay them out on the tables, not to use as actual templates for inlay (because each one is individually scribed and inlaid), but just to give me some idea as to what it would look like.
Using these, I can easily adjust positions and determine the best design layout and evaluate what I need to make.
I still have some spare bog oak keys left over from last year – one large one and three smaller ones – so I’ll make up a few more and maybe even make some medium-sized off-cuts using two of the larger ones to see if having three sizes might show better.

Proposed butterfly inlays for hall table…
Not bad, but I want to see how it looks with a transitional size between the two…
More to come later…
TKW

