A little rushed for time, so I’ll have even fewer words in this post today…
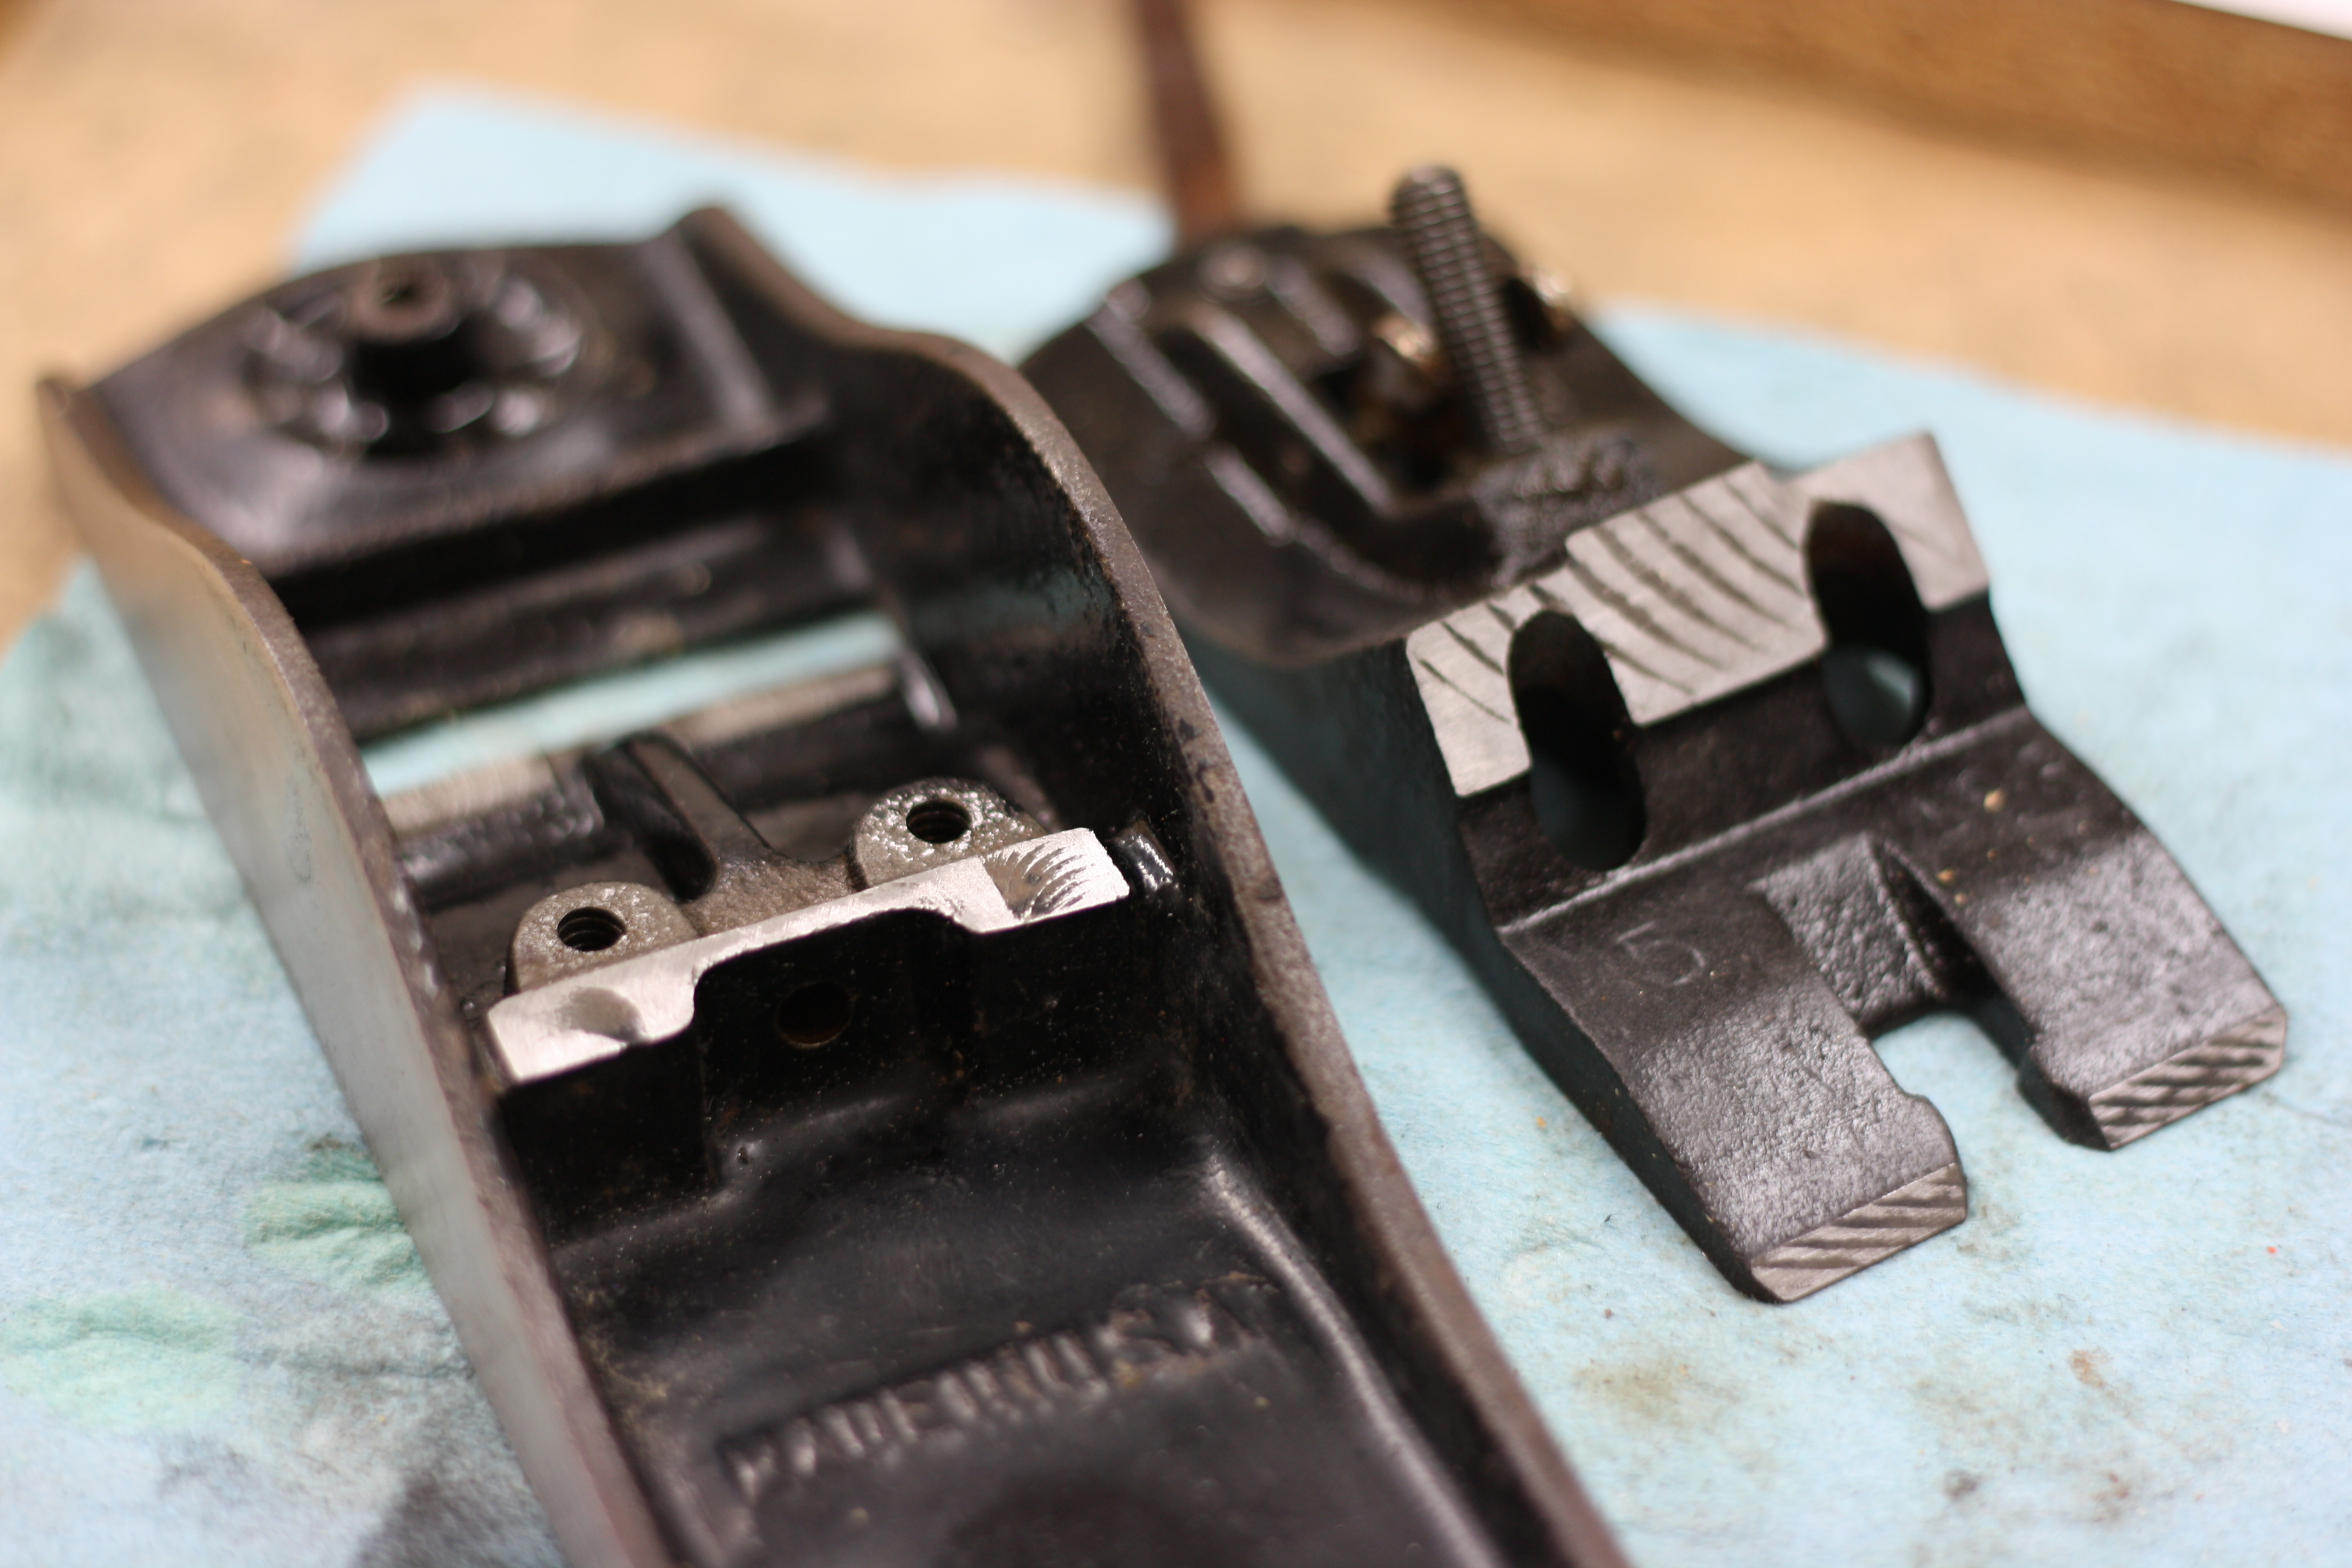
The base and the frog aren’t too bad off to begin with…

The base and the frog after a little bit of filing…

Oops. No before of the top of the frog, but here it is after a bit of work…

Frog/base assembly looks tight now, as does that blued connector tab!
Anything with threads gets a little bit of Lithium grease prior to assembly.

Another view of the seated frog, locked into place…

Knob and tote after two coats of gunstock finish…
This weekend, I’ll spend some time flattening and sharpening the blade and fettling the cap iron to fit properly to the blade before assembling the whole thing and trying it out.
Book Review: With Wakened Hands

With Wakened Hands, Furniture by James Krenov and Students
by James Krenov
This is my fifth James Krenov book and the last of five he wrote before his passing. My version is soft-bound, but the quality is still quite high. After 13 years, the spine and binding seems to be holding up very well. The paper is a good thickness, the text is easy to read and sans serif. Most importantly, the photos are high quality and matte finished. They are well-framed and properly lit to show you all of the grain detail as well as the form. All of this makes for a quality publication.
In truth, if you have not yet picked up any of the James Krenov books to read, this might very well be the best one to start off with! It is lighter on discussion than the other books, and heavier on pictures, with the main focus being to share with you some of the works completed by him and his students at the College of the Redwoods. His goal is, “… to bring this refined work to the attention of the public.” He wants to connect with the kind of woodworker who strives for a greater degree of success, and inspire them to do just that.
The book is broken down into five sections: Workmanship, Teaching, Wood, Creativity, and Fingerprints. The first section is a discussion about the quest for quality. In covering this topic, Mr. Krenov gives us a pretty good synopsis of his life to-date and explains his current role in the school. With references to not buying freshly cut wood anymore or not working in the shop with the students as much as he used to, it is quite evident he is aware of, and has come to terms with, his mortality.
The second section begins with greater detail about the College of the Redwoods, going into the reasons why he started there, though he was propositioned by several private schools, and giving us a rundown of how the program works. If you focus on any text in this book, please make it the second part of Section Two, where he discusses how to get the most joy and satisfaction out of woodworking.
In the section on Wood, Mr. Krenov highlights the absolute importance of not only picking the right wood for your project, but in understanding that wood and its properties in order to make an intimate connection between you and the project. But what should you really take from this section?
“Get wood. Get all you can, and then get some more.”

Yoda as Krenov?
Finally, in the last part of the book, he offers his insight on leaving fingerprints in your work, doing things to make it your own. This includes everything from wood selection to design, surface texture to joinery, hardware to finish.
After everything I’ve said thus far, I have to be honest with you. I’m not sure I can write a review or summary of this book that is better than the one-line inscription to the previous owner in blue sharpie on the first page:
“To my woodworker, May you continue to learn from life and be fascinated.”
Yeah, that about sums it up.
That last blog entry was a lot of writing, so I’ll try to keep this mostly images.
I spent a few hours down in the basement last night, working on the Millers Falls No. 9 Smoothing Plane…

Detail of the blade, cap iron, knob, and tote…
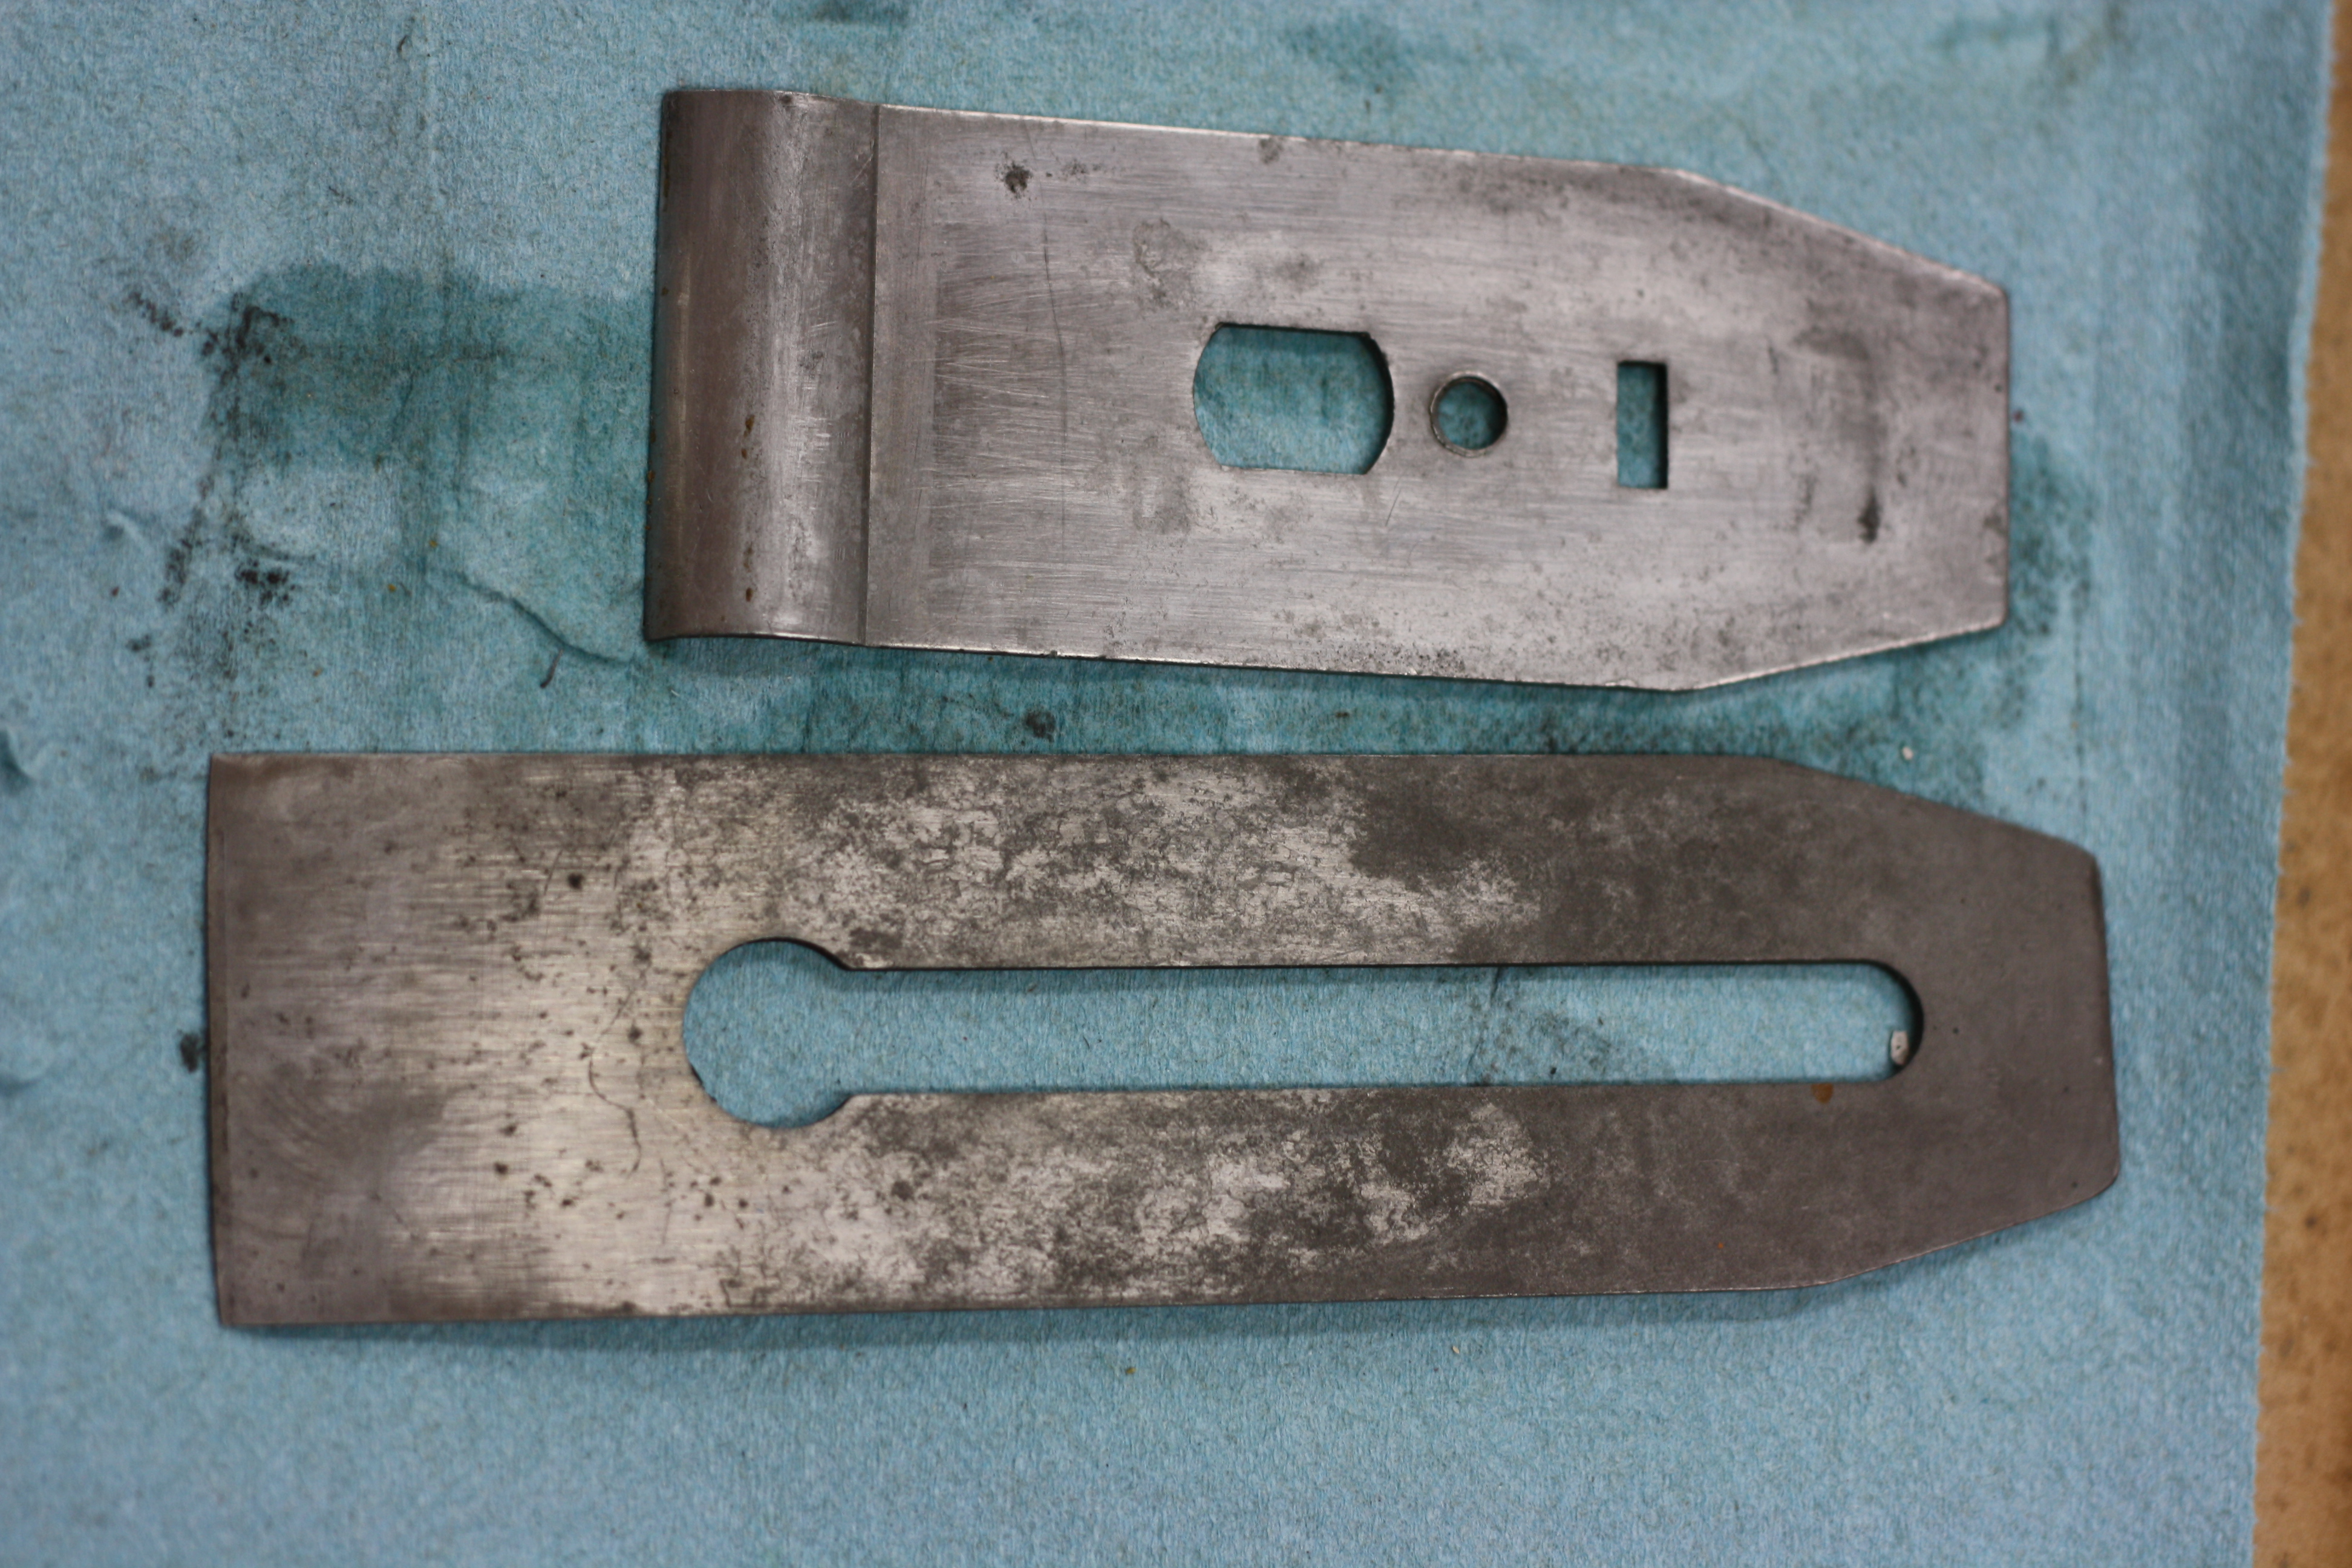
Blade and cap iron after soaking in Evaporust for 6 hours… I’ll finish cleaning them up later.
Oh. My. Goodness. I can tell you now why I’ll never collect or pick up another Type 4 Millers Fall handplane. That orange varnish is horrible. I thought about trying to just leave it, but if you’ll notice in the pre-restoration detailed image, there is a distinct line across the tote near the base. Or maybe you won’t; it’s kind of a crappy picture. In any case, I think it is a break. It didn’t look like it went all the way through, but I needed to examine it more closely to see what needed to be done about it. That meant removing the varnish. Not knowing exactly what it was they used, I first tried lacquer thinner and denatured alcohol, to no effect. I didn’t really think it would work, but… one has to hope, right? I thought I had some green paint stripper laying around. Apparently I didn’t. That meant removing the tacky (as in tasteless, not sticky) orange varnish the hard way – scraping and sanding.

An aggressive card scraper worked best…

After some serious manual labor, it was determined the varnish held the break together…
When it comes to removing orange varnish, “MF” has a whole other meaning. But I finally prevailed. Because I didn’t have much time left in the evening, and I didn’t have any weird angled jigs for gluing up totes, I decided to go with Titebond Hide Glue, holding it in place myself until the glue set. I’ll scrape off any residual glue before I put a few light coats of shellac on the tote.

Didn’t notice the blue tape until after I took the photo…
I decided to do something easy before quitting for the night, so I tackled the small bits.

Pre-restored lever cap…

My brass-polishing takes a matter of two seconds with this stuff…
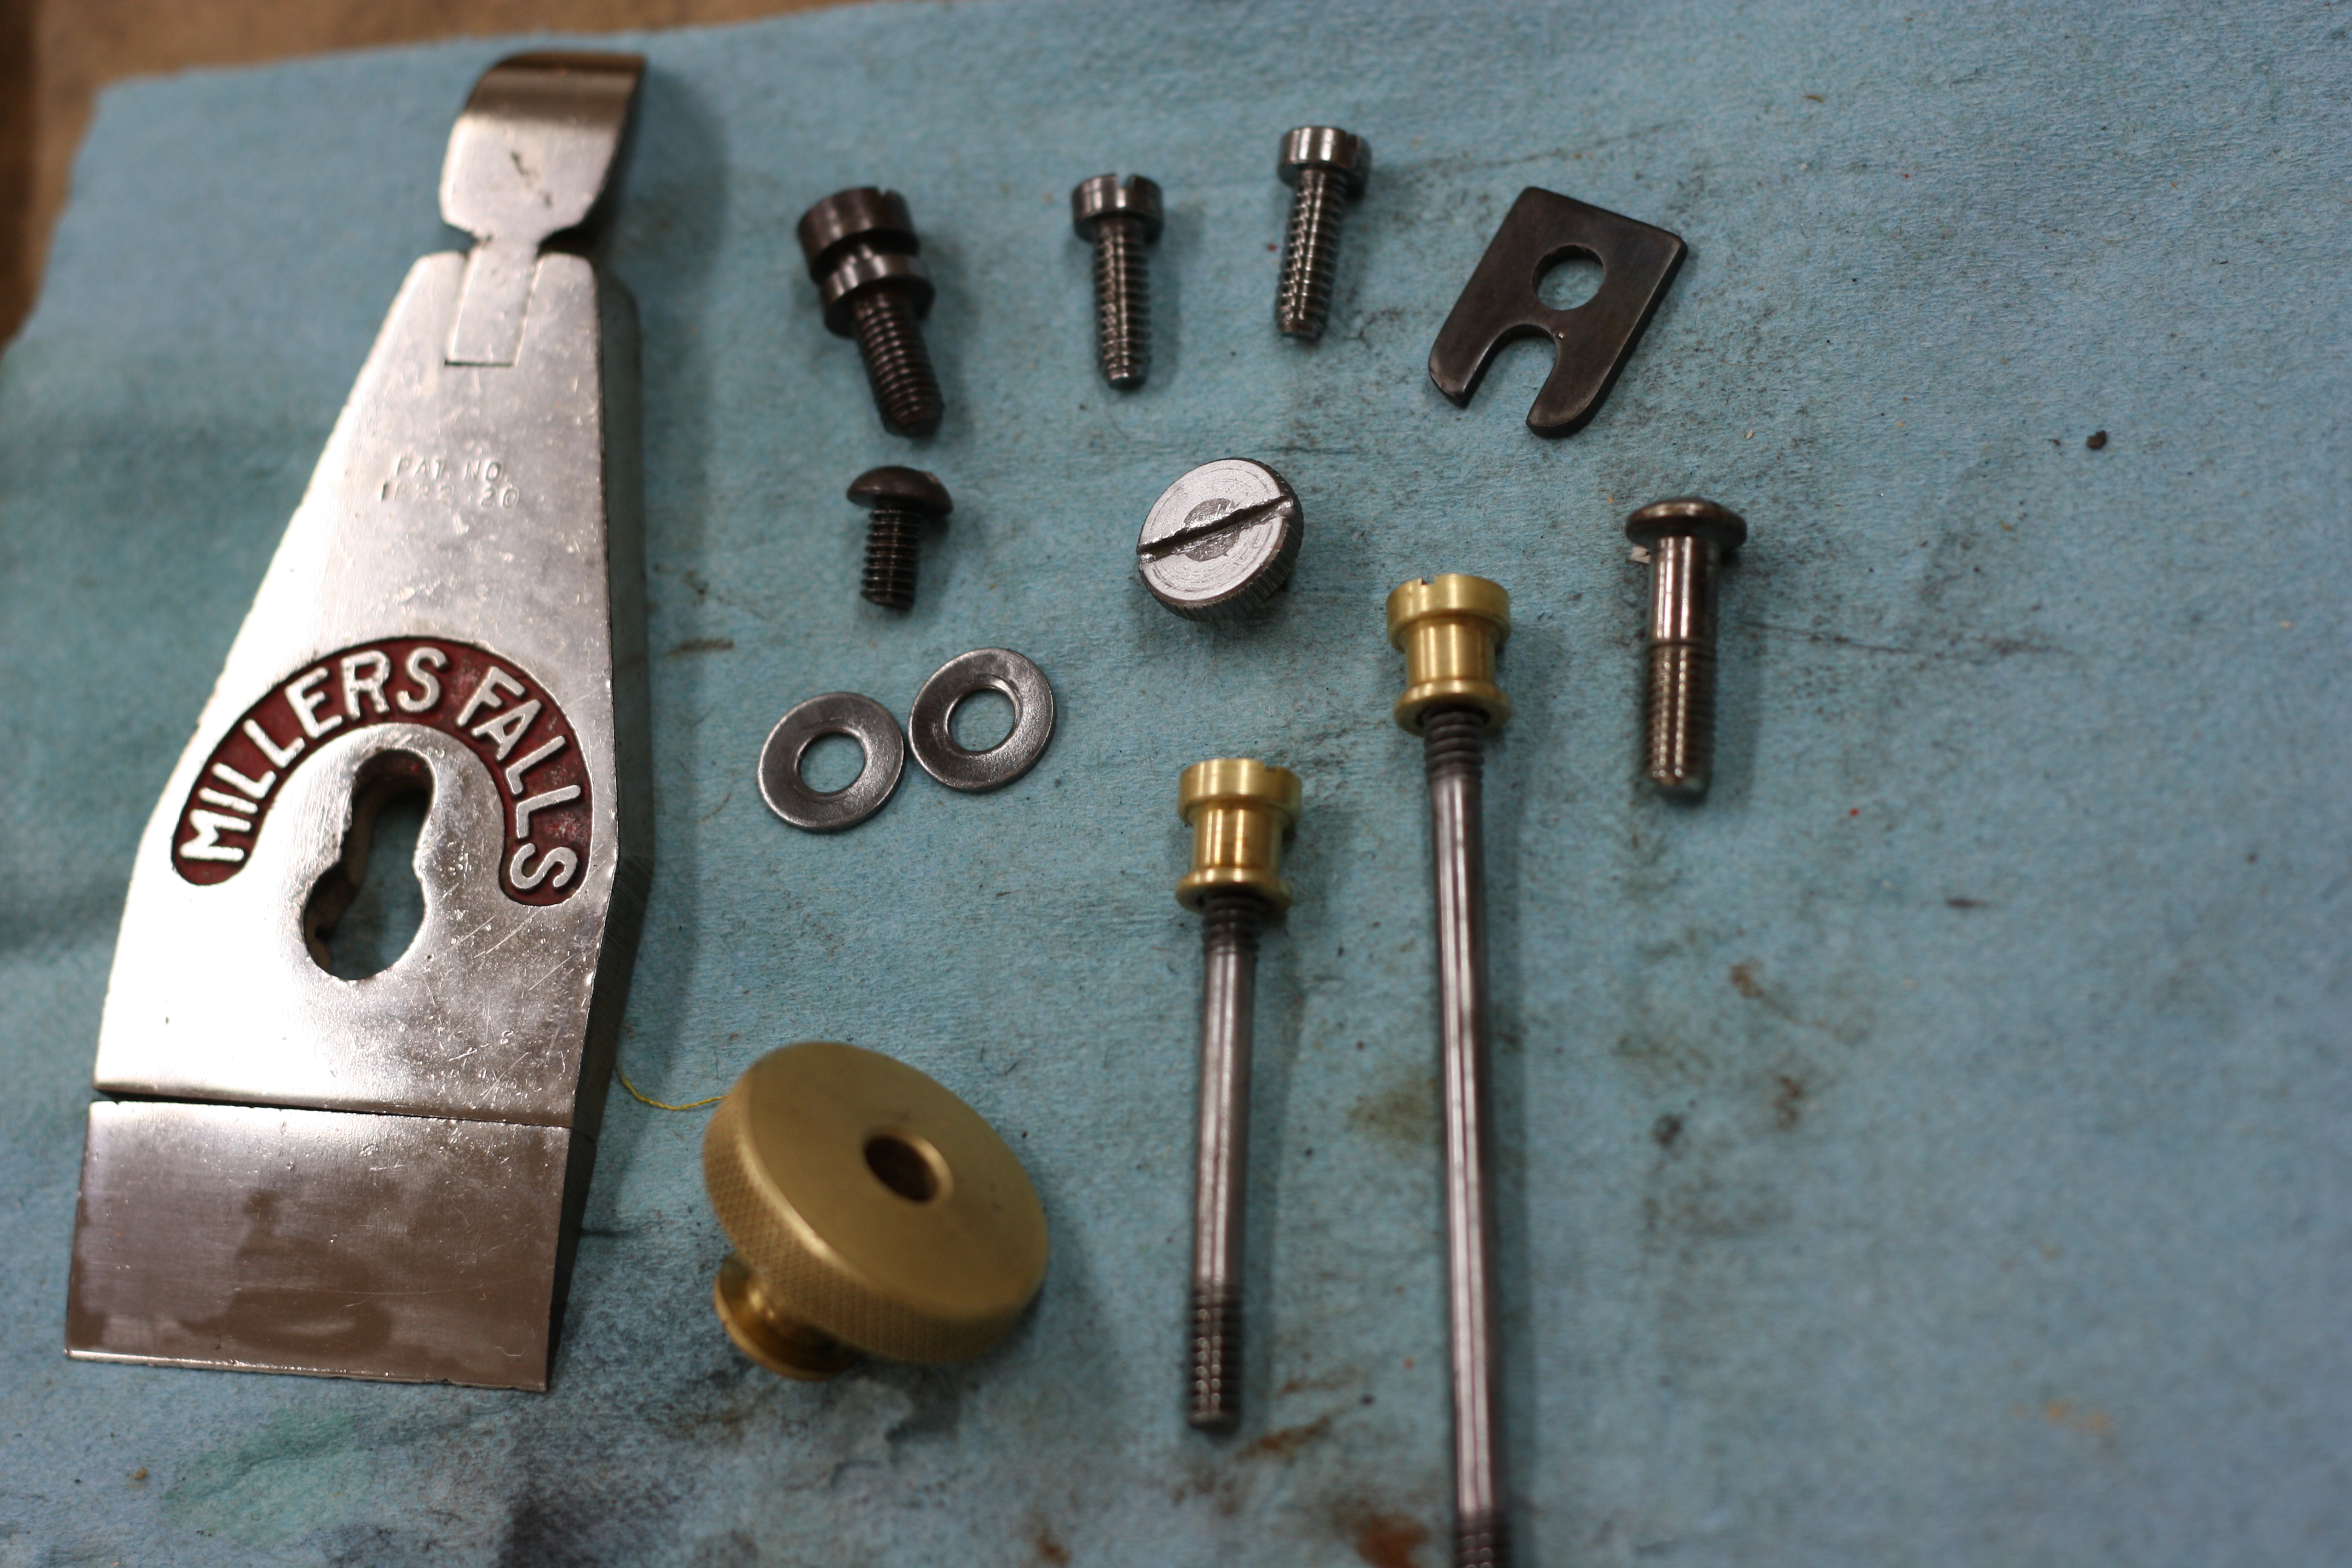
Lever cap and small bits after cleaning…
After soaking for a few hours in mineral spirits, the small screws and bits cleaned up rather easily. I use a Dremel with a small wire wheel on it to clean crud out of threads and such. I noticed the metal tab that holds the frog adjusting screw was originally blued, so, being the bluing expert that I am, I decided to re-blue it! I’m not yet happy with the final polish on the lever cap, so I’m going to give that one more round of polishing.
Tonight I’ll try to tackle the frog and plane body. Based on the amount of plane shavings I found packed UNDER the frog when I disassembled it, I have a feeling I’m going to be filing a bit to get the frog to seat well. (More to come…)
At some point last year, I was at a garage sale just down the street from my house. Due to a combination of several factors – it was raining, late in the season, and pretty chilly out – there weren’t a whole lot of people there, nor had there been a lot of people there that day. Still, I was surprised when I stepped into the garage-turned-workshop to see an old Millers Falls hand plane sitting there with a $5 price tag on it.
I picked it up, popped off the lever cap and took out the blade/cap iron, and gave it a quick once-over for cracks or obvious issues. Seeing none, I gladly gave the man $5 and went home with a Millers Falls No. 9 smoothing plane (equivalent to a Stanley #4).
I didn’t really need the plane. And though I do love me some Millers Falls eggbeater drills, I haven’t ever found an attraction to their planes. My thought was to fix it up and give it away to someone who might need it. But, as is so often the case, life happens. I sat it behind my regular user hand planes and promptly forgot about it.
Then, last week Chris Schwarz had a blog post that caught my eye. Sam Cappo is working on a Perpetuating Woodworking project, putting together a set of tools and building a tool chest, all to be passed on to a needy woodworker who will breathe life back into them as they begin their woodworking journey. Chris is donating a portable workbench but, more importantly, he put out the call for tools, which is exactly the fanfare a project like this needs. Hey, this is exactly what I wanted to do with this plane, anyway! So I contacted Sam and let him know I had a smoothing plane for his project.
This morning, I found myself with a bit of free time at home while we had some house repairs being done. I went into the basement and started getting familiar with the smoothing plane before I tuned it up for use.
Using a Millers Falls Type Study, I easily determined this was a Type 4 smoothing plane, manufactured between 1955 and 1966. Key features of this type include: a high knob and a chunky tote of goncalo alves (instead of cocobolo), a thick red-orange varnish (still partially present), a black frog (all previous types had a red frog), and the famous three-point lever cap. Well, that was easy enough!
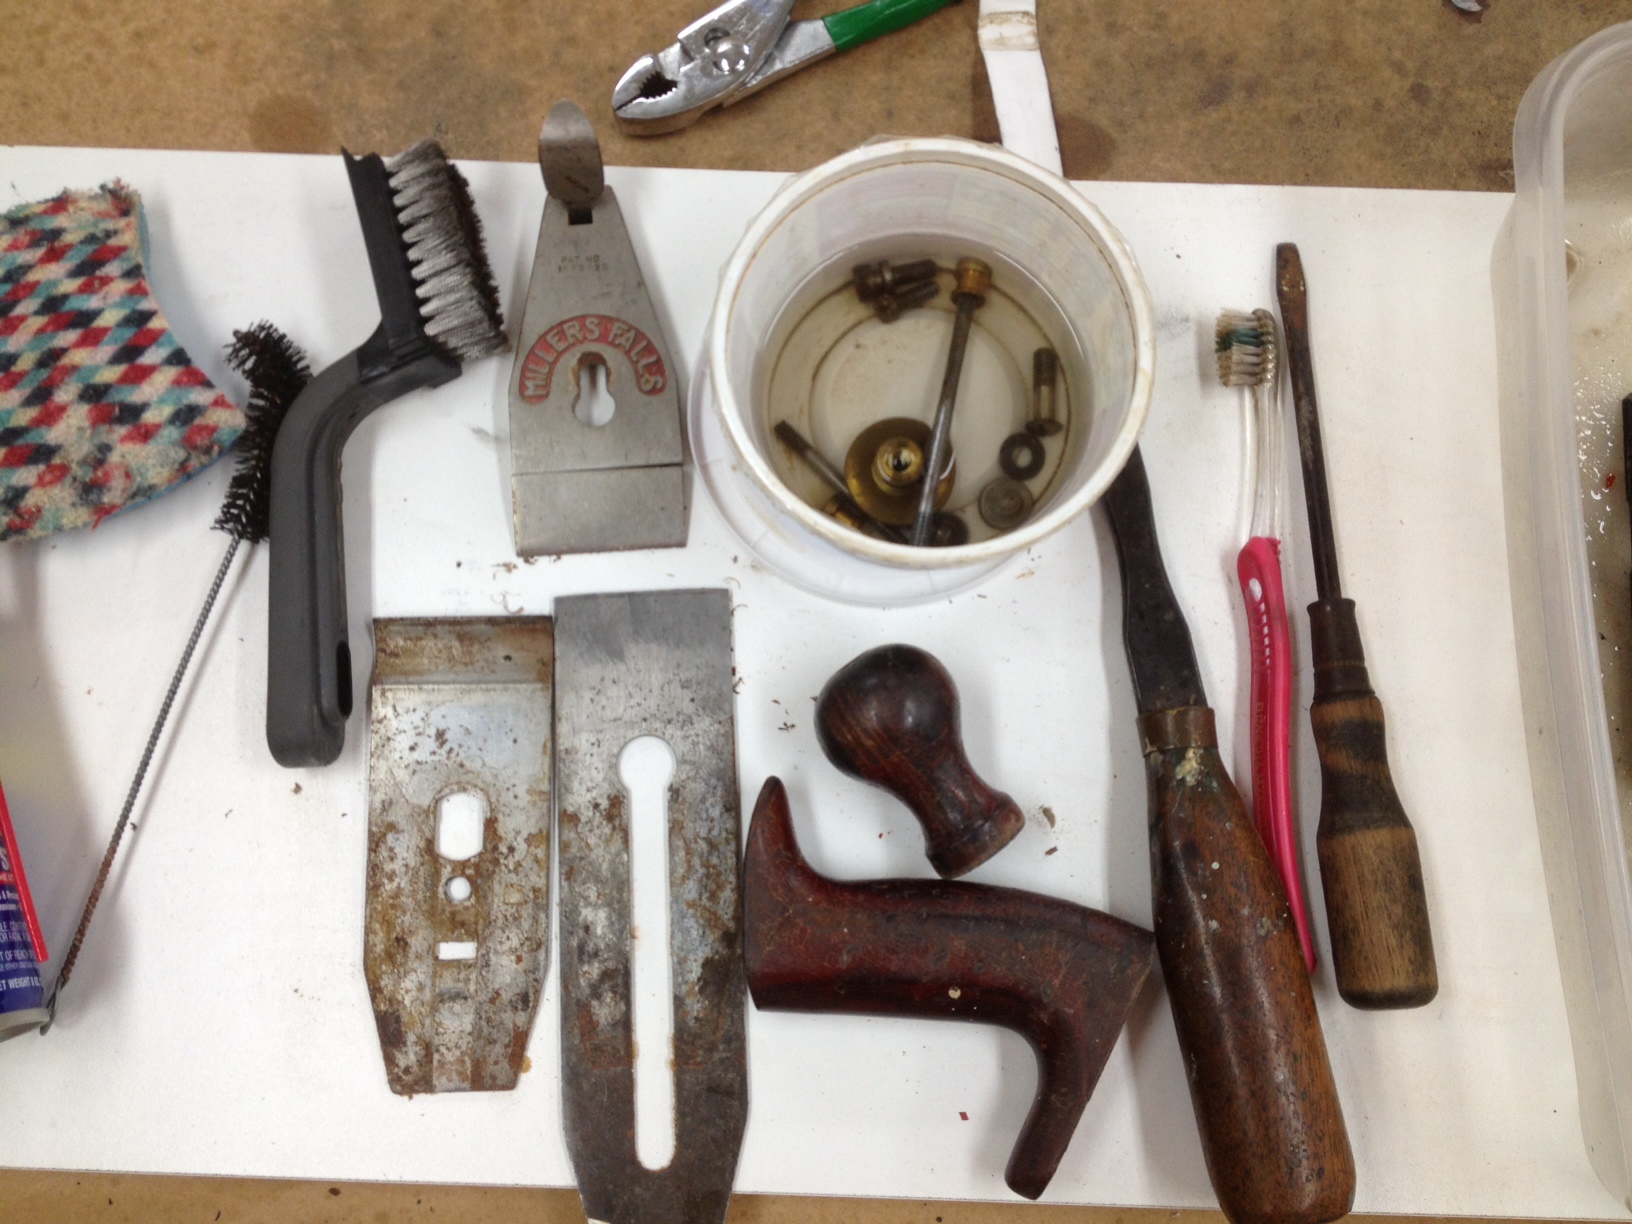
Disassembled, Part One…
Then I wanted to see if the sole was flat enough to spend the time fettling the plane or if there were any as-yet unnoticed defects that might stay my hands before I did any more work on it. I started by laying out some 150 grit adhesive-backed sand paper onto a melamine board to begin flattening the sole. I didn’t do any prep work beforehand, just retracted the blade and sprayed down some WD40 on the sandpaper and went at it. I did not intend on fully flattening the back; I was just checking for defects and to see how much work I had ahead of me. After just a few strokes, I could tell everything looked to be in good condition. There was a small hollow behind the blade opening, and it was going to take a little bit of work to get all of the sole flattened, if I choose to take it that far, but it was in-line at the important parts – the toe, behind the blade, and the heel. I decided to work on it a bit more.
I’d thought about getting a photo or two at that point, but I’d once again forgotten my blue latex gloves, so my hands were a black-stained swarffy mess and I didn’t want to pick up cell phone or camera to get a picture of it. I’ll need to spend a little more time with it later to get the bottom completely smooth, but it shouldn’t be too much work. I’ll hit the sides, as well, just because I figure I’ll clean this thing up as best I can.

Disassembled, Part Two…
Then I went about disassembling the plane, soaking various parts in WD40 (the body and frog), low odor mineral spirits (most of the screws and bits), and Evaporust (the blade and cap iron). As you can see, I did snap a few shots off here. Unfortunately, the wife was home to take her shift (had LOTS of things done to the house) and I had to get to work, so I figured I’d let everything soak for a few hours and then pick it back up again this evening… (more to follow later)
Introducing Finley To Roy Underhill
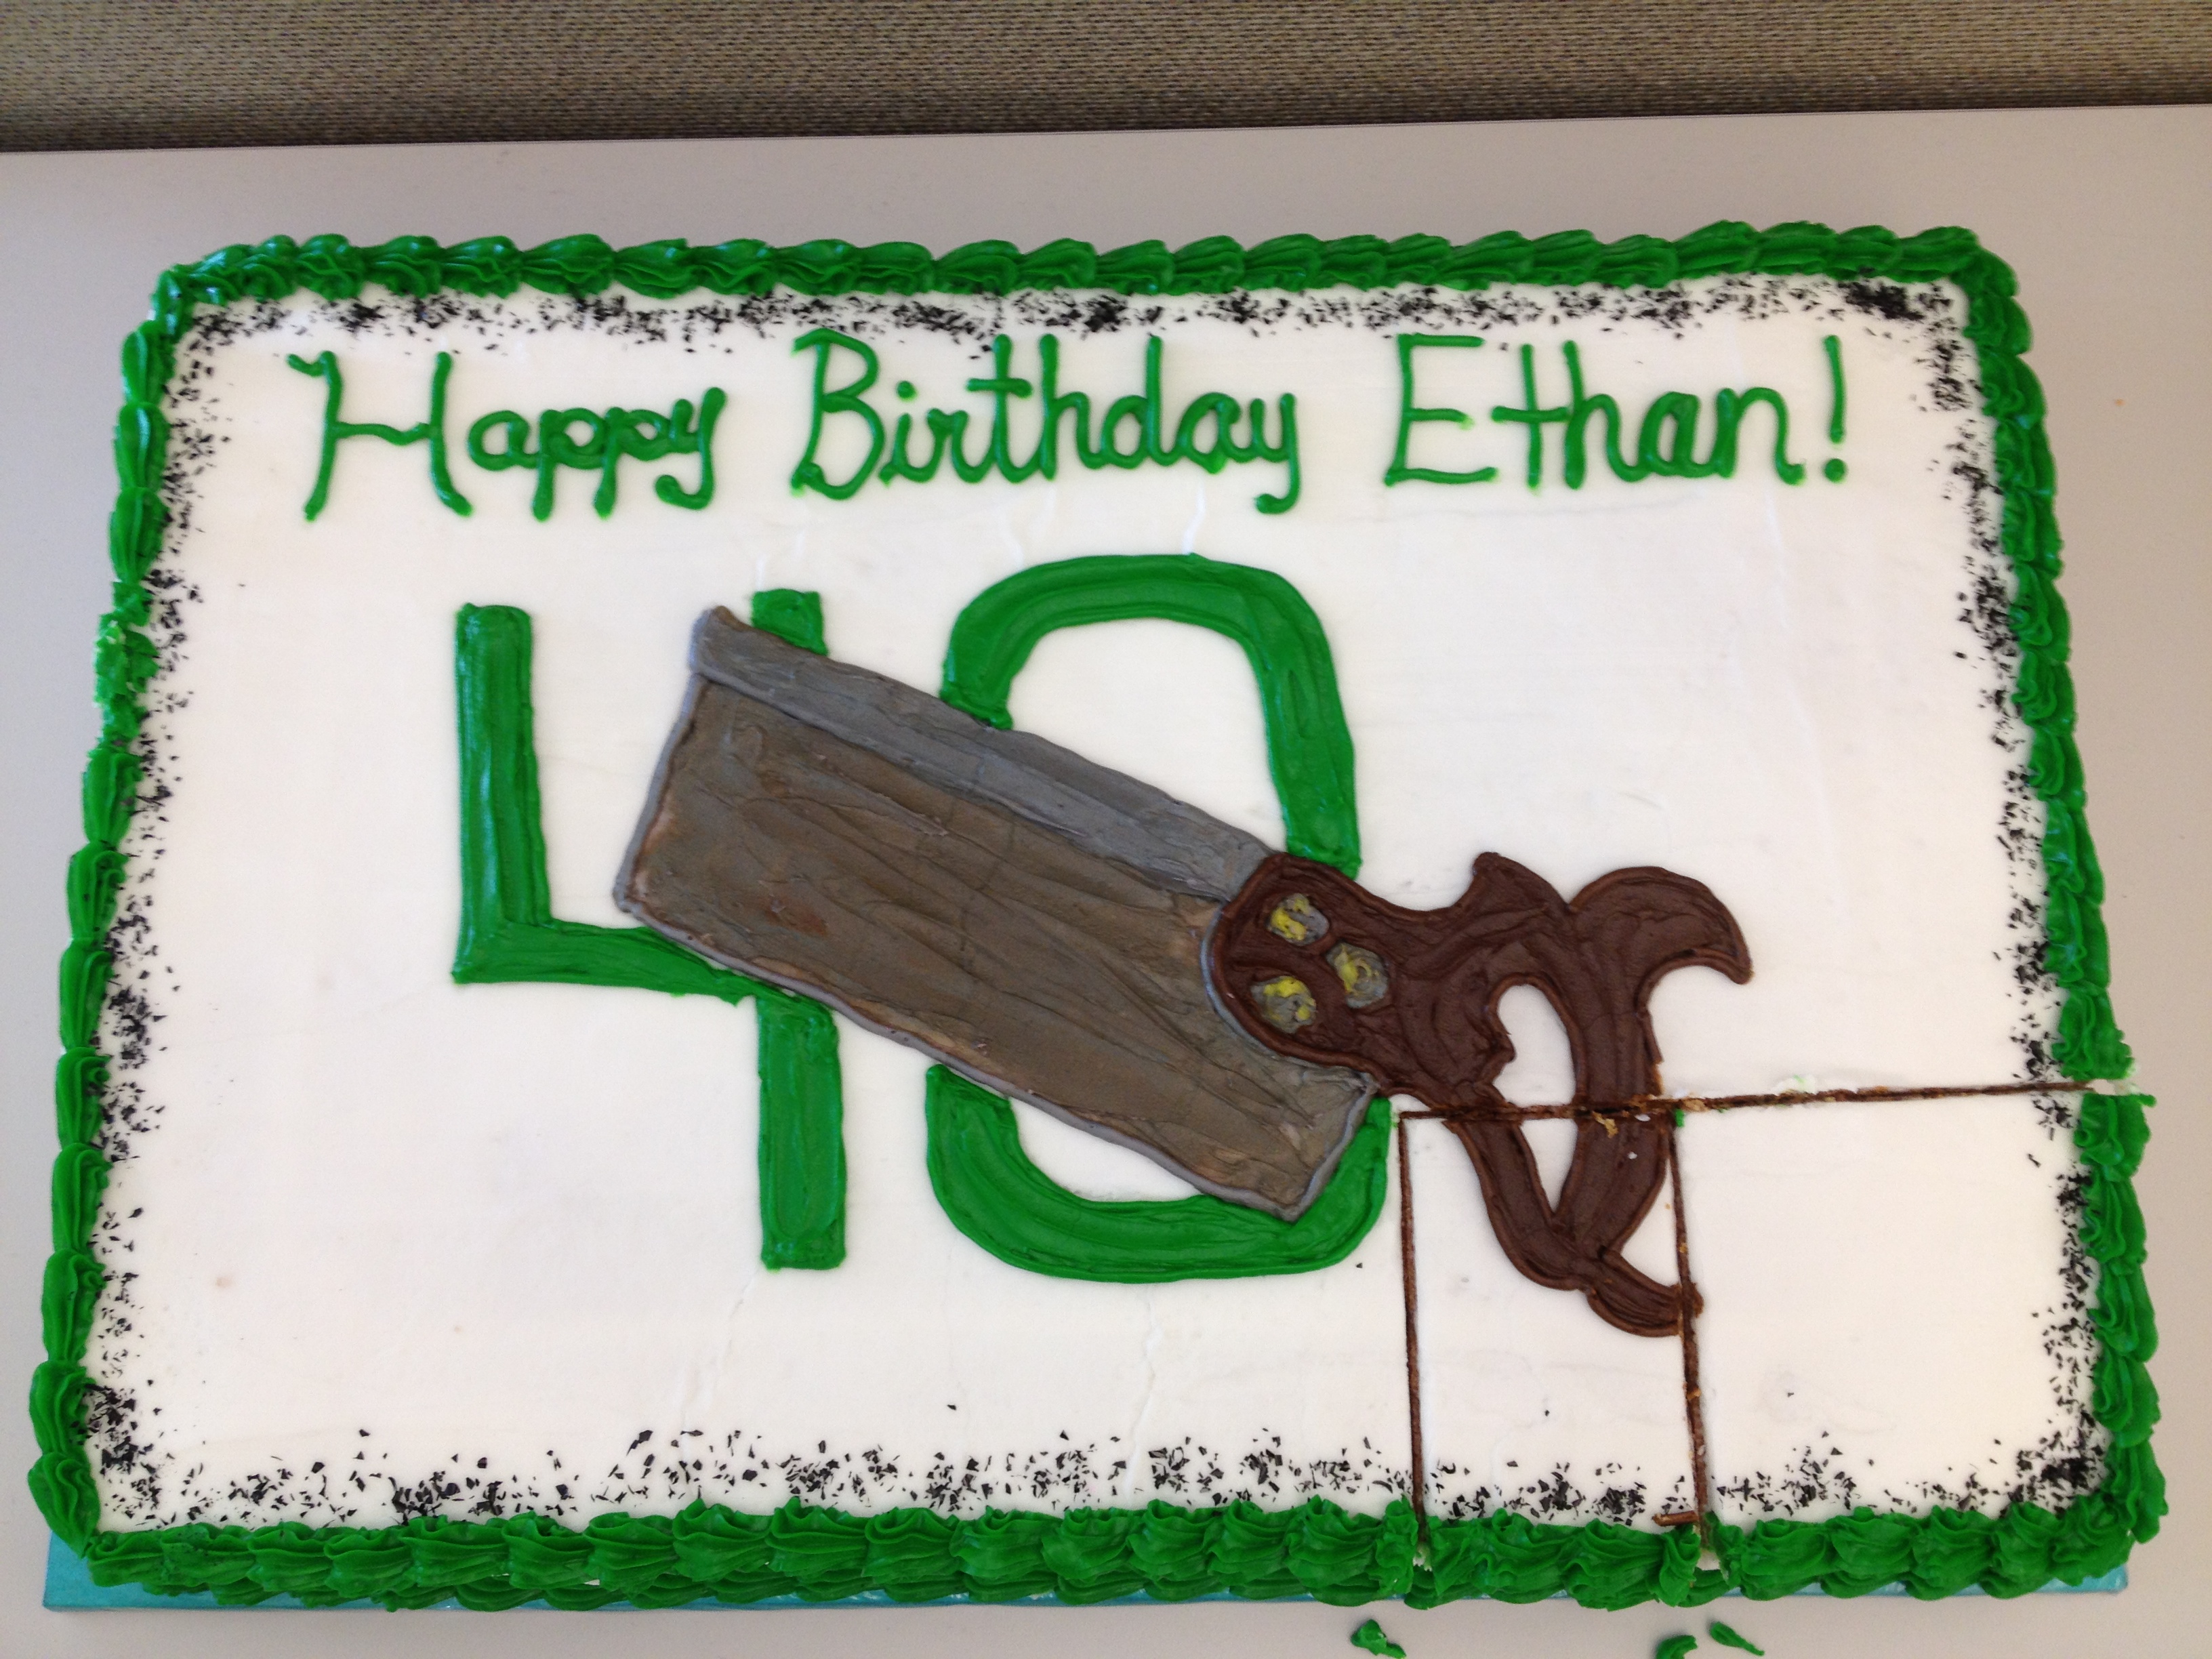
An excellent representation of an early 1900’s era Disston backsaw… and tasty, to boot!
Last Thursday was my birthday; it was a significant one only in that it started with a 4 and ended in a 0. Generally, I’m not a big fan of celebrating my birthday anymore. I’d rather not focus on it now, to be honest with you, but I bring it up because I want to discuss some of the presents I received.
As far as in-laws go, mine are pretty good. They’ve embraced me and all of my idiosyncrasies. More importantly, they enable my woodworking habit. And they always seem to know what I want (thankyouverymuch, Amazon and Lee Valley Wish Lists!).
So I was pleasantly surprised when I opened a few packages that night to reveal Season One and Season Two of The Woodwright’s Shop on DVD. I remember watching Roy on Saturday afternoons on the local PBS station when I was a kid and I looked forward to watching him again as an adult. But because of a busy schedule over the weekend, I didn’t have a chance to sit down and start watching them until Sunday afternoon, during Finley’s nap.
After lunch, I got him down, did a few dishes, cleaned up the kitchen, made myself a cup of coffee, and finally went into the living room and moved a cat aside so I could sit on the sofa. Before I could even select Play All, the cat had moved back into relative position (translation: she sat on my lap). So the two of us settled in and started watching Roy from the beginning…
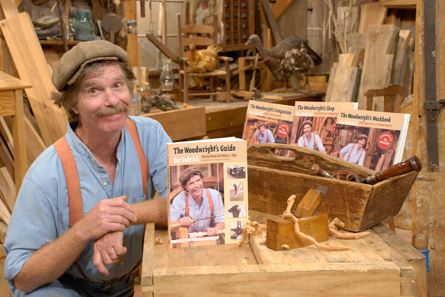
Roy, hocking his wares…
The point of this entry is not to review the DVDs, so I won’t get too much into the episodes I watched except to say that I’m going to have to watch them over a few times to glean all of the information I can. There are some great quotes here and there, if you can catch them, and it’s refreshing to watch someone work live in front of a camera, with no retakes or editing to make it look better. THIS is reality TV to me.
By about the start of the fourth episode, Finley woke up from his nap. He and his mom came down and settled into the rocking chair for a few minutes. I decided to go ahead and continue watching Roy, partially because… well, I wanted to keep watching Roy. But also because I wanted to see how Finley would react to it.
I have to stop here and explain to you that Finley doesn’t watch normal TV. For the first 18 months of his life, our rule was, “If Finley is awake, the TV is off.” Then we slowly introduced a few things here and there, like Thomas the Tank Engine (complete rubbish, if you ask me; Sir Toppum Hat could increase productivity in his train yard by at least 60% if he fired Thomas and replaced him with a non-speaking engine) and some DVDs of kids’ music and songs. We occasionally watch older cartoons, such as Richard Scarry’s Mother Goose Nursery Rhymes. We’ve tried a few others, like Veggie Tales, but, to be honest with you, he really just doesn’t have much interest in watching TV. He’d rather play. In that aspect alone, I consider myself a successful father.
There is one DVD he asks to watch at least once a week. It is Big Easy Express, which is a musical documentary/concert film/road movie about three bands (Mumford & Sons, Edward Sharpe & The Magnetic Zeros, and Old Crow Medicine Show) and their journey from the Bay Area in California all the way to New Orleans via an old passenger train. He calls it “Mumford Red Train” (because one of the cars on the train is bright red) and when we stayed in the hospital for three days in December because he had RSV, it was the only thing he would watch. I’m sure the nurses thought we were horrible parents for making our son watch some music DVD instead of cartoons. I consider this a second aspect in which I am a successful father.

St. Roy and that infectious smile!
Anyway, back to St. Roy… So Finley does not watch much “normal” TV. He’s never seen a sitcom nor a contemporary cartoon. He’s only ever watched one Disney movie, Cars, and he doesn’t even get 20 minutes into it before he wanders out of the room to play with his own toy cars. I was interested to see what he would do with Roy.
To my wife’s surprise (and my extreme pleasure), the second I turned The Woodwright’s Shop back on, Finley stopped what he was doing and started watching Roy. It was the episode with the lathe discussions, so there was lots of moving machinery and big wheels (Finley just said the other day that he loves anything with wheels, so maybe that has something to do with it) and wood flying everywhere. At one point, he was demonstrating other techniques to make things round if you didn’t have a lathe and so he sat at his shaving horse with a drawknife, working a stave of red oak and throwing shavings into his face. He stopped to discuss drawknife techniques (bevel up vs. bevel down) and said (paraphrasing), “I can’t get it to work worth a toot this way, so I always use this kind of drawknife with the bevel down.” I’ll have to keep that in mind the next time I try to rough something out with my drawknife.
Finley continued watching through the end of the episode in complete silence, he was so engrossed in the show. At that point, I paused it to go feed the cats, one of which was making her hunger known as she sat on my lap. When I got back upstairs, Finley said, “Dadda, can you turn it back on now?”
Well! Isn’t that music to any woodworker’s ears? Your not-quite-three year old asking you to turn Roy Underhill back on! I did and we started watching Roy make a rocking chair. After that episode, I turned it off so we could go for a walk before I got supper started. But I was curious as to what Finley thought about the show. I don’t have to tell you by that point I was envisioning sitting down with Finley every Saturday afternoon to watch the latest episode of The Woodwright’s Shop, do I?
Me: So, Finley… did you like watching Roy? Did you like The Woodwright’s Shop?
Finley: Yeah.
Me: What part did you like best?
Finley: I liked… I… Roy Underhill talks about… he talks about…
Me: Yes?
Finley: He talks about toots.
Me: … eh, what?
I had no idea what he was talking about. Then it struck me. He was talking about Roy’s description of using the drawknife bevel up or bevel down in the third episode. “I can’t get it to work worth a toot that way.” Somehow he latched on to the only bodily function (aside from bleeding) Roy mentioned, and managed to take it out of context. Got it. OK, so we still have a little ways to go. But the interest is obviously there.
If you’d asked me before yesterday afternoon what I thought my favorite episode or part from The Woodwright’s Shop was, I would have answered Episode One of Season One, because I love the idea behind being self-sufficient, making the things we need, using energy from the sun via the vegetables and fruits we grow and eat to power our muscles. It is fairly close to how I was raised on a farm in small-town Washington, Missouri, now 40 years ago. I’d seen that first episode at some point later in life and his opening message to the start of his 31 year career was so passionately delivered it has stuck with me all this time. Now, though, I’d have to say it is Episode Three of Season One, simply because it’s the first one I watched with my son.
If you ask Finley what he likes about Roy’s show, he’ll say it’s because Roy talks about toots.
Latest Addition To TheKiltedWoodworker blog…

Will replace this with an actual photo of books in my library soon…
The other night, I sat down in front of a few of our bookcases at home and took some notes on what books I have in my collective woodworking library. I finally got a chance to key them in last night. Please note it is accessible via my link bar, but you can also get to it with this one:
I’ve added links to the books I’ve reviewed so far on this blog; my plan is to write a review of at least one book on this list every month. For anyone that doesn’t know, this is partially to fulfill my duties as the Editor of the St. Louis Woodworkers Guild newsletter; but it is also because I’m working to improve on my review-writing skills and this is a great way to do it. OK, and because I like to write.
Let me know if there is a book in the list you would like me to review before you buy it; I’d be happy to do so.
Let me know if there is a book in the list you would like to borrow, so I can try to point you to someplace where you can buy it or direct you to check it out from a public library. Sorry; I’ve lost too many books over the years, loaning them out to well-meaning friends and acquaintances. I’m afraid I have to live by a no-loan policy, as far as my woodworking books go.
Come to think of it, many of my tools are likely under that policy, as well.
Book Review: Greene & Greene, Creating a Style

Greene & Greene, Creating a Style
Book Review: Greene & Greene, Creating a Style
by Randell L. Makinson and Thomas A Heinz
As much as I like a good woodworking book that gives me instructions and dimensions I can use as a basis for a project, I have just as big an affinity for books that make me think about what I’m creating before I even make my first saw cut. These are the kinds of books that also help me to stop worrying about being so exact with my measurements and dimensions and just let the form evolve and grow as I build it. This is the spirit I want to nurture in my own artistic style of woodworking.
Greene & Greene: Creating a Style is not your typical coffee table book on Greene & Greene furniture, though it does contain some of the best detailed photographs of Charles & Henry Greene’s works I have seen to date. Instead, this is more of a study of how their architectural style, and resulting furniture style, developed and how they refined this style over the years. It works to provide substance to the architectural beliefs that Charles Greene wrote about early in their career. He said:
Our attempts mostly in the line of domestic architecture may be arranged in three grand divisions: 1) to understand as many phases of human life as possible; 2) to provide for its individual requirement in the most practical and useful way; 3) to make these necessary and useful things pleasurable.
The first chapter discusses plans, beginning with the request for a simple bungalow from Mr. & Mrs. Arturo Bandini in 1903. This U-shaped design was one of their first that encouraged a flowing relationship between inside and outside spaces. In the houses that follow, Makinson and Heinz show you another 13 or so plans, stepping through the evolution of the overall idea of building a structure that is harmonious with its surroundings.
In the second chapter, the focus turns to the materials they used, from shingles and siding to natural stone and brick garden walls. Through their distinctive and creative use of natural materials in their design elements, they fashioned graceful and inviting houses that did not rely upon grandiose budgets.
The chapter most woodworkers are going to jump to is the third one, which focuses on interior rooms they designed in their entirety, from the hardwood flooring laid on a bias to the candlestick sitting on the fireplace mantle. This chapter contains photographs of rooms staged as they would have appeared when the home owners saw them for the first time. Though they depict different rooms, in different houses, during different stages of their architecture career, they always display what Charles Greene referred to as “the oneness of all that exists.” If you take your time, and really examine at the details in the imagery, you can easily find the small things that build on and complement each other to create continuity and harmony within each space.
If you are looking for a book with a bunch of pictures of the typical Greene & Greene elemental styles we see every time Charles or Henry Greene’s name is mentioned, then this may not be the right book for you. But, if you are interested in reading about their first architectural projects and seeing how these projects planted seeds that grew into what we now expect to see, and if you are interested in trying to apply Charles Greene’s third grand division of architectural belief to your own work, to make necessary and useful things that are also a pleasure to touch and use and see, then… maybe this is a book you should consider reading.
Rehabilitating My 42x
Looks great on the outside!
I hesitate to call this a “restoration”, and it isn’t really much of a repair, so maybe I should call this a rehabilitation? It didn’t even take that long. In fact, I spent more time shopping for the right saw set so that I wouldn’t have to do a whole lot to it in the first place.
I’m not going to sit here and wax philosophically about saw sets. I know what they’re used for, but have never used one. I could probably figure out how to use mine – it isn’t complicated, in concept. But I’m not a saw sharpening authority by any means. Heck, I’m barely a saw sharpening novice! (Something to keep in mind as you read on.)
I am, however, fairly adept at navigating your favorite auction site and mine – eBay. So let’s wax philosophically about that for a bit!
When I was told I had to have a saw set for Matt Cianci‘s Build A Back Saw class I’m taking next month, I started looking for one in familiar hunting grounds. Matt recommended trying to find the Stanley 42x, as it is the quintessential saw set, the one everyone compares every other saw set to. In cases like this, where I am well aware of what I don’t know, I tend to stick to the advice of others who I believe ARE in the know. Thus began my (fairly short) search for a Stanley 42x.

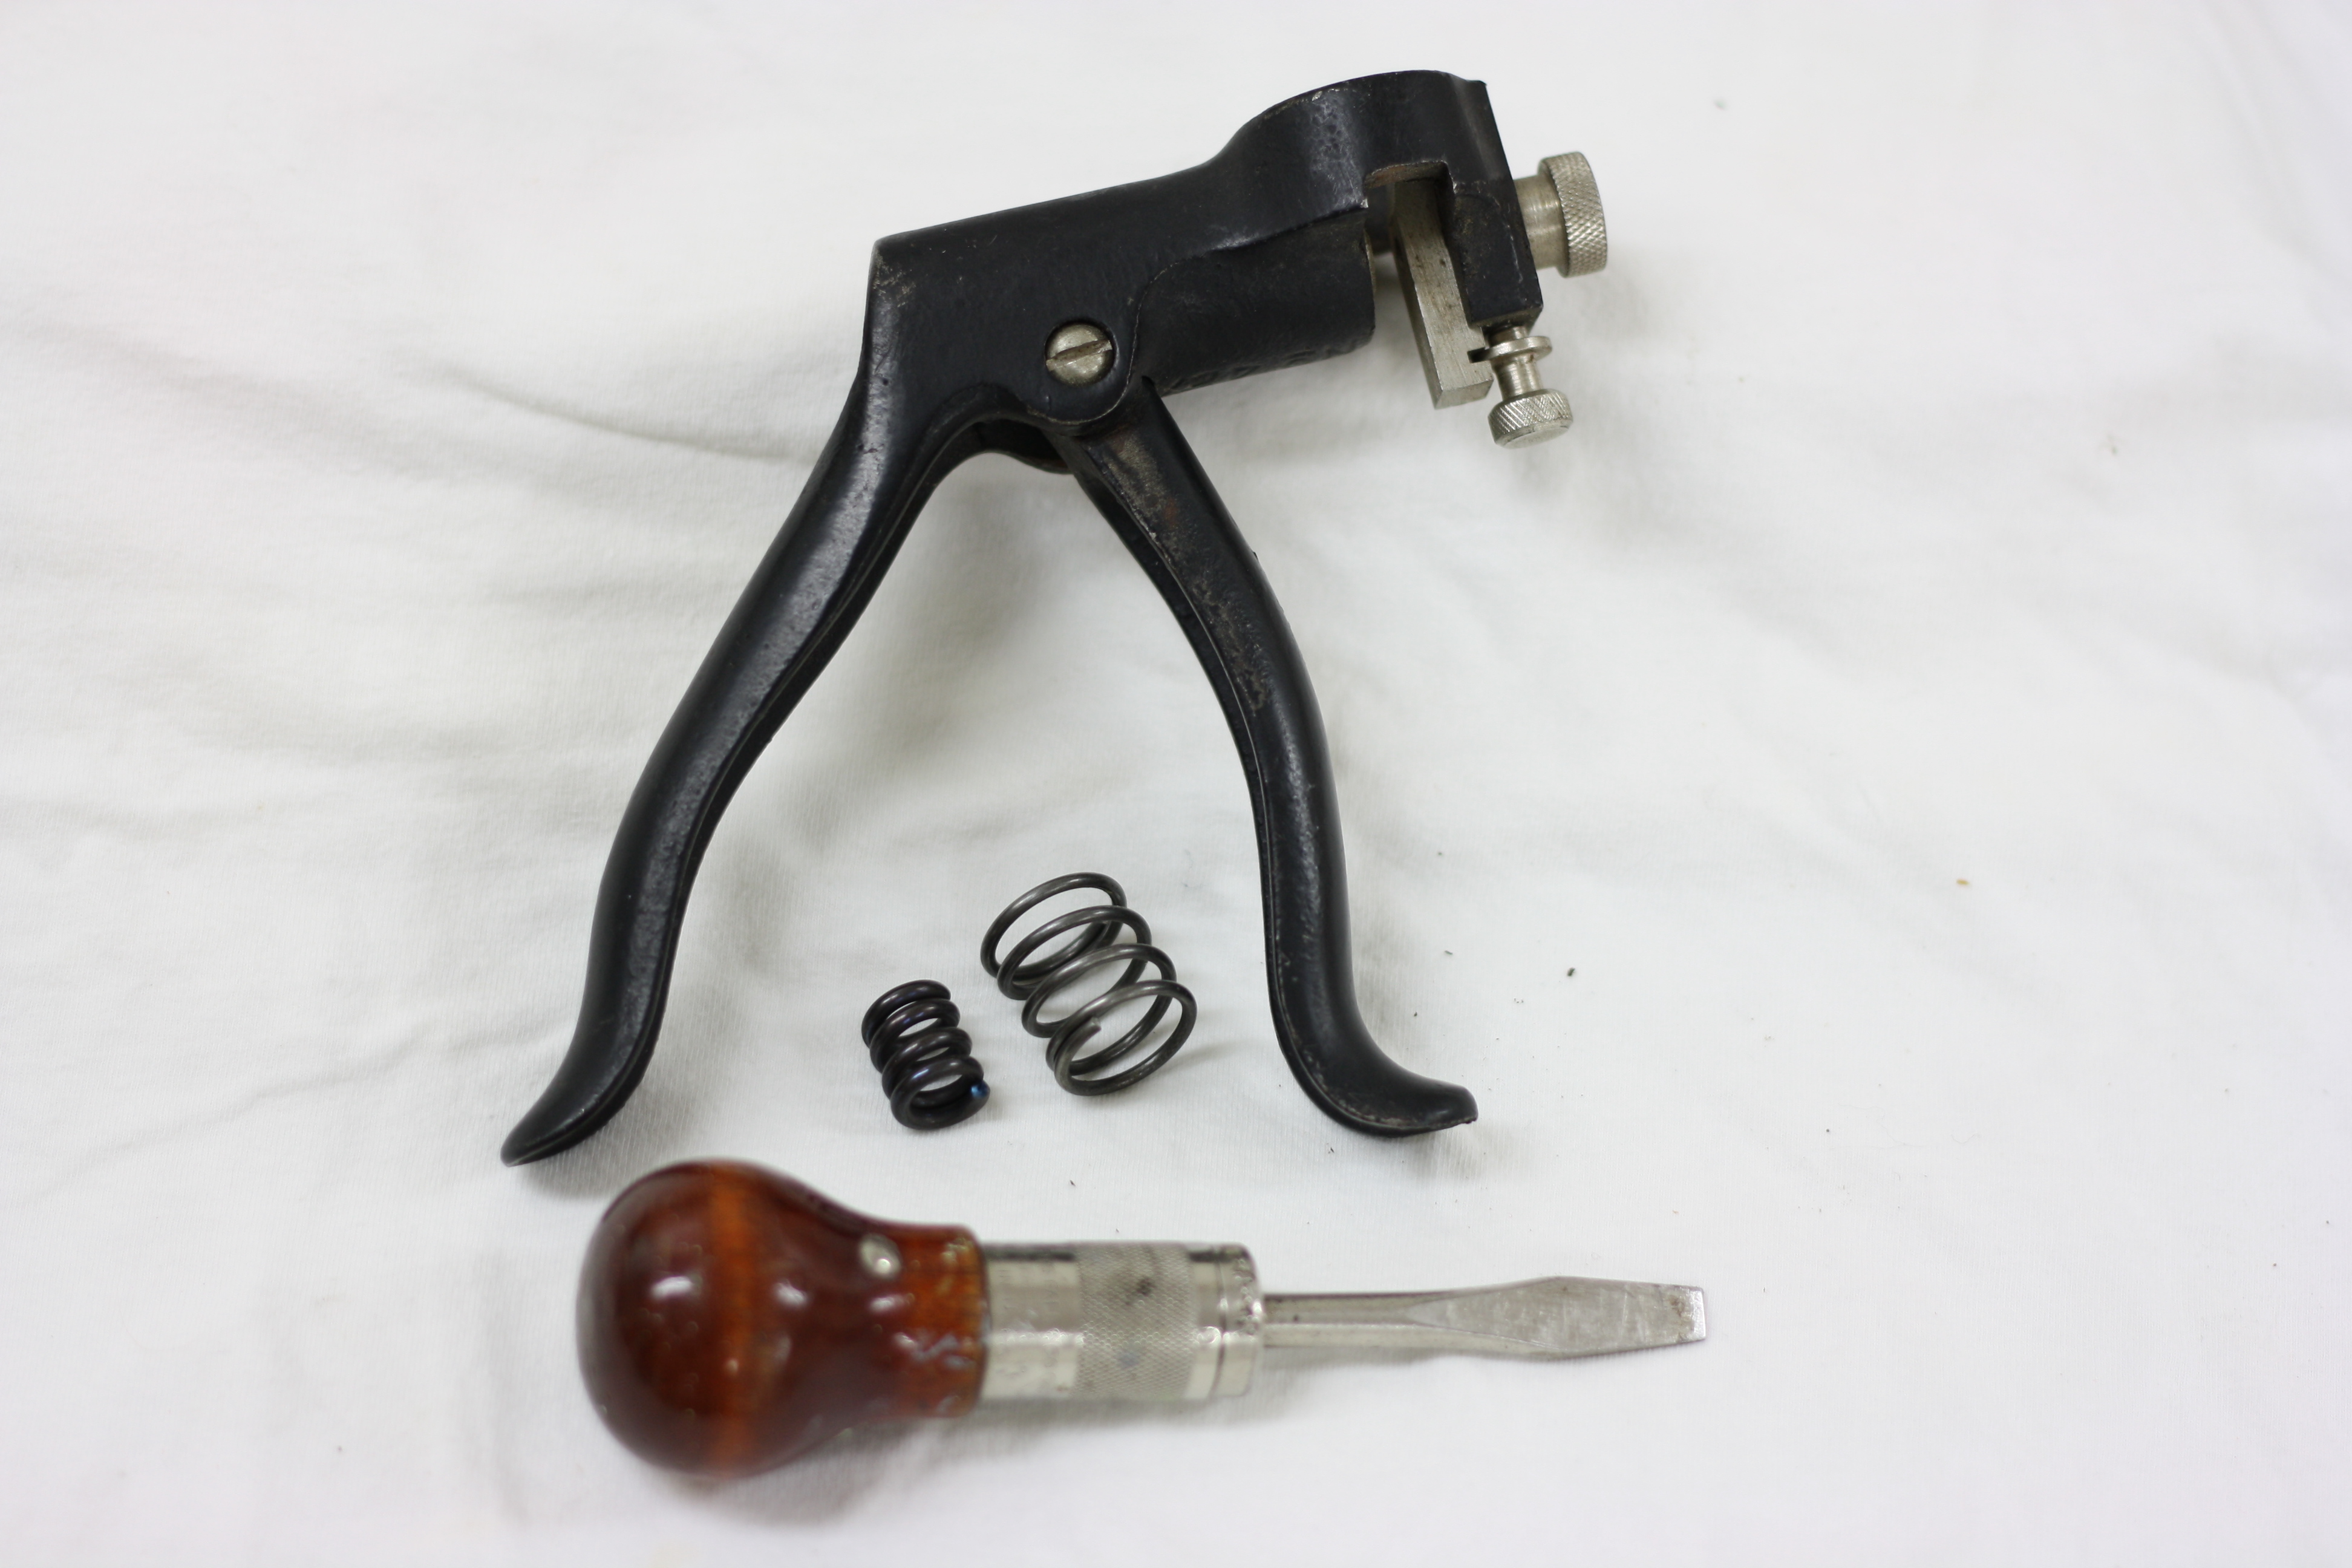
Fully disassembled… there isn’t much to it.
After a few weeks of watching the auctions (what? You don’t just go out and buy the first one you run across, do you?), I determined that most of the Stanley 42x saw sets tend to sell for anywhere between $30 and $50, regardless of condition. In other words, one that is all beat to crap can sell for the same price as one that is in near perfect condition. My goal became: Buy one that is in near perfect condition and save myself a lot of trouble.
Patiently, the eHunter waits on his haunches by the Stanley watering hole. He spies his target – good condition, no box (to discourage high-bidding collectors), low starting price, late night ending time – but makes no move. Instead, he watches to see if his quarry will come closer. It does! In fact, it heads right for him! He waits… and waits… until just the right moment, when he STRIKES, mere seconds before it gets away!! And snags a (damned near) perfect Stanley 42x saw set for the acceptable price of $38.
And when it arrives in the mail, it is true to the surveillance photographs our eHunter so closely reviewed. It’s only fault is one that cannot be photographed – the handle does not easily return to its starting position when grasped and released; it appears the springs are at the end of their life.
Once again, Joe Federici came to the rescue. Joe knows saws – probably better than most people I know, and certainly better than me – so I turned to his website for information. A quick stop by his on-line store and I had two brand new Stanley 42x saw set springs coming my way, along with a full set of instructions for replacing them.
With replacement parts and my trusty Millers Falls No. 63 at hand, I pulled out Joe’s instructions and started reading them. But I have to be honest with you… I made it about half way through the first step before I said, “Oh, I got this…” and set them aside and just started into it.
(I don’t need to explain that to anyone, do I?)
It was a pretty simple and painless procedure. Remove the only screw you can find, remove the handle, remove the anvil and cylinder (and accompanying springs), replace springs, add a bit of lithium grease for lubrication, replace anvil and cylinder, replace handle, replace screw. Give it a few squeezes to make sure you didn’t bugger anything up and you’re good to go.

Done! The difference is amazing!
I did go ahead and remove some dust from the under side of the grips and… well… seriously, that was about it. This thing was so clean it had about 98% of the original finish. The only part with any kind of wear showing was where the teeth on either side of the tooth you’re setting rest during the process.
This was about the most painless tool restoration rehabilitation project I’ve done in seven years. Looks just like it did when I started, right?
In this case, that’s a good thing.
(Blued the) Back In Black
(Hold on to your butts… I’ve had the Single Parent Pants on for a week now, and apparently sleep deprivation is cumulative.)
Blued the back
I made it black
Rusted too long I’m glad to bring it back
Yes the, handle’s loose
missing screws
Joe knows what he’s talkin’ about
Open windows up wide
Finish getting me high
Forgot Moses T’s uses turpentine
I’ve got, taper files
Slim styles
Sharpened teeth seen gleaming for miles
‘Cause the back
Yes, It’s black
The back is black
Blued the back to black
(I’m just going to let that soak in for a bit while Angus does his shuffle thing…
What’s that? You want to go back and re-read it now that you have the timing of the music? I’ll wait…
OK, better? I think we’re ready to move on. Even if we’re not, we probably should.)
Previously, on The Kilted Woodworker…
I found a miter box.
And a saw.
Fixed up the miter box.
Disassembled the saw.
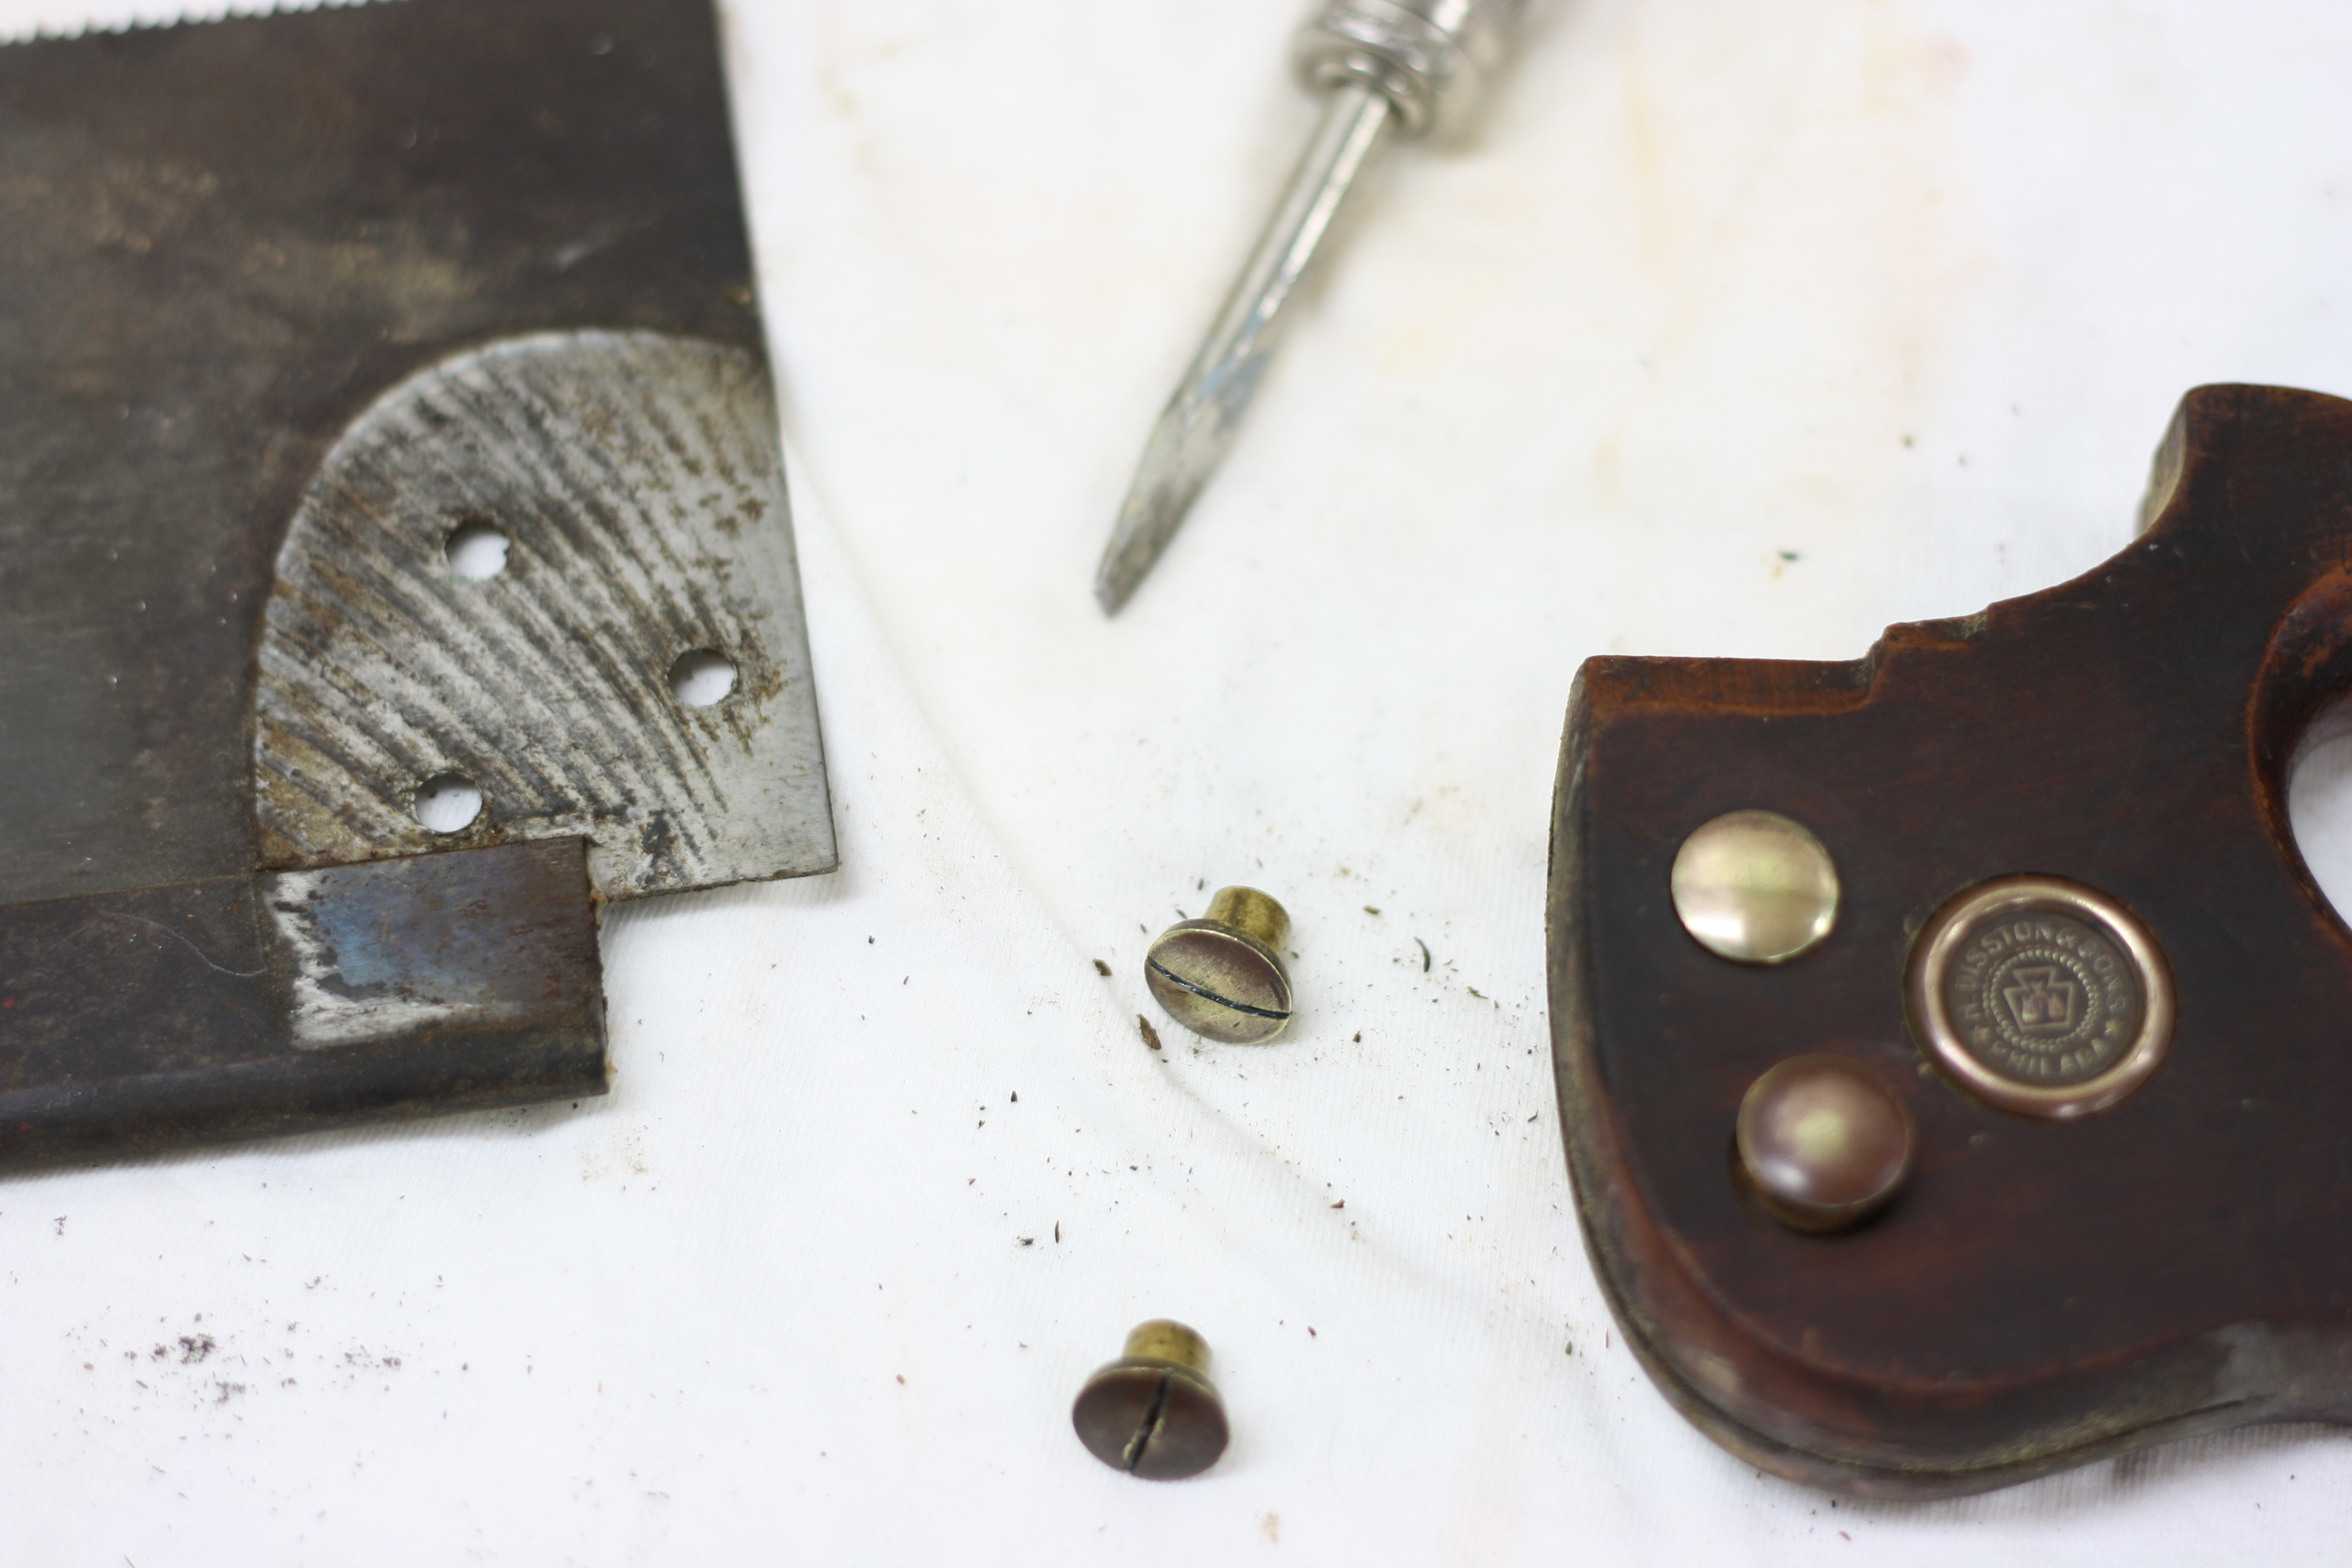
Cleaned the brass.
Cleaned the tote.
Now on to the plate and the back…
Apparently, when someone discusses their steps for cleaning up a saw plate, they skip a lot. Or, maybe it’s just easier to say, “I sand both sides of the plate through the grits, using 180, 220, 320, 400, 600, and 800,” and leave it at that.

The back and plate, as found…
This is one of those “easier said than done” situations. I’m just glad I didn’t have to worry about saving an etching – there wasn’t one. Don’t get me wrong – it isn’t exactly complicated work. First you remove the tote. If you’re going to remove the back, then do that and find a nice flat surface to lay the plate on and get to it. I’d recommend using a cork-backed sanding block and some melamine for an easy-to-clean flat surface. If you’re not going to take the back off the plate (something I’m not comfortable with doing just yet), then it is slightly more complicated as you have to provide clearance for the back when laying the saw plate flat. I just laid it off the edge of the melamine board, so… maybe it wasn’t that much more complicated.
Then… start sanding. Lubricate with WD-40 or low odor Mineral Spirits or some such thing (WD-40 worked better for me).
Keep sanding.
And… more sanding.
(Seriously, it seemed to take forever.)
Still sanding.
You know you’re doing it right if you’re finishing up with that 600 grit, staring at the 800 grit, and thinking to yourself, “Psh… 600 grit looks juuuust fine.” Only pure dedication takes you through 800. We are hobbiests; don’t feel badly if you stop at 600.
I didn’t. (Feel badly, that is.)
Oh, and I sanded the back to those levels at the same time. It was easier that way (vs. doing the back later) because I already had the appropriate grits out and ready to go. I also took a steel brush and scrubbed at the teeth as best I could. I’m still not totally sure I did that properly, but… we’ll see.
Once you get the plate and back the way you like them, go put on a pair of the blue nitril gloves. I mean… take off the old blue nitril gloves you were OBVIOUSLY wearing for the first part (because nothing shows off dried, chapped, winter hands like a bit of grease slurry stain on your fingers and hands!) and replace them with some clean ones. If you weren’t wearing gloves before, just know it takes about five or so days for that staining to finally go away.
Then get out your bottle of Krud Kutter and spray everything down really well. I used the green mesh pad on the back at that point, because I wanted to get it as clean as I possibly could. Then wipe off every last bit of leftover grease and dirt and sanding detritus When you’re bluing the back, you want it clean – clean as you can get it – so the bluing doesn’t show off your fat thumb print right next to the words “Cast Steel”. (That’s one of those easy lessons I learned by reading how someone else did it wrong.)

Cleaned and taped off…
I’m all about ease and convenience, so when it came time to get my bluing agent, I took the easy way out. I went to a local gun store and bought a gun bluing kit by Birchwood Casey. It cost me $14 and came with everything I needed, if I didn’t already have it – bluing/rust remover, degreaser, bluing agent (in paste form, which was easy to control), sandpaper, 00 steel wool, wool applicators, and a final rubbing cloth. (I used my own 0000 steel wool and sandpaper instead of the supplied material.) I should be able to blue the next 10 back saws I come across with the amount of agent I have left over.
If you have not removed the back, you have to tape off the plate. I used blue painter’s tape. I set it right where I wanted it and then pressed down hard several times to create a tight seam to keep the bluing off of the plate. Then you want to set everything up so you’re not scrambling for anything when you have bluing sitting on your back. I laid out fresh newspaper, tore off a few sheets of paper towels, used an old plastic lid to squeeze some of the bluing paste into it, and wiped down the back one more time. Then it was time for the moment of truth.
Deep breath. I swabbed the wool applicator through the bluing paste, held my breath, and started applying it to the back. I figured more was better, so I didn’t go easy on it (likewise, I didn’t paint it on, either). Make sure you don’t skip the two ends!
Then all you have to do is wait 30-60 secon… oh-shit-i-forgot-to-get-a-clock.
One Mississippi, two Mississippi, three Mississippi… I stopped roughly somewhere in the range of 45, just in case I was counting too slowly or too quickly.

Black, the new blue… or is it the other way around?
Then I wiped off every bit I could with a shop towel and went over it very (VERY) lightly with the 0000 steel wool. Well, what do you know! It looked pretty damn good! There were a few little spots where it might be coated better, so I went ahead and did a second application (which was done much more calmly, since I didn’t think I could jack it up that much at that point). I counted again (since I still forgot to go get a clock), wiped it off, and went over it once more with the steel wool. And it looked REALLY good!
I removed the blue tape and was happy to see a nice clean line on both sides. Though I was excited to see how it looked put back together, I wanted to give it time to set, so I waited 24 hours before wiping the back down with an oiled cloth and reattaching the tote.

Medallion side…
… and the back side.
And there you have it, a mostly completely restored 100 year old back saw. Can’t wait to put it back to work! But… it’s not quite done.
In just about a month, I’ll be taking a Build A Backsaw Class with Matt Cianci. My plan is to hold off on sharpening this saw until I can get some one-on-one expert instruction from him during the class. I’ll be sure to give you an update at that time, though.
TKW

(Sorry about the Back In Black bit in the beginning. Hey, at least I wasn’t paraphrasing Beckett!)
Taming of the Tote
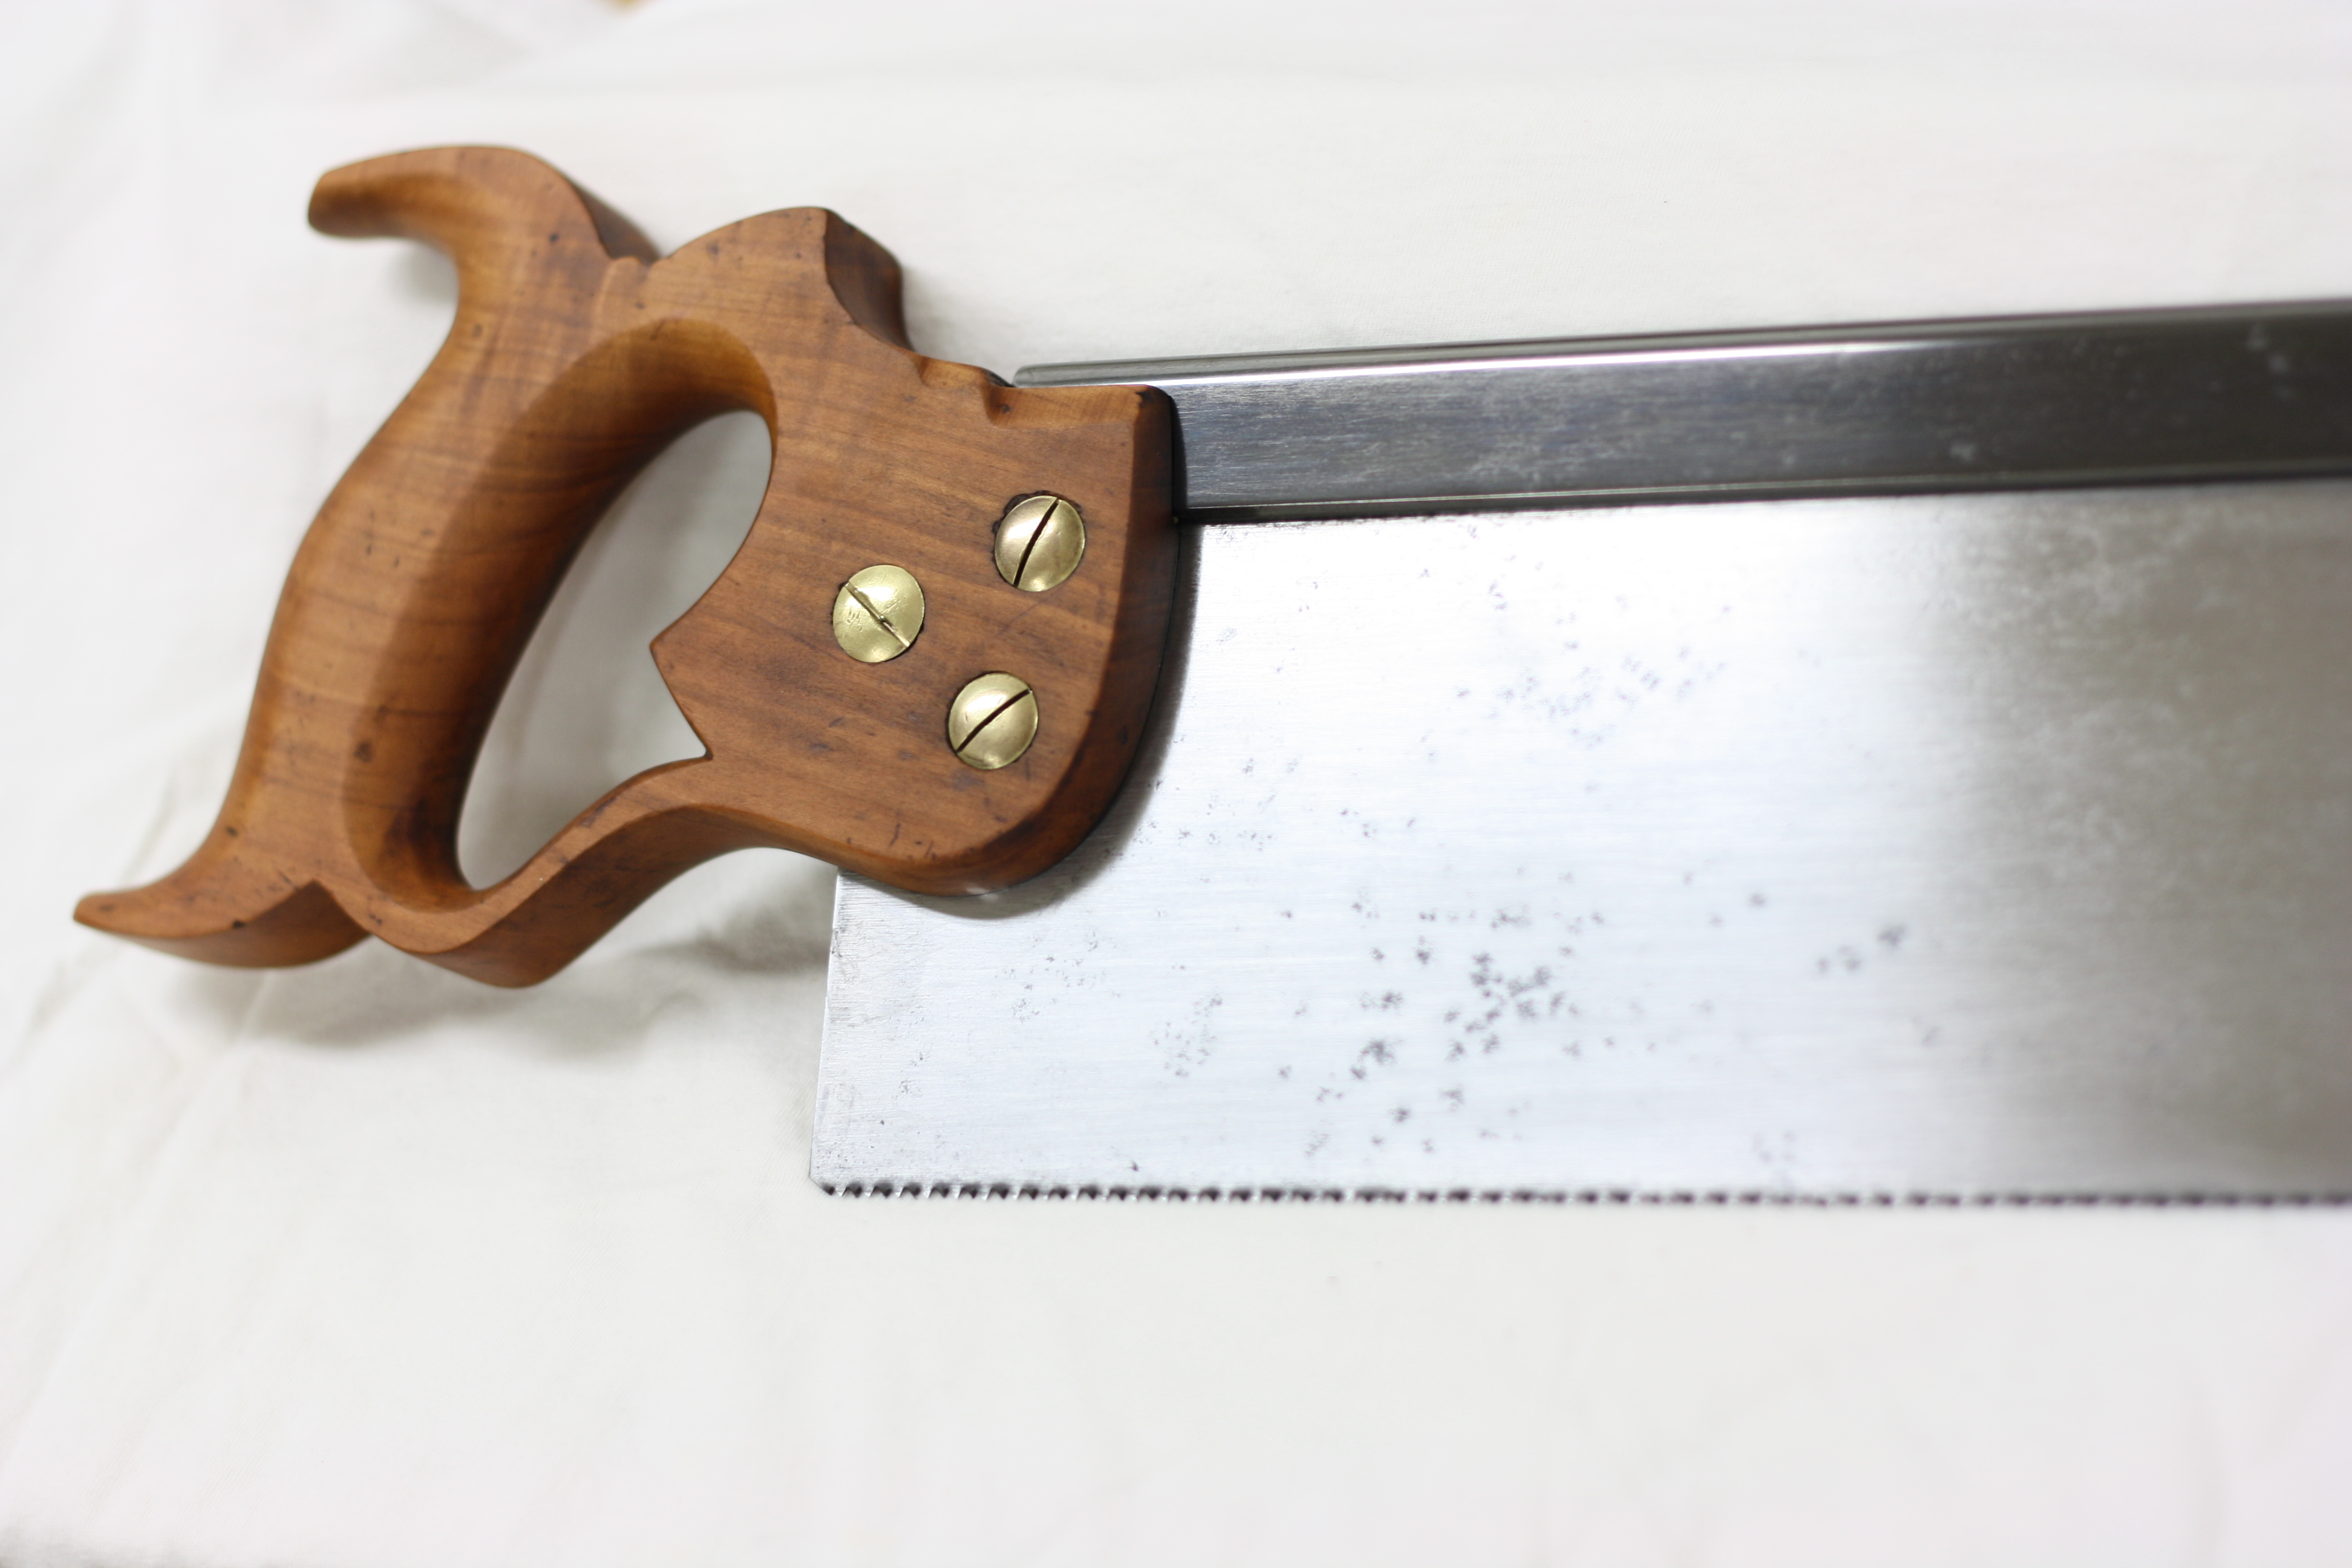
Disston 14″ Back Saw Disassembled
Recently, I picked up a Craftsman 3646 miter box and have been working on restoring it. Even though the Craig’s List ad was for the miter box, what caught my attention was actually the saw that came with it – from what I could tell, aside from being completely filthy and missing one of the slotted nuts, it appeared to have a nice, crisp chip-free tote in my preferred style. I do not believe this particular miter box originally came with a saw, so this was probably just the saw the previous owner used with it.
After spending some time getting the miter box in shape, I turned my attentions to the saw. A bit of examination produced the following information:
- 14” Disston backsaw
- 12 TPI, 3.5” left under the back
- 1896-1917 era medallion
- Applewood tote of the same era
- Aside from missing one half of one of the saw nuts (the slotted half), and despite 100 years of grease and grime, the saw was in great condition
I was excited to see what kind of condition I could bring this saw back into, so I got to work. The first thing I did was contact Joe Federici, author of Positive Rake and a restorer of saws, with a few questions I had. He responded with lots of valuable information on what worked best for him and where he bought some of the equipment he used. With his information in hand, I went down into the workroom and got to it. (Oh, he was also able to provide me with a replacement slotted saw nut.)
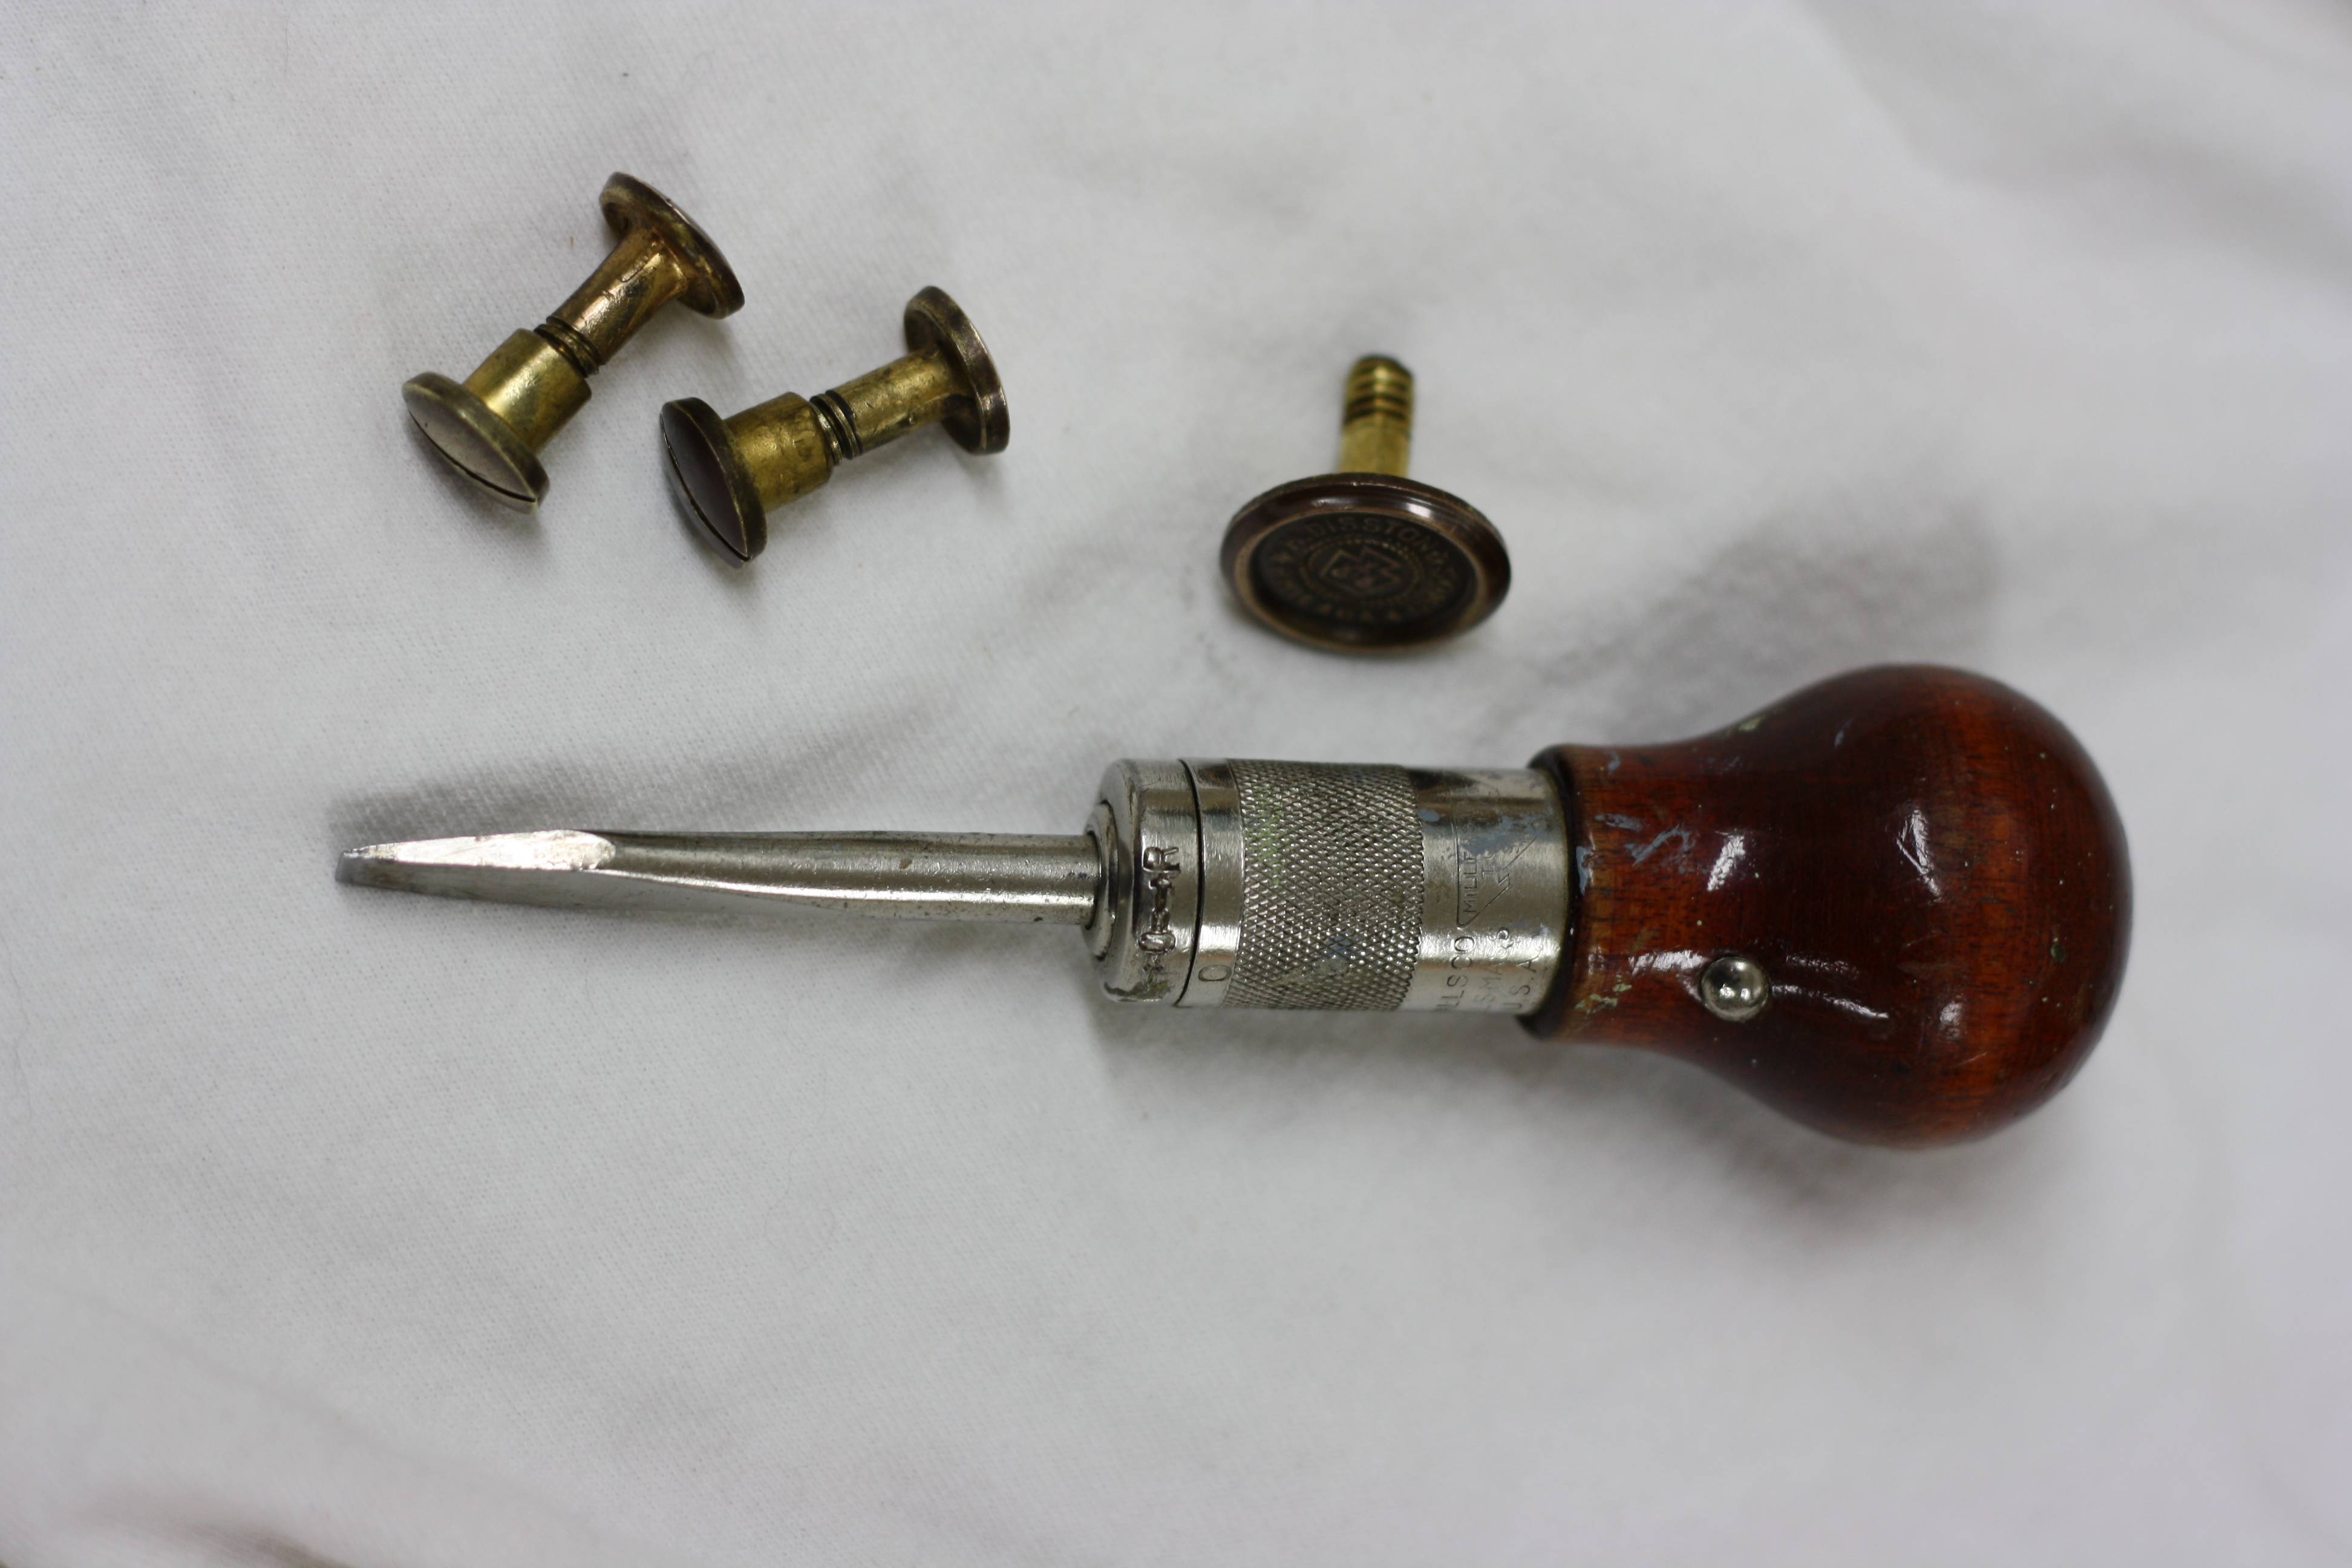
Millers Falls No. 63 Ratcheting Screwdriver
One of the tools that came with the cast iron file handle I picked up at auction a few months ago was a small screwdriver. Now, I probably needed another screw driver like I needed another hole in my head. But, as it turns out, this is a very nice little bit of work. Another Millers Falls product, this is the No. 63 Ratcheting screwdriver. The ratcheting system is easy to adjust with a quick finger motion and the head of the screwdriver is strong and nice and thin at the end. It fits the palm of my hand comfortably and happens to work perfectly for unscrewing standard slotted saw nuts. So I kept it. Still trying to figure out where to put that other hole in my head…
After breaking down the saw into all of its individual components, I started working on the brass. I gave each piece a quick dip into Jax Instant Brass And Copper Cleaner (available from www.Metaliferous.com) and scrubbed it with a soft brass wire brush (also available from http://www.Metaliferous.com). This cleaned them and gave them a nice matte finish, which is just what I wanted. I finished them off with a quick rinse in fresh water and set them out to dry.
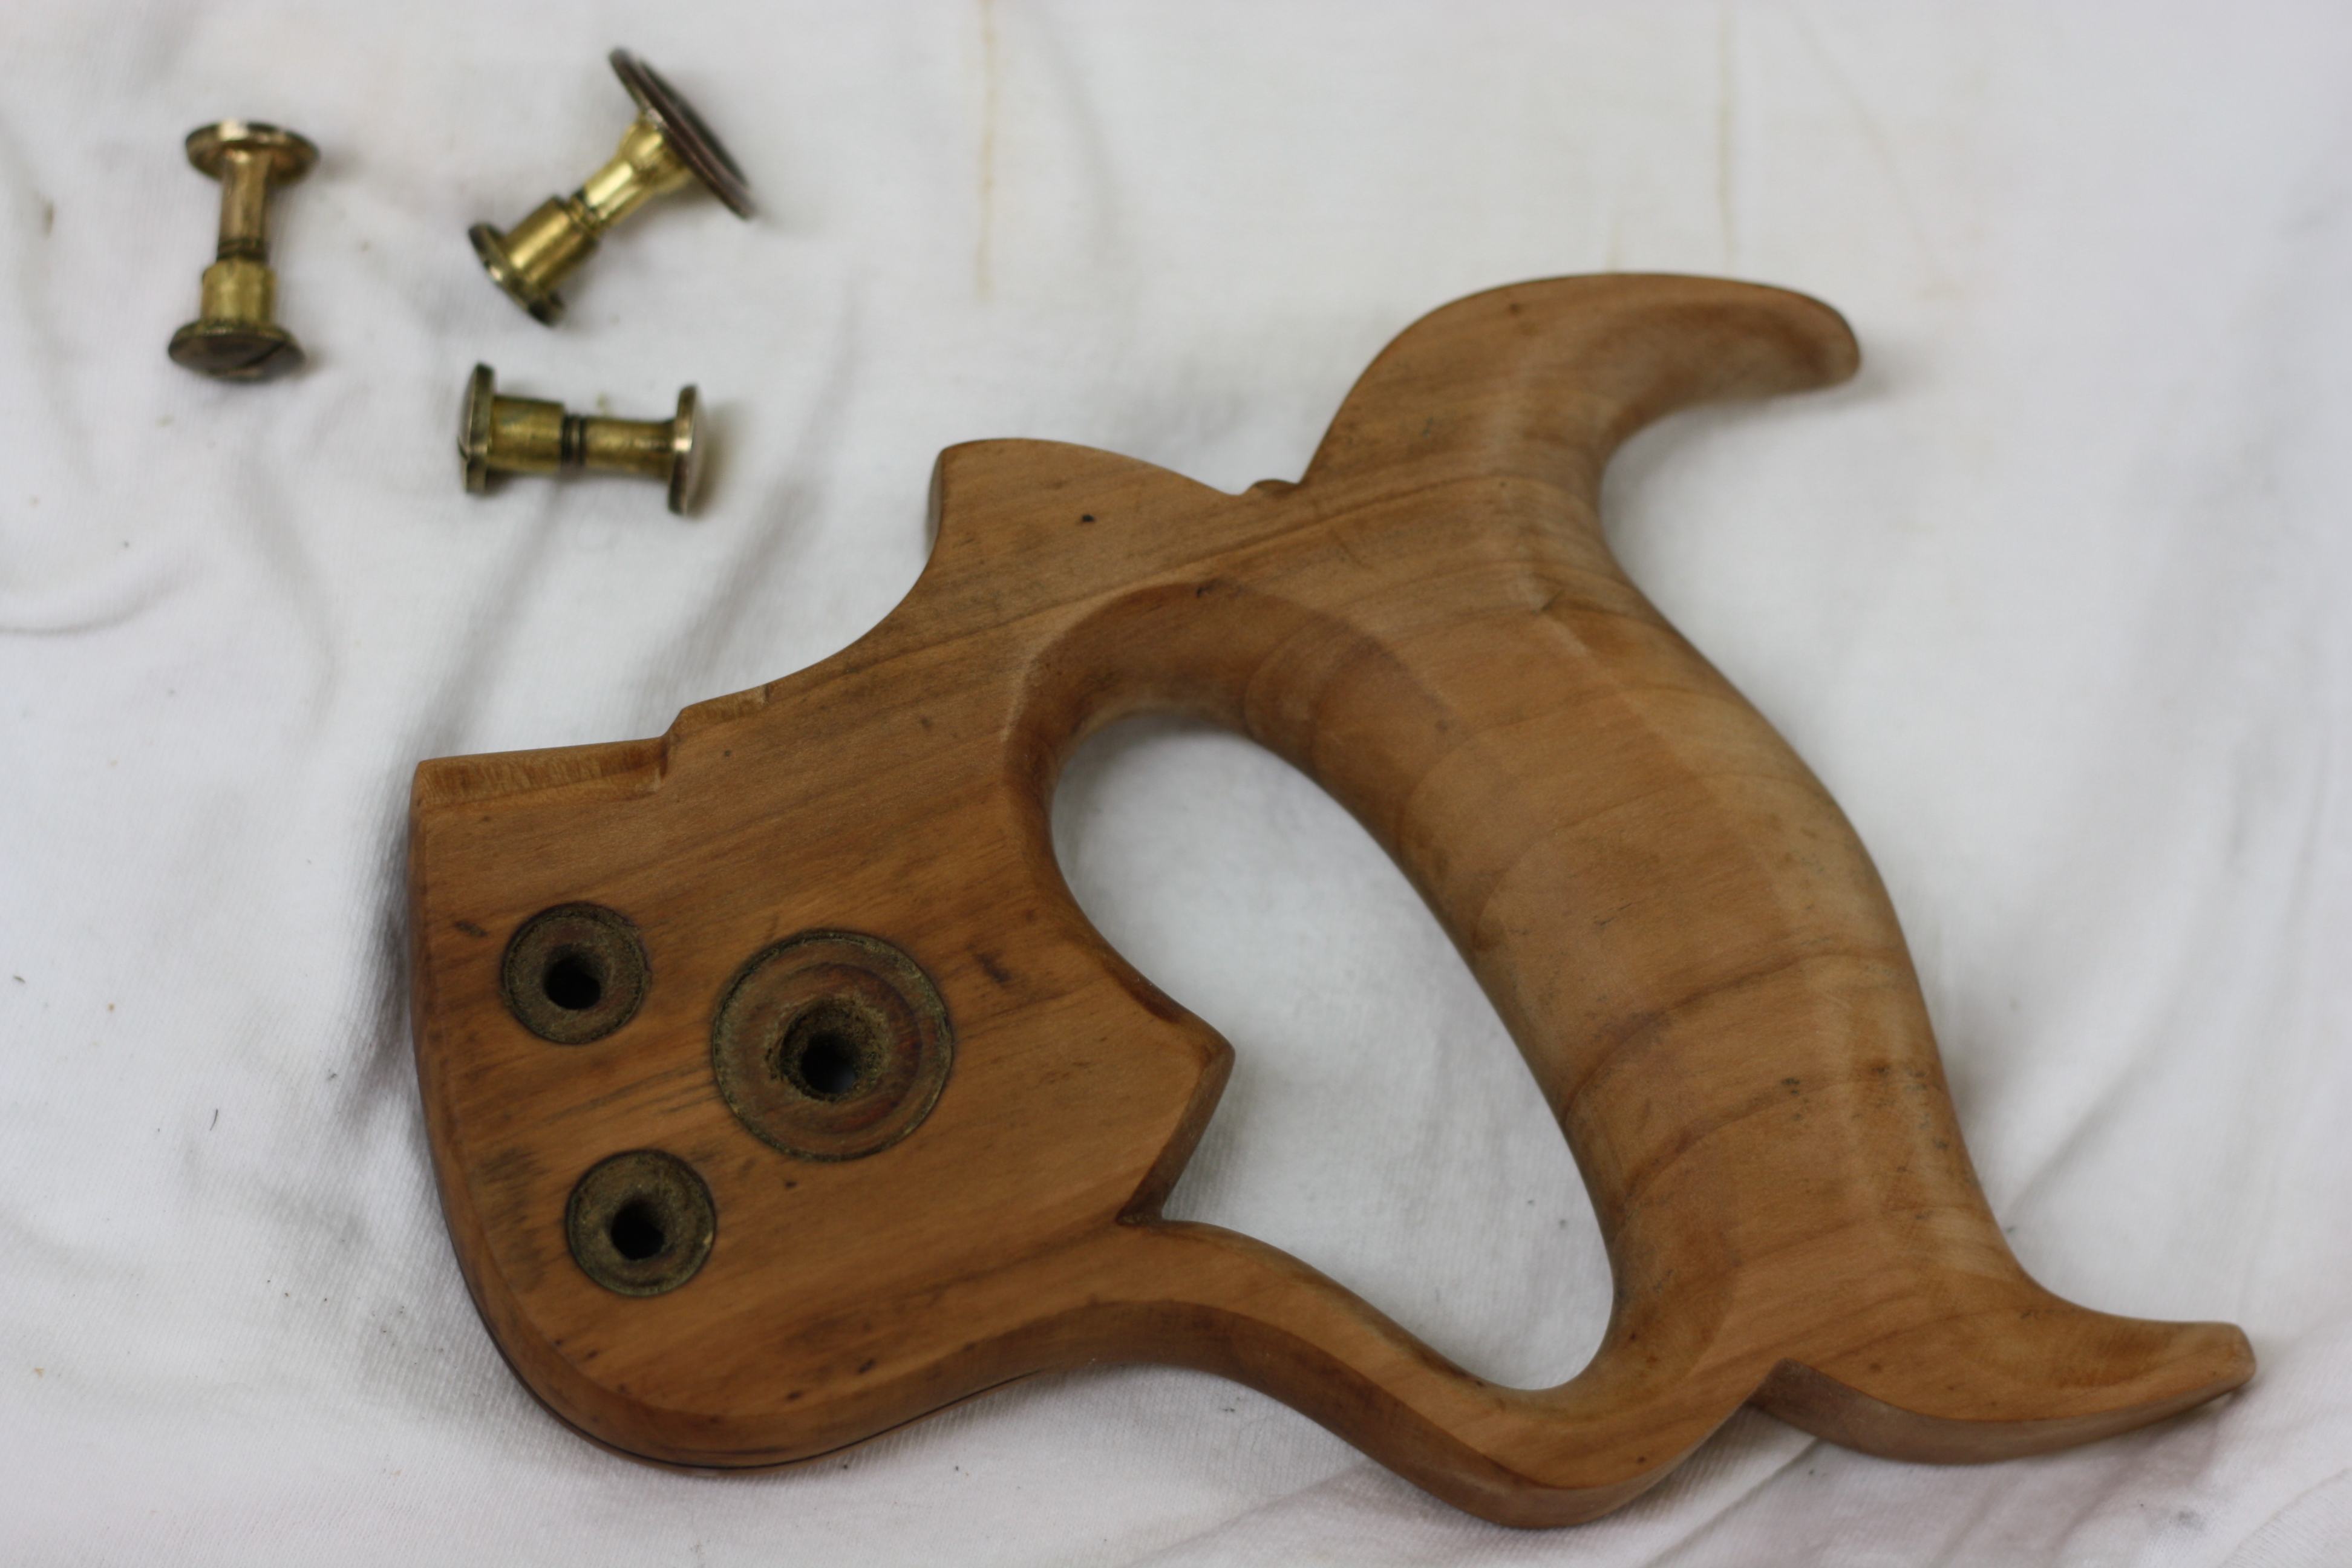
The Tote After Hurricane Sanding
Next I tackled the tote. It really was in perfect condition, structurally, so it just needed a good cleaning. I sprayed it with Krud Kutter degreaser and started scrubbing with a green scouring pad. When it was covered in a slurry of grime and gunk and degreaser, I’d wipe it down with a blue shop towel and spray fresh degreaser on it. Once I had a significantly cleaner tote, I use a shop knife to gently scrape off the last bits of the original finish that were tenaciously hanging on. Then in order to even everything out, I sanded the tote with some 220 grit sandpaper. To maintain the crisp appearance, I finished sanding each side by wrapping the sandpaper around a sanding block and hitting the flats of both sides of the tote. After wiping it down really well, I applied two coats of Moses T’s Gunstocker’s Finish, waiting 24 hours between coats, and added a coat of Renaissance Wax.
Next time, I’ll discuss the saw plate and the back. Stay tuned.
TKW

