Not Bored Cutting
I recently had a need to make a cutting board for someone. I wanted to make something unusual, with some highly figured domestic woods – most likely maple and walnut. I prefer these species because their pores are closed (or at least very tiny), which I think is better for something on which food will be processed.
I had a really nice piece of curly walnut that was from the family farm. I also had some really great curly maple from Ohio – scrap wood I’d gotten from my ex-wife’s uncle several years ago when he built some shelves for their house. The problem with the walnut was that only part of it was highly figured; the rest was pretty plain. So I needed to come up with a design that took advantage of this.
In the end, I decided to cut the walnut into a wedge and then frame it with the curly maple.

When I posted pictures of it, someone asked me how I managed the angles. The big secret here is that I didn’t manage angles. I didn’t measure one angle! It looks a bit complicated at first blush, but it really isn’t. Hopefully you’ll agree after I explain.
Everything is just a straight measurement off of the center line. For the handle, the center line marked the point where I bored the hole. Then the shoulder measures out X” from the center line on both sides. Those points are connected to the center line at the end of the board to delineate the area of figured walnut I had available. Then the maple is also measured off the center line at the shoulder and then at the end.

I drew this all out on a template, cut it into three pieces, marked out my walnut and maple accordingly, then removed a wedge shape (overcutting to actually make two pieces) from the maple board so as to maintain grain continuity.
The cuts were all made with handsaws – panel saws for the straight cuts and a coping saw for the handle. The handle hole was bored out with a brace. I cleaned up and finessed the edges of the boards with my old Type 11 Stanley No 5.

When it came time to glue the three boards up, I knew I’d have a problem with the angles and the clamping pressure. My solution was pretty easy, though. I clamped the walnut board from handle to tip – not hard enough to crush the end, but just enough to make it sturdy. Then when I applied glue to the edges and clamped the boards across their width, the maple boards slid down until they hit the first clamp and then I was able to draw them tight.
I squared everything up with new measurements off the center line and trimmed it up with a backsaw and my Veritas low angle block plane. It was a fun exercise to do this all with hand tools, but if I make more in the future I’ll likely speed it up a little by using the drill press and bandsaw on some of the cuts.
I wanted to include some food safe wood butter with the cutting board and figured it would be a project the Tiny Human™ could assist me with. I pulled out my big block of bees wax, a bottle of food-safe mineral oil, and my double boiler kit (a hot plate, a handled pot, and a bowl with ring handles, all picked up at Goodwill for $5). We estimated about 2oz of wax (1/8th-ish of the 1lb block) and about 8oz of mineral oil, added both to the bowl and set the bowl in the pot (half filled with water) and turned the hot plate on medium.

After a while, the wax melted and the Tiny Human got to stir it all together. Then I poured it into small jars that used to contain delicious artichoke hearts. Once it cooled, it was ready to go.

After a bit of sanding, the board was ready for wood butter. I also added four little rubber sticky feet to the bottom of the board so it wouldn’t slide around in use.
I think the end result looks tops.
And as much as I enjoy working with wood, as much as I enjoy making things for other people, I REALLY love it when the recipient loves using the things I make for them.
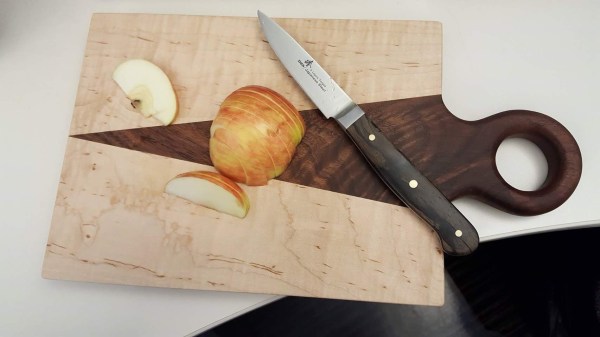
Knife with zircote handle also by the Kilted Woodworker, by the way…
TKW

