Studio D Conference Table, Part 2
As I indicated in Part 1, one of the biggest challenges throughout the entire project was just trying to manipulate the large and unwieldy slabs of wood by myself. I took full advantage of any bit of knowledge I’d learned over the years – I used luan ply and cardboard when I needed to slide them and built a long, low trolley (like a mechanic’s trolley) using a piece of 2×12 and some caster wheels for when sliding them wasn’t enough.
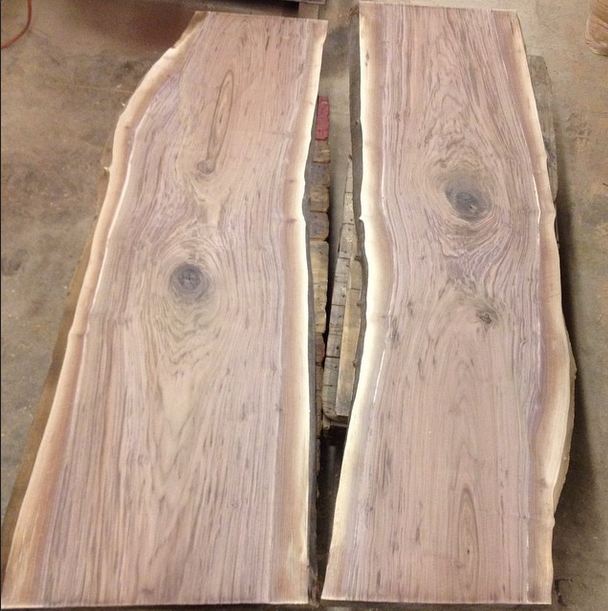
Once I had the planks in my possession, the first order of business was to clean off three years of barn dust, grime, and grit. An hour or two on a chilly spring morning with a stiff nylon brush gave me a better look at some of the figure and grain pattern in the planks.

Cleaned up nicely with a bit of elbow grease…
Then I had to load them back up into my car to get them to WunderWoods, where my friend Scott has a 37” wide belt sander he calls his “friend maker”. (For the record, I was friends with him before he got the wide belt sander. And I paid him for time on the machine.) We ended up removing 5/16” off the two planks before they were flat. I didn’t mind; every pass made them just a little bit lighter.
Planks all flat and cleaned up. Bonus: I got in a killer bicep workout!
Almost every step in this entire process involved making some pretty significant decisions that would have a large impact on the final product. Once they were flattened, I needed to figure out how I was going to lay the tables out. If I book-matched them, I would end up with one live edge that sloped downward and one live edge that sloped upward and that would look weird. If I slip-matched them, one end would be significantly wider than the other. With some help from Scott, I decided on the layout pictured above. The slab on the right is sequential to the one on the left, only rotated 180 degrees. This ensured I have downward-sloping live edges on both sides and it also helped even out the width of the two planks.
Then it was time to make the planks just a bit lighter as I removed some edges to prepare them for joinery. I had several design discussions with the client up to that point. We were both on the same page in that we wanted the table design to showcase the wood. So he was OK with leaving some of the sapwood in the middle; he even suggested leaving some of the live edge, as well, creating a gap they might use for power cords for electronic devices.
Using a Festool TS 55 (borrowed from Michael, another friend – I have some really great friends, in case I haven’t mentioned that before) I trimmed off one edge of each plank so I could join them. As discussed, I left as much sapwood as possible and kept a bit of live edge, too.
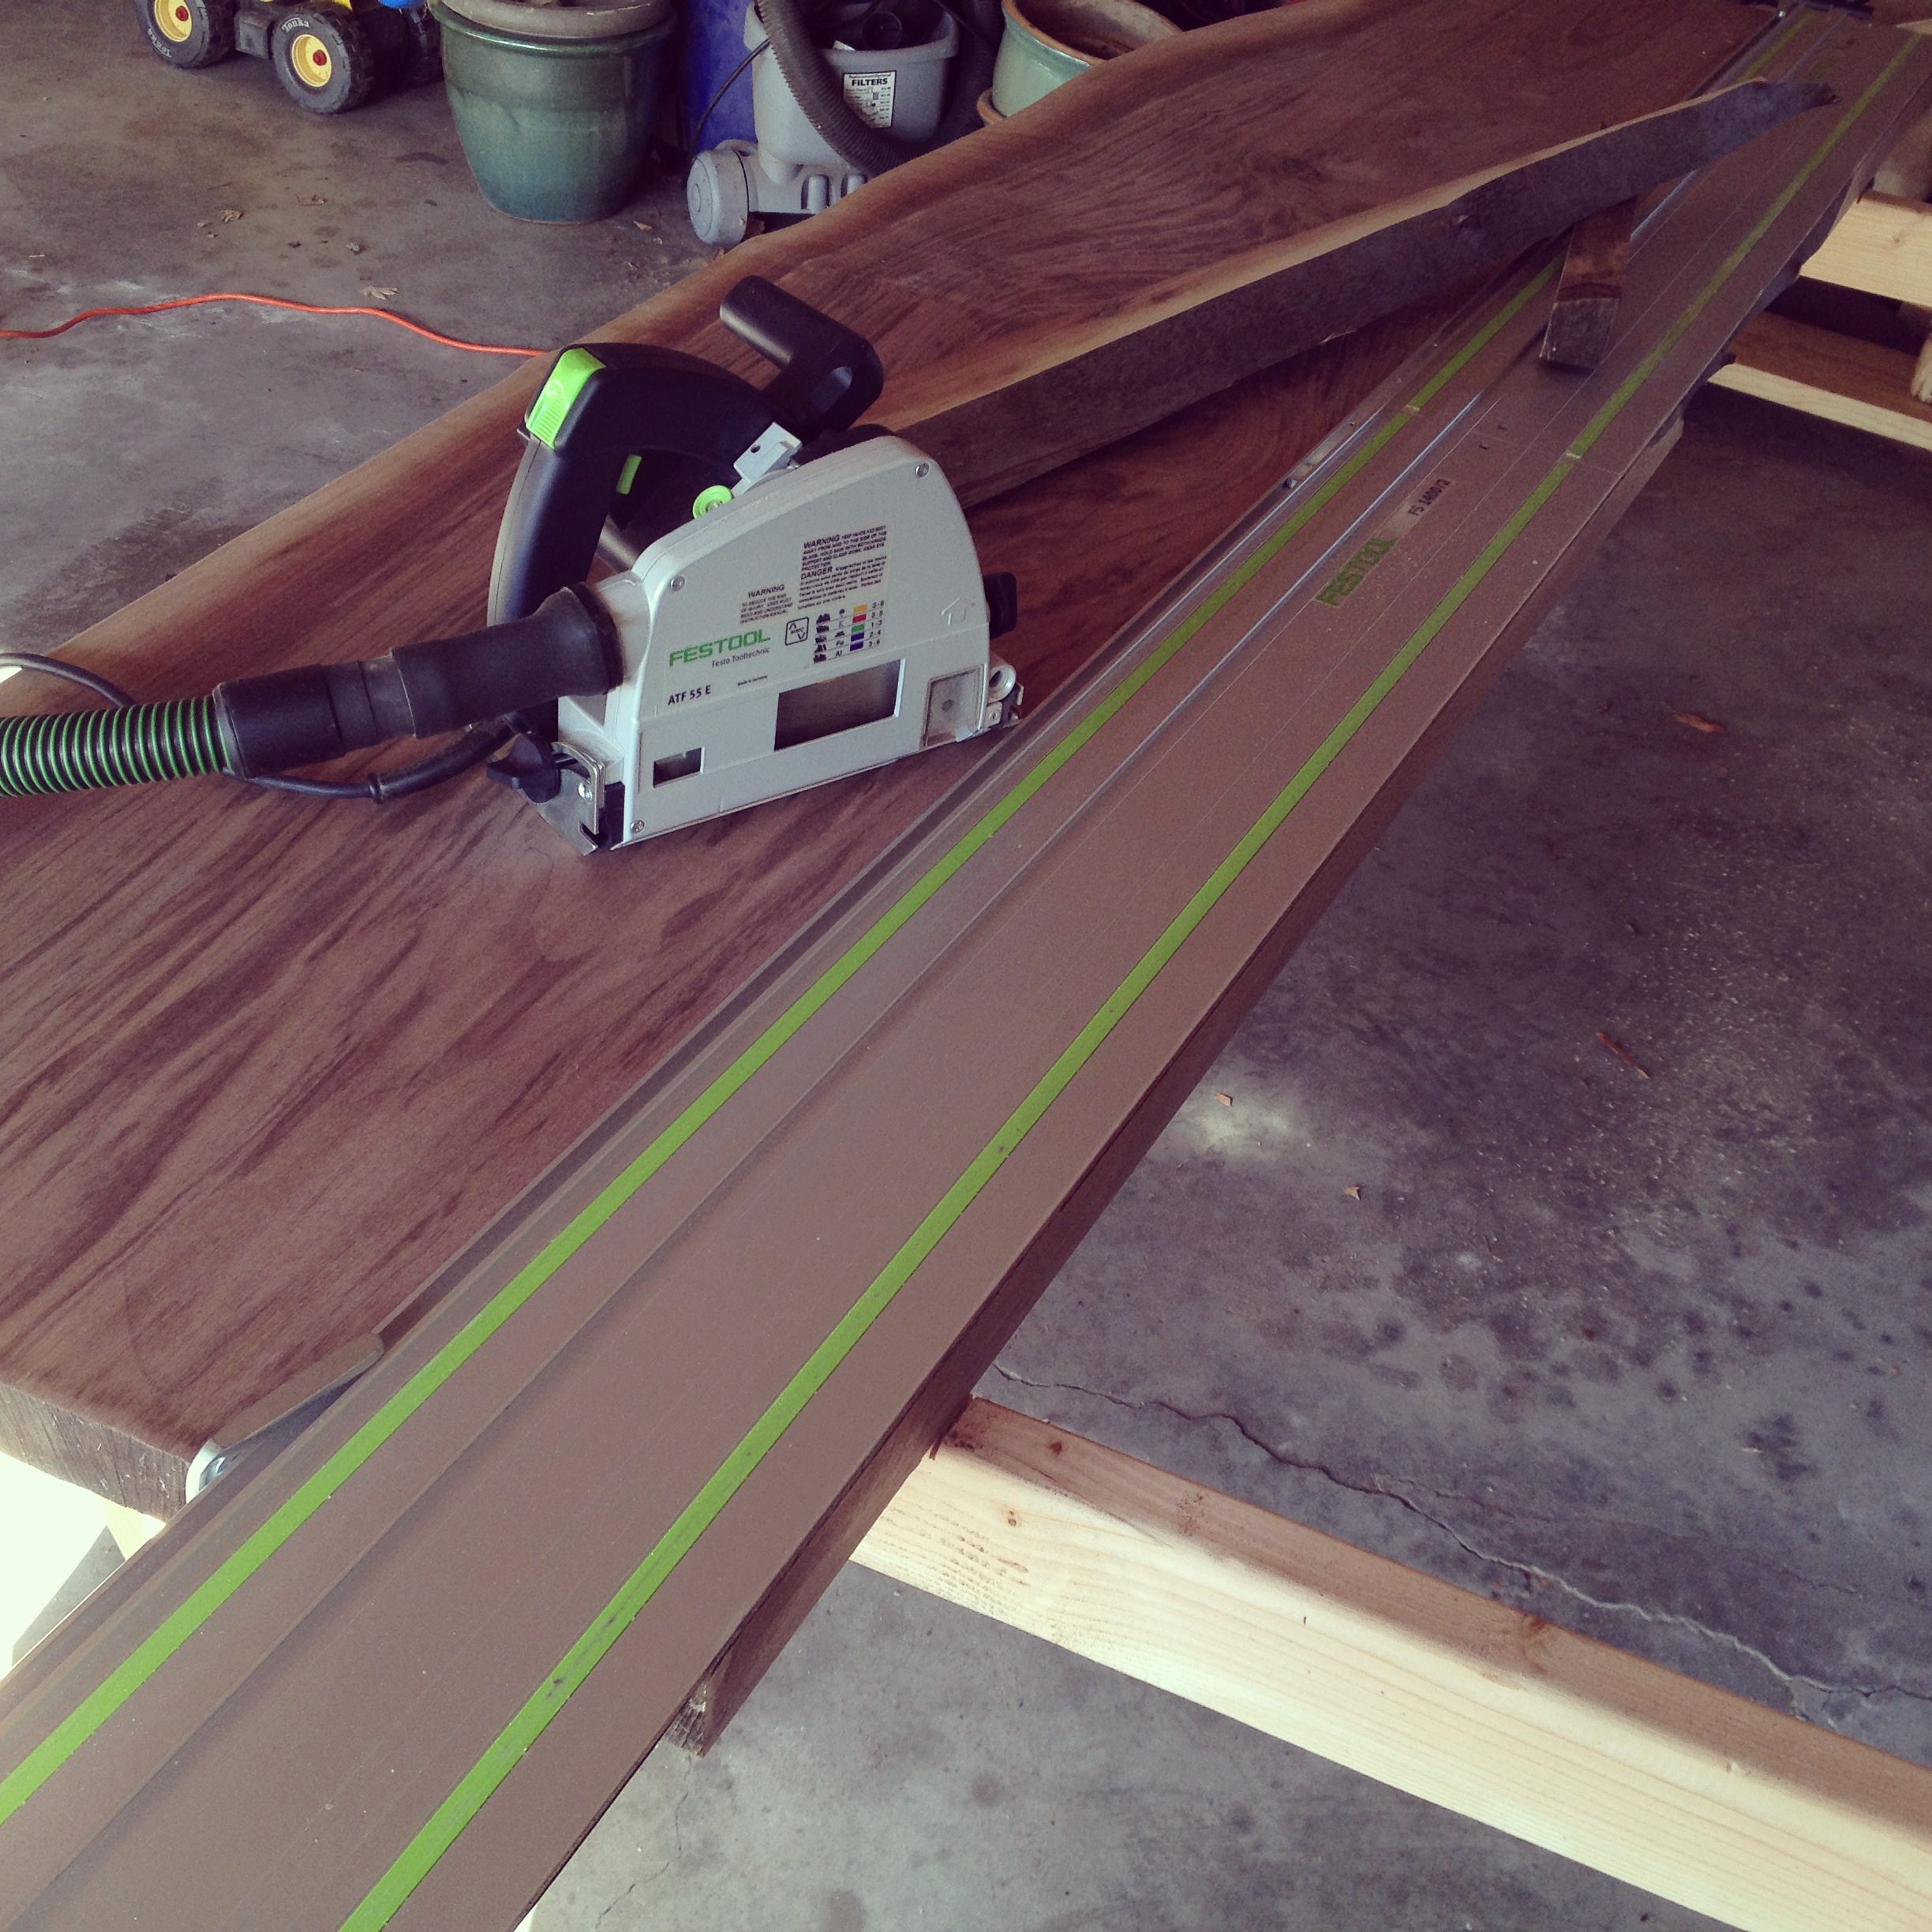
Though I am not Catholic, I said a Hail Mary before each of these cuts…
The Festool got me very close to a jointed edge, but it obviously needed more work before it was ready for a glue-up. That left me trying to figure out how to best joint them. The obvious solution was to clamp the slabs to a workbench. But what do you do when your workbench is in the workshop in the basement and your incredibly large and unwieldy planks are in the garage? You improvise, of course!

Ingenuity at its finest…
I grabbed one of the large reclaimed pine beams that will, at some point, be used for a new workbench and brought it out to the garage. I clamped it onto one end of the sawhorses and put an old milk crate (“old” as in strong and sturdy, the kind a college student in the 1990’s might somehow end up with before you could buy cheap ones at Walmart) on the ground between them. Then I lifted the plank up (a bit lighter after some wood removal and some additional drying in my kiln-like garage), rested it on the crate, and clamped it to the beam. The other plank ensured I had enough weight on the sawhorses that nothing moved easily and it kept everything from tipping over.
It worked quite well, I have to admit. I was able to use my recently-refurbished Type 9 No. 7 (a topic for another post) to get it incredibly close. I was so pleased to be able to get this level of accuracy across eight and a half feet of 6/4 walnut!
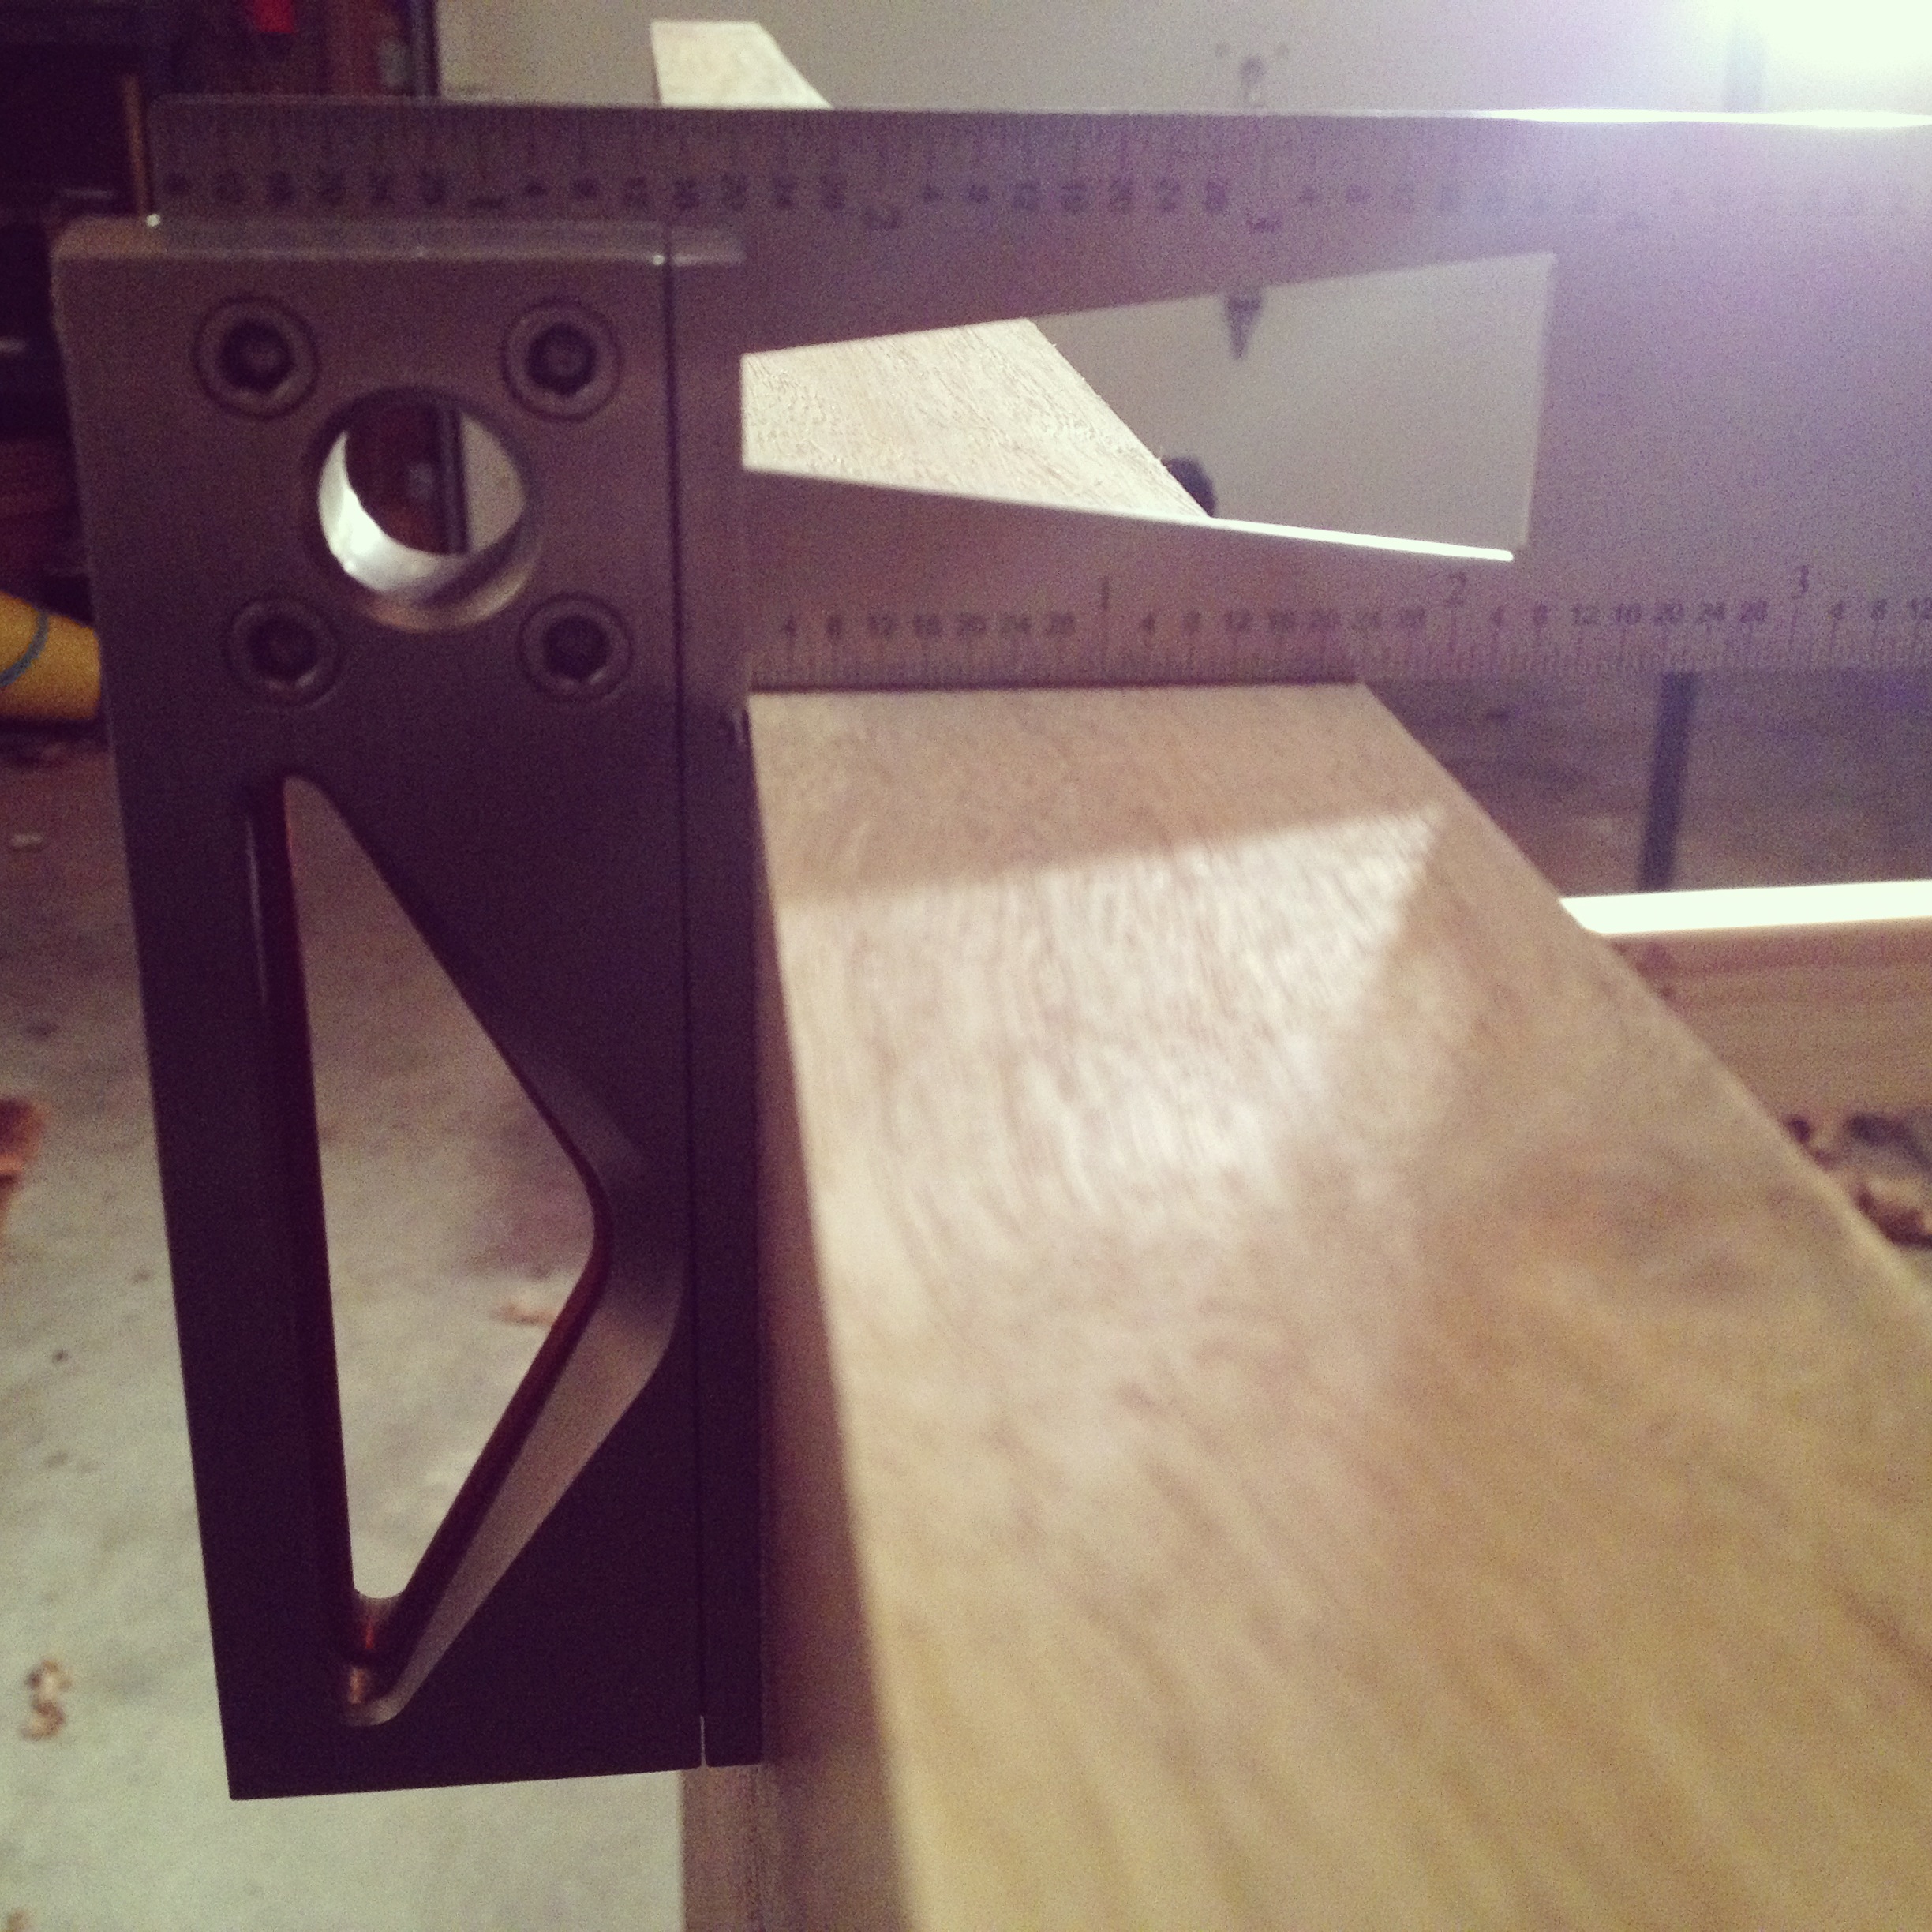
Checking for gaps with the most accurate square I own.
The final finessing of the joint would be done with a well-tuned and sharpened block plane while the planks were flat and I could easily push them together to check my progress. Obviously, this joint needed to be executed well, so I spent several hours getting it just right.
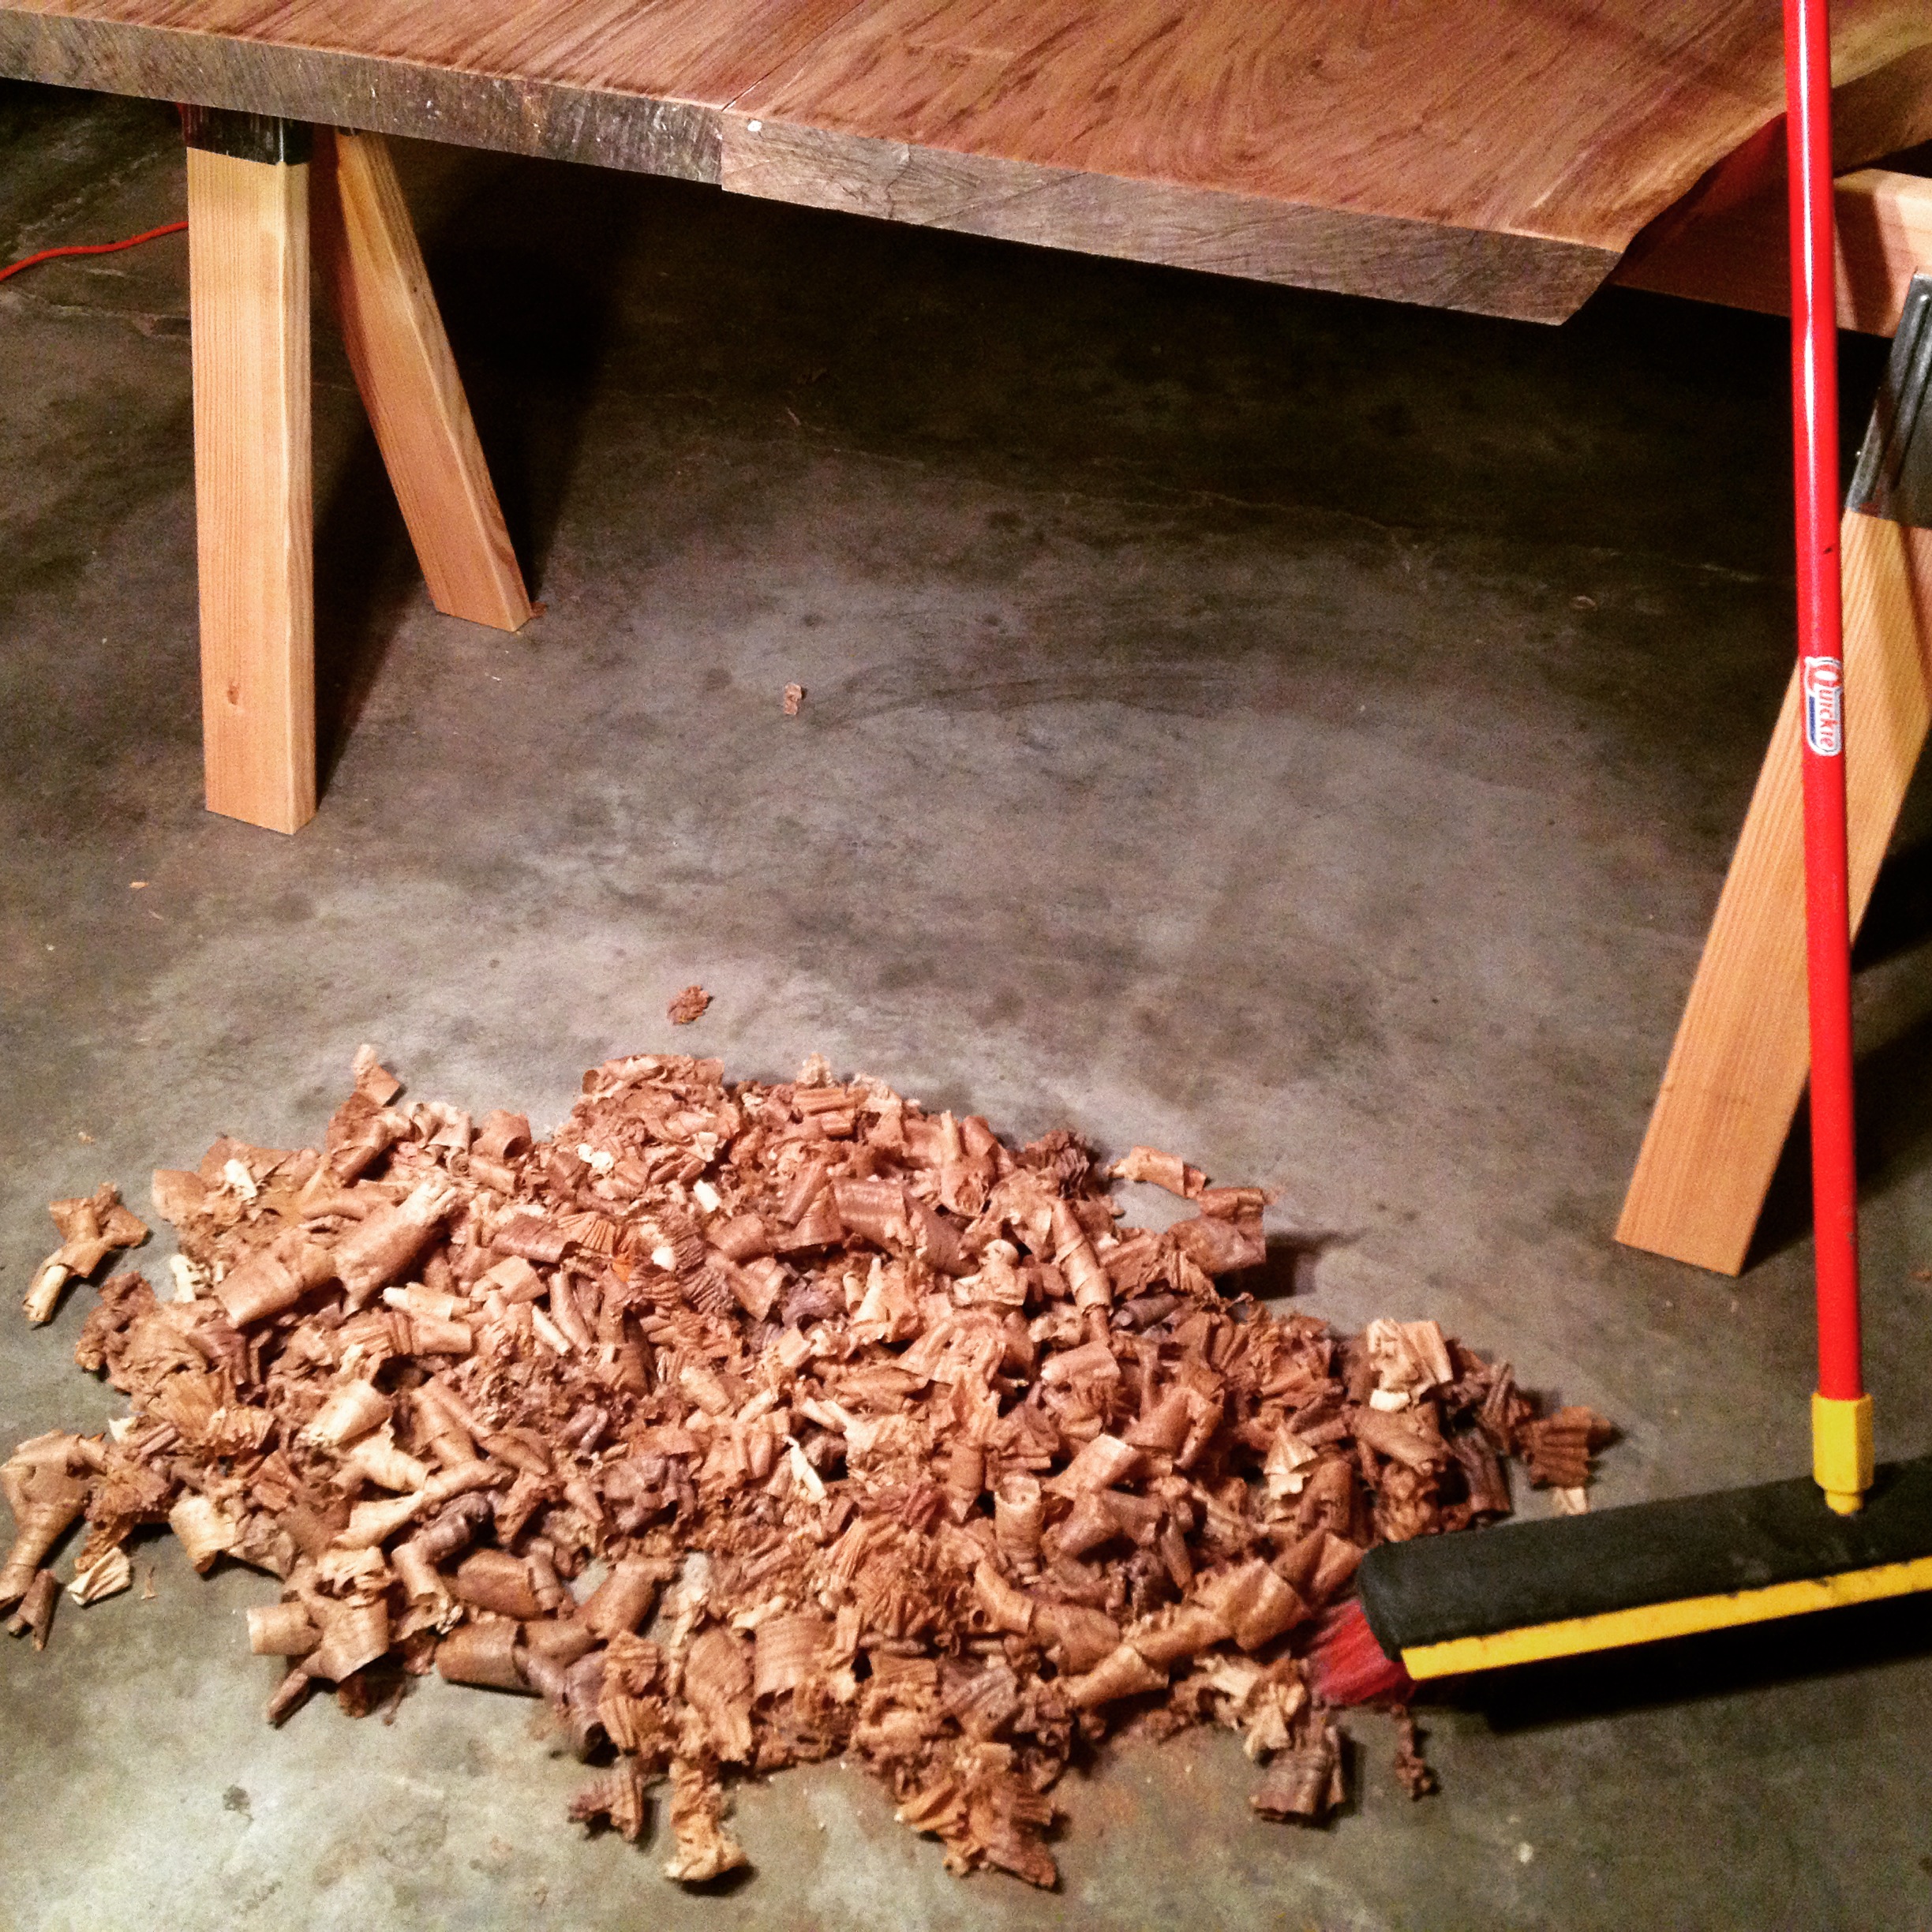
Edge-jointing shavings…
I’ve never had so many savings from jointing two boards; this is more like the volume of shavings I have after surfacing the boards for a box!
It wasn’t yet time for glue, though. I wanted to do as much work on the two planks while they were still separate because they were easier to maneuver. So at this point I began working the live edges.
After doing a bit of studying and research on live edge tables, I’ve come to the conclusion that they should really be called “lie” edge tables. The live edge you see on a finished table is rarely how the edge really looked when the tree was cut down. In this case, I had some really sharp spikes that were hidden under the bark where new branches were forming and part of one side came to a fragile, almost knife-like edge for several feet. I couldn’t leave it as-is because it was prone to breaking and was even kind of sharp. So I pulled out a variety of tools – some drawknives and spokeshaves – and went to work on making my own live edges.

The tools used to create the lie…
After a bit of trial and error, and a lot of work, I ended up with live edges that still looked “real” without having edges that could slice an arm or stab someone in the chest. I also (brilliantly) took the opportunity to create several areas that were close to 90 degrees so I would have places to put my clamps during the glue-up.

It’s just a little white lie…
In the next part, I’ll cover knot stabilization and the glue-up.

