Auxiliary Fence For The Record 043 Plow Plane

Record 043 avec curls of shavings but sans fence…
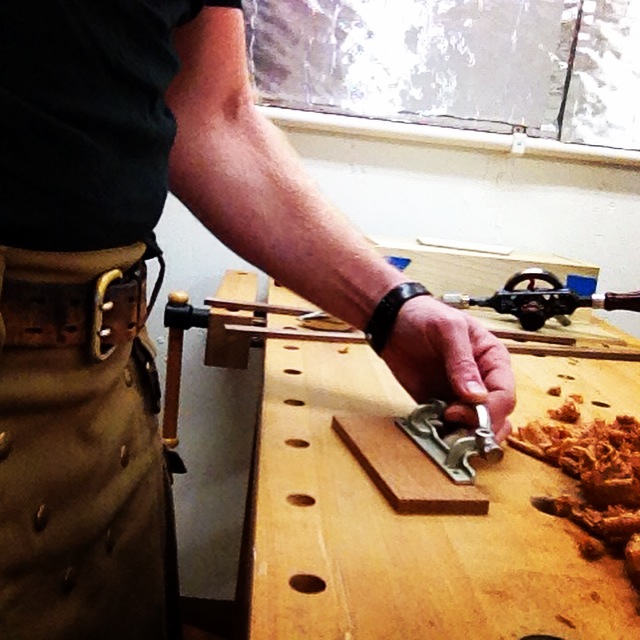
I recently spent some time upgrading one of my Record 043 plow planes. Don’t get me wrong, it worked quite well the way it was. But I thought I might improve its function just a bit by adding an auxiliary fence so it had more surface to register off of when I’m plowing grooves.
Ideas form more quickly when I have materials in hand.
After some thought and careful consideration, I decided to use mahogany for the fence. But that didn’t completely narrow it down for me, unfortunately. First I grabbed a piece of what I thought was Honduran mahogany. But as I played around with it, and then planed a bit of it, I quickly realized it was Spanish Cedar (neither Spanish nor cedar, as I like to say). Though I love working with it, and it was nice quartersawn wood, it’s probably too soft for a fence, so I couldn’t really consider it.
Still, I thought it might be fun to make some comparisons, so I kept the Spanish Cedar (SC) on the bench and grabbed a bit of my Cuban Mahogany (CM) and a (real) piece of Honduran Mahogany (HM). To be fair, I tried to select quartersawn stock for all three pieces. I should note, however, that the SC and HM were probably harvested relatively recently, say within the last five years, while the CM is reclaimed lumber from a connection I have in Puerto Rico and more likely around 50 years old by their estimates.
From left to right: QS Spanish Cedar, QS Cuban Mahogany, and QS Honduran Mahogany.
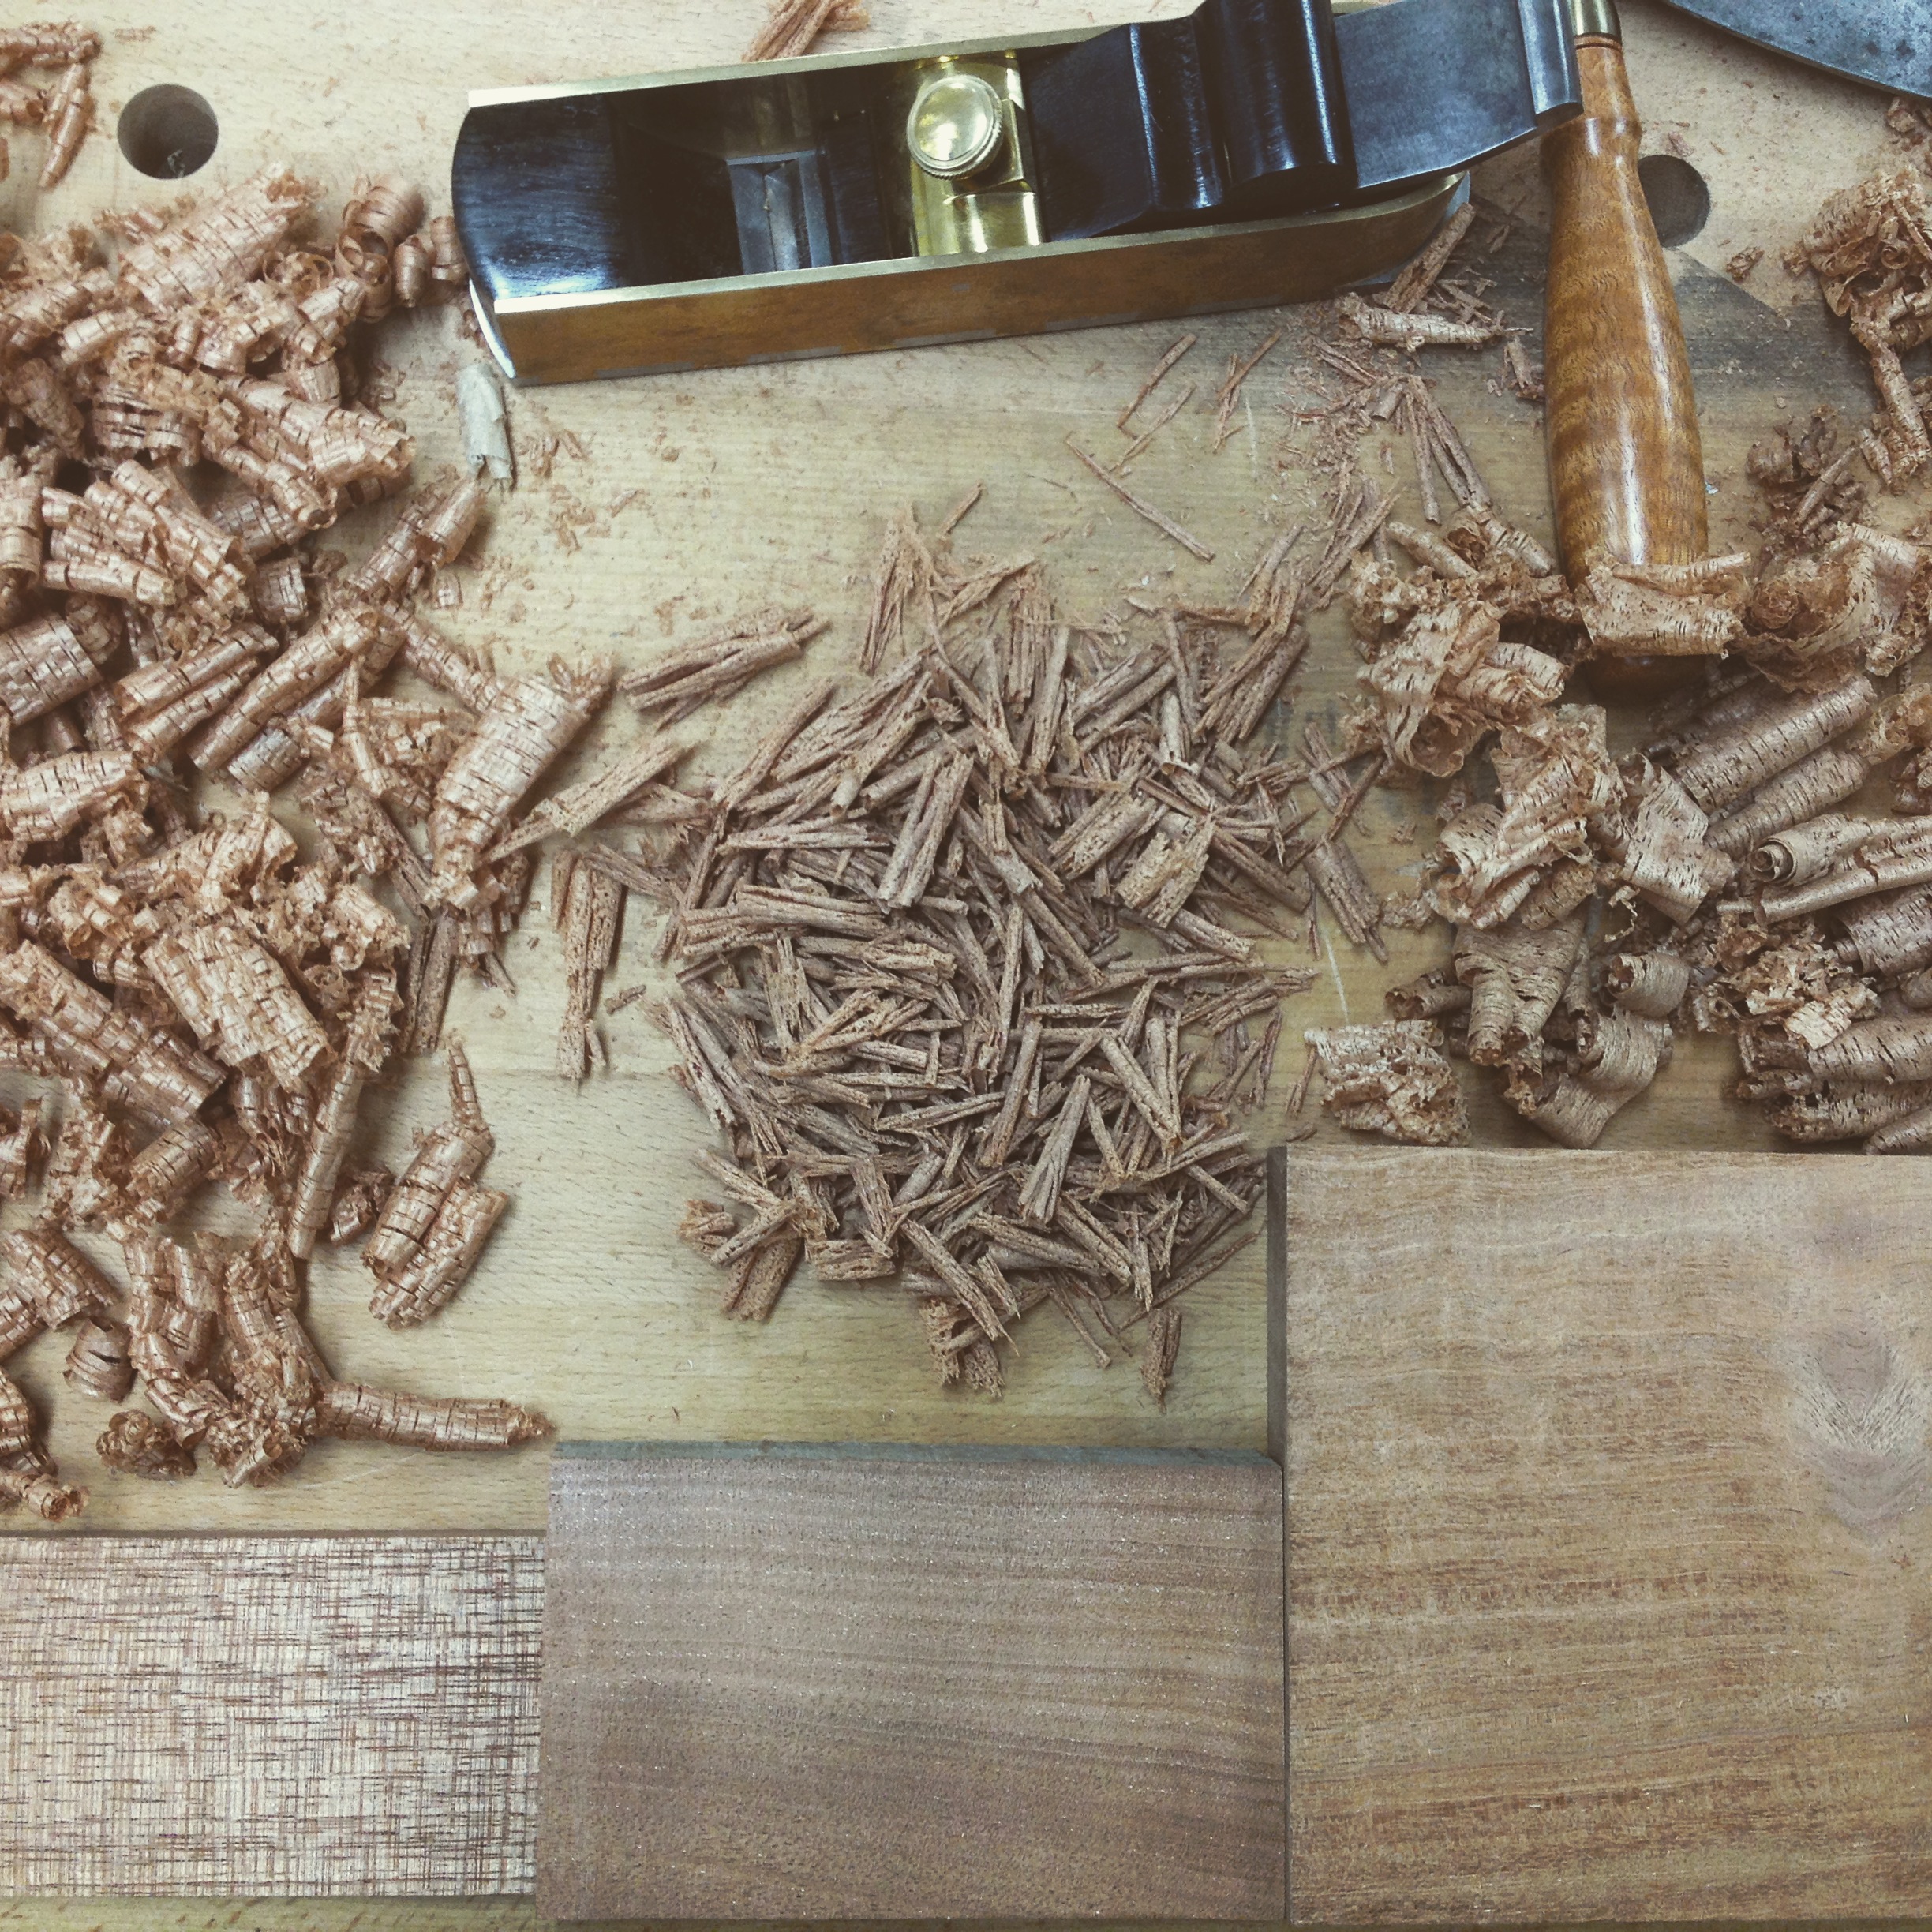
I prepared each of the pieces of stock with the same plane. It was interesting to note the differences in the wood shavings, considering they are all quartersawn wood in the mahogany family. Most notable was the difficulty I had in taking shavings in the CM; it definitely has a denser, tighter grain structure than the other two.
I finally decided on the Cuban Mahogany and went to work, cutting it to the desired size and thickness. I did use the bandsaw to rip the wood as it was 10x faster and more accurate than I am at ripping at this point; if it wasn’t the Cuban Mahogany, I would have tried it by hand, but my stock of that material is limited, so I don’t mess around with it.
Unfortunately, time got away from me and I sort of forgot to do much by way of “in progress” pictures, though I did take the time to gather up all of the tools I used. Amazing how many tools it takes to complete such a simple addition, isn’t it?

The tools of the project…
After letting it sit for a day or two, I realized I wasn’t really done with it.

Fence finished… or maybe not.
I decided that any time I make something myself like this, I need to personalize it. So I thought I would inlay a little bit of something into the inside face.
I cut thin slices of pure white holly and wonderfully scented West Indies Satinwood (also from my source in Puerto Rico, incidentally) and made a little clover inlay.
Amateur Tip: If you’re working with an unusual shape, try inlaying that shape into something regular first; then when you’re inlaying the piece into your work, it is a more straight-forward process. If you mess up the initial part of the process, you’re just out the thin bit of inlay and you don’t also have to try and correct the error in the project.

Preparing the inlay…
The little black-handled tool at the bottom of the picture is one of my great $1 purchases at some estate sale. It is stamped “Genuine Ebony” on the handle and I have to assume the blade was larger at some point. It holds a great edge and is perfect for incising where I need both precision and strength. Hopefully I’ll get several more years of use out of it before it sharpens away to nothing…
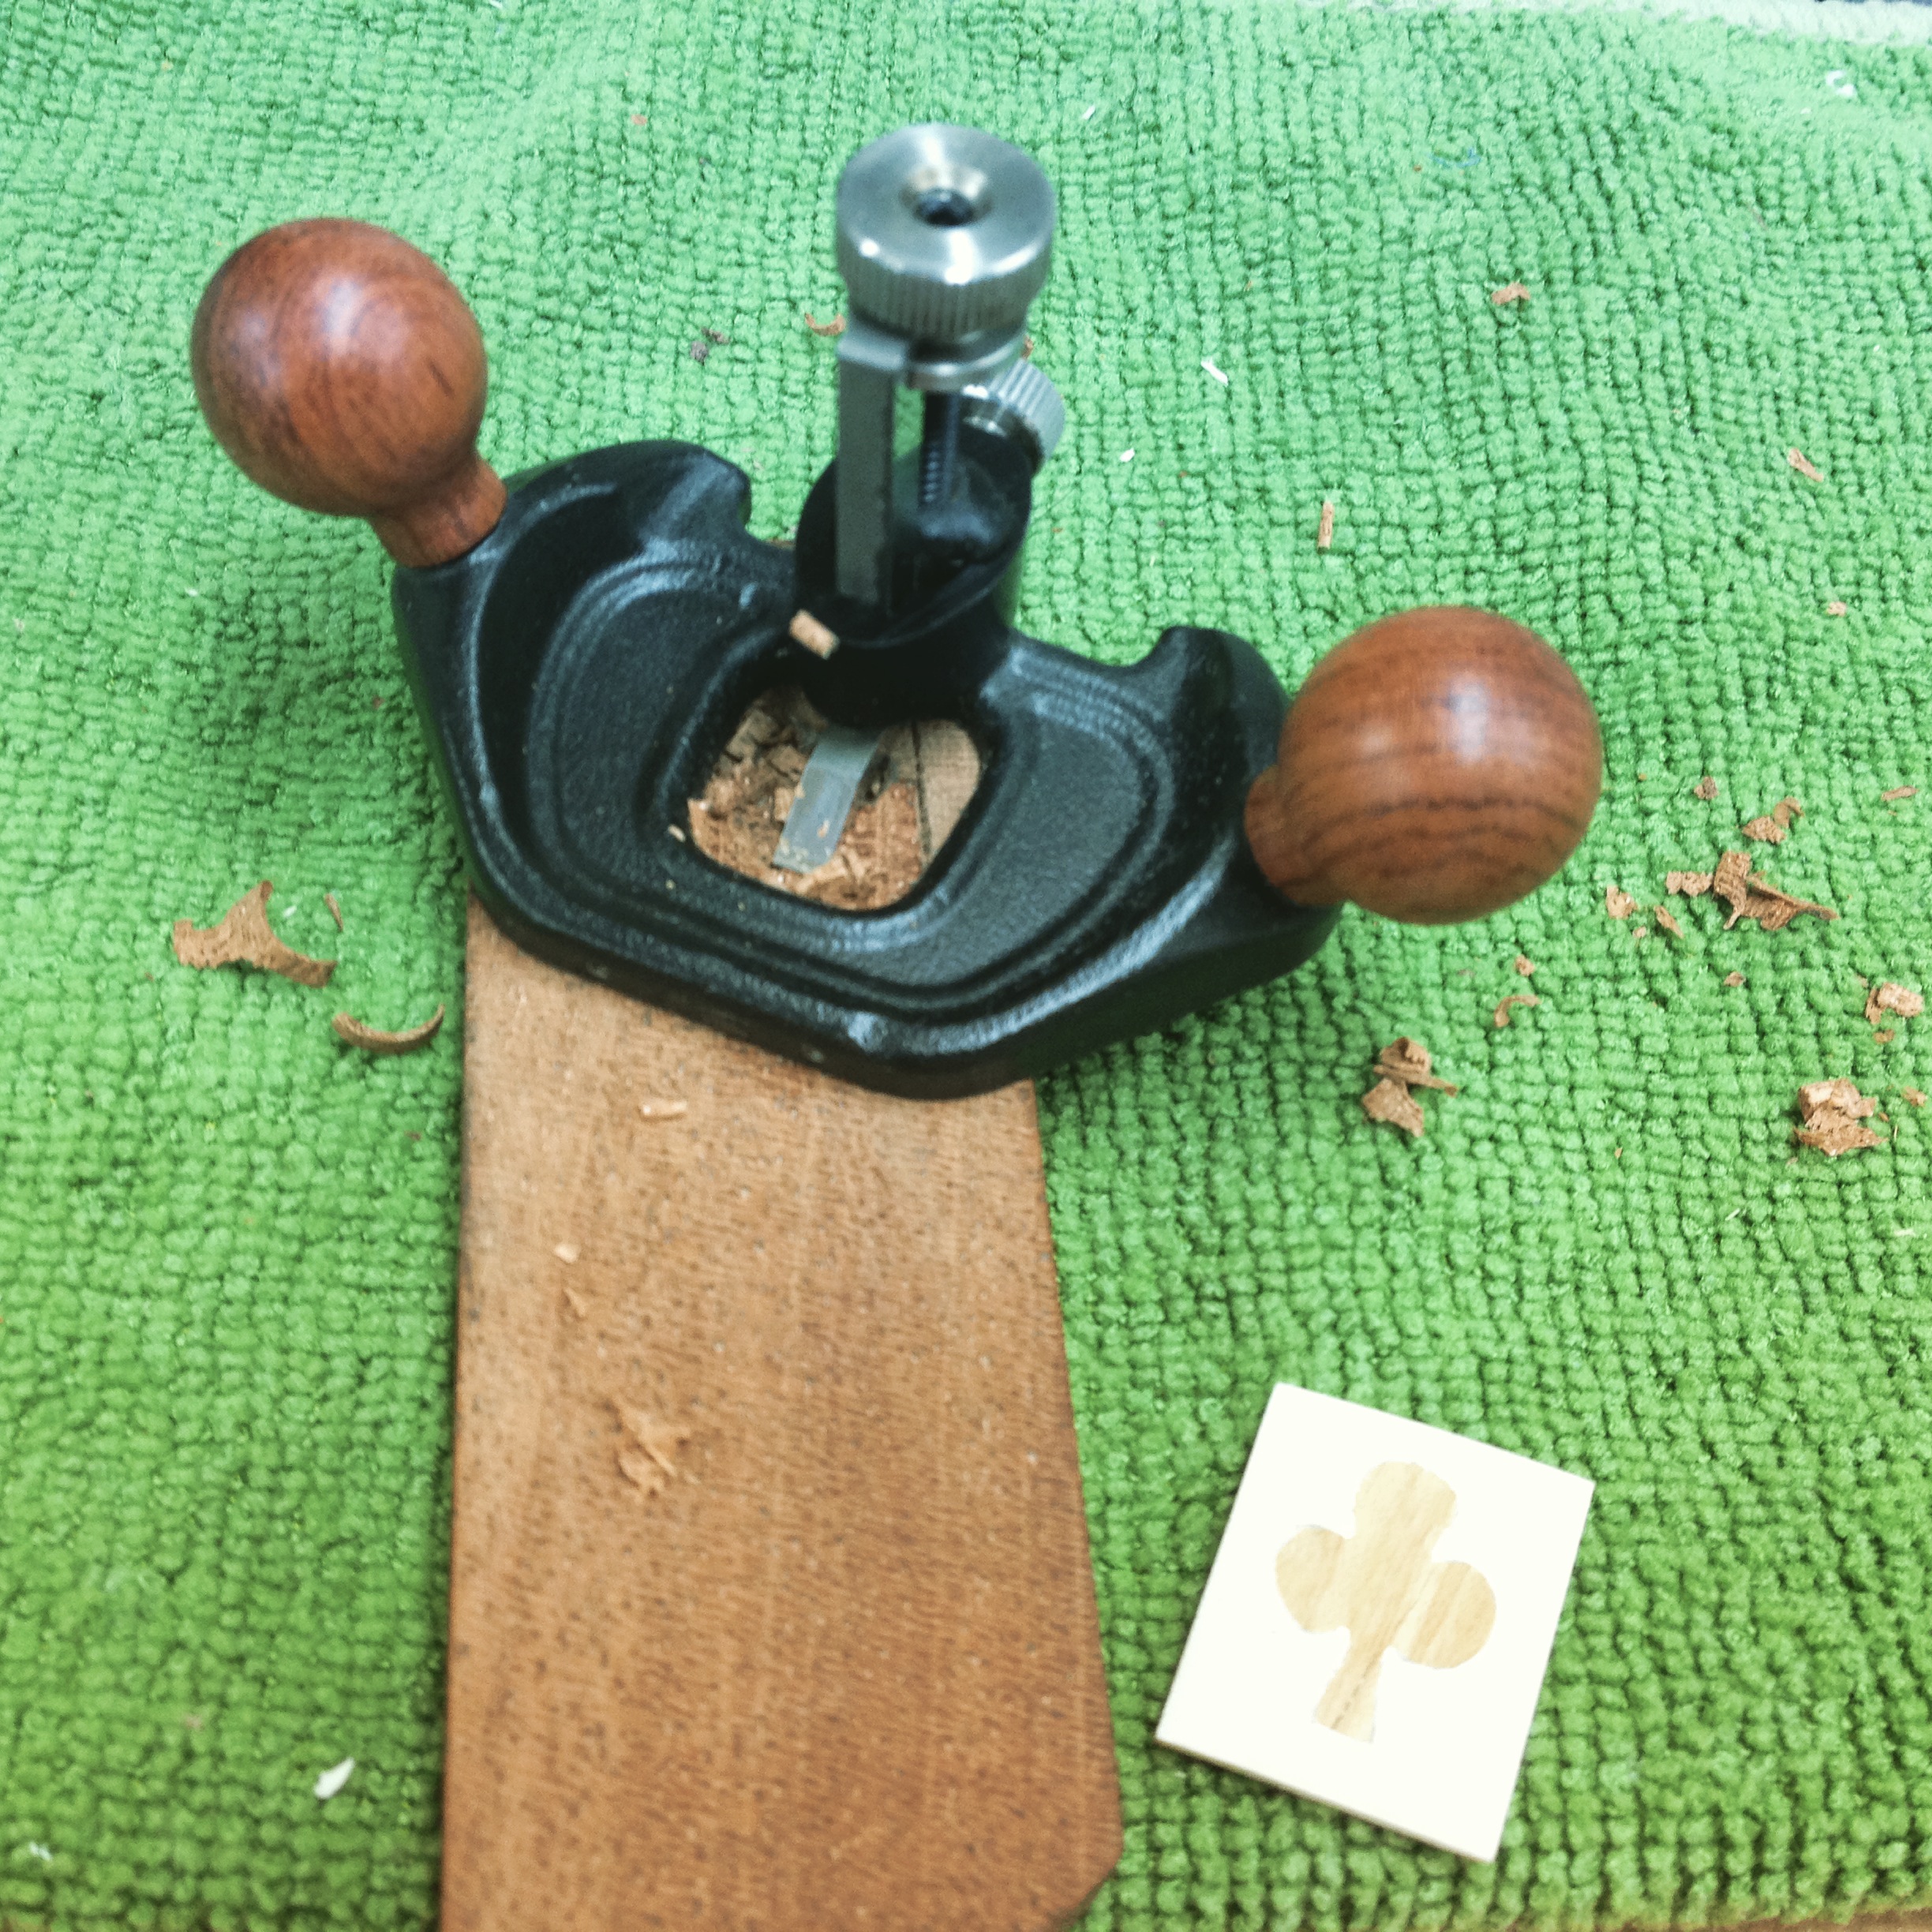
The Veritas micro-router sees some action on the green…
I sometimes use microfiber cloths as a base when I’m working with small pieces. I found the cloth “sticks” to my bench top quite readily and the small piece of wood I’m working on “sticks” to the cloth just as readily. The only problem is that wood chips stick to it, as well. Haven’t figured that one out yet. Anyway, I used my Veritas micro-router (it’s more than a gimmicky stocking stuffer!) to remove most of the waste, then tidied up with my small ebony-handled umm… micro-knife.

Not all glue-ups are stressful.
Glue-ups are always really stressful, aren’t they? Well… not really, when it’s just one little rectangle of inlay in a block of wood no bigger than a notecard. Honestly, it was fun. A while ago, I finished a project and had several long strips of walnut left over. I cut them into smaller pieces and added some PSA cork to one face. I keep them in a coffee can near the bench and pull them out when I’m clamping for a glue-up or when I’m putting something between bench vise and bench dog and don’t want little grid marks in the end grain. Very handy, although I have a huge roll of PSA cork I had to store somewhere because I couldn’t find it in anything but a large3’x5’ sheet.
After setting my clamp-up monstrosity aside “for 24 hours to cook” (never understood that phrase… I’ve never cooked anything for 24 hours, and I make most of the meals in our house), I unclamped it and used a block plane to level the inlay. You don’t want to sand holly, if at all possible, when it is inlaid in darker wood. The sanding dust from the darker wood will muddy up the holly and you’ll be properly chuffed by the whole ordeal.
Leveling the inlay…
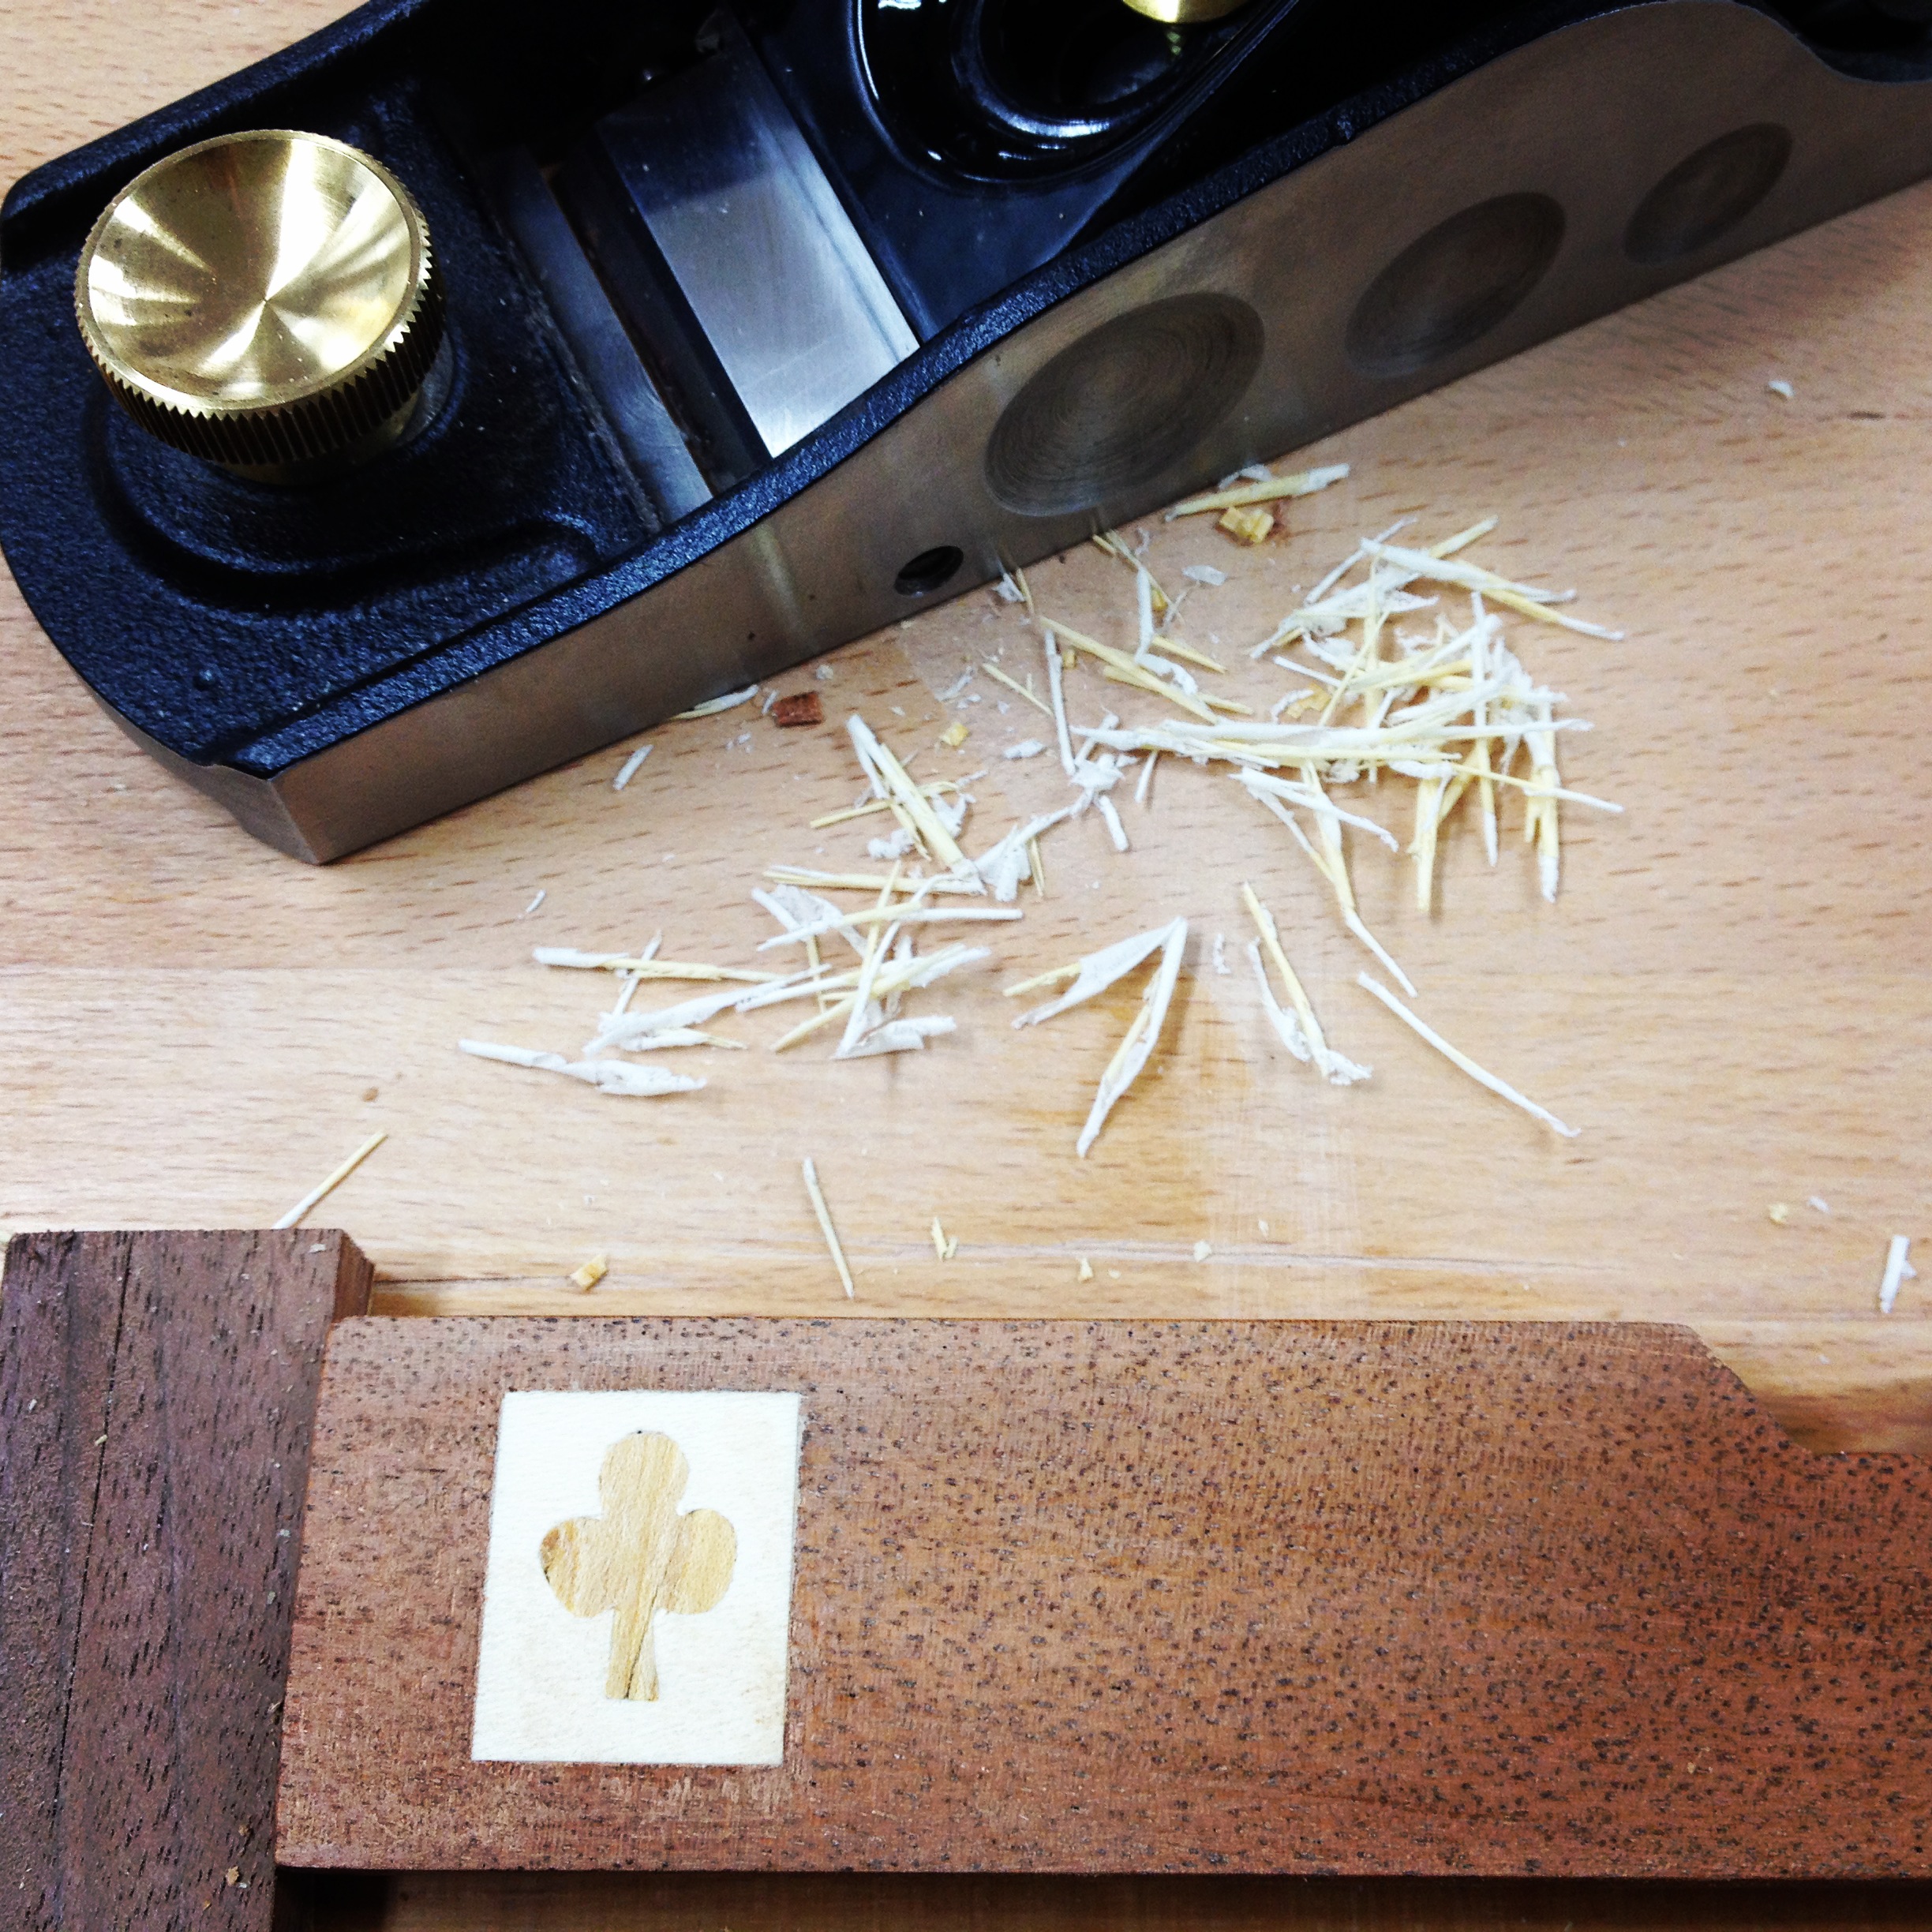
Assuming the fence is going to see some wear (it is a fence on a plow plane, after all), I didn’t put any petroleum distillate finish on it, like I have on the rest of it (gunstock oil). Instead, I opted for the polissoir and some bees wax. I think the end result looks rather smart.

The completed inlay…
In fact, I liked the end result so much, I decided to put auxiliary fences on three other planes in my shop. One of them, my Veritas Skewed Rebate plane, got completed in short order because I happened to have a nice piece of Rosewood with some sapwood in it I wanted to use.

Two down, two to go!
The other two, a second Record 043 and a Record 044, stalled a bit at wood selection, then another project came up on my radar and they got sidelined temporarily. But I’ll get to them soon enough. Hopefully I’ll remember to photograph the process a bit more for you.
TKW


I like the tip about the polissoir and wax for the fence. I’ll be trying it out on my 043.
LikeLike
Yeah, I think burnishing it and waxing it are two things that will aid in reducing friction. Honestly, I’m not worried about wear on the fence because that QS Cuban mahogany is really tough on the face side.
LikeLike