A Momentary Lapse of Anarchy

Old Craftsman Miter Box and Saw
Damn.
Just when I thought I had this old tool habit kicked, via the ATC, I happened upon a Craig’s List ad for an old Craftsman miter box for $18. (Ok, so I guess I hadn’t totally kicked it as I was searching CL for miter boxes at the time… and if I type in “ww” into my web browser address bar, the first thing to come up is “www.ebay.com”.) The box itself didn’t catch my attention (right away), but the crisp handle on the backsaw that came with it did.
After the wife and son went down for their afternoon naps, I made a quick phone call and got some driving instructions, hopped into the car, and drove 45 minutes to see a man about a box. When I got there, it was everything I’d hoped it was, so I gave the elderly man a twenty dollar bill and made my way back home.
In the basement, I extracted the saw from the miter box and gave it a quick look-over. As previously mentioned, the tote was in near perfect shape, structurally. It didn’t have so much as a chip or crack to speak of. But it was covered in grease and oil and only some of the original film finish. It was a Disston, and the medallion came from the 1896-1917 era. The shape of the tote backs up the medallion, so it all appears to be original. The only physical fault is that it was missing one half of one of the saw nuts (the slotted half). It wasn’t broken; just missing. The 14″ backsaw has about 3 1/2″ of depth left under the back, so there is plenty of life left in it. I’m in the process of cleaning it up; I’ll post more pictures when it is done.
On to the miter box…

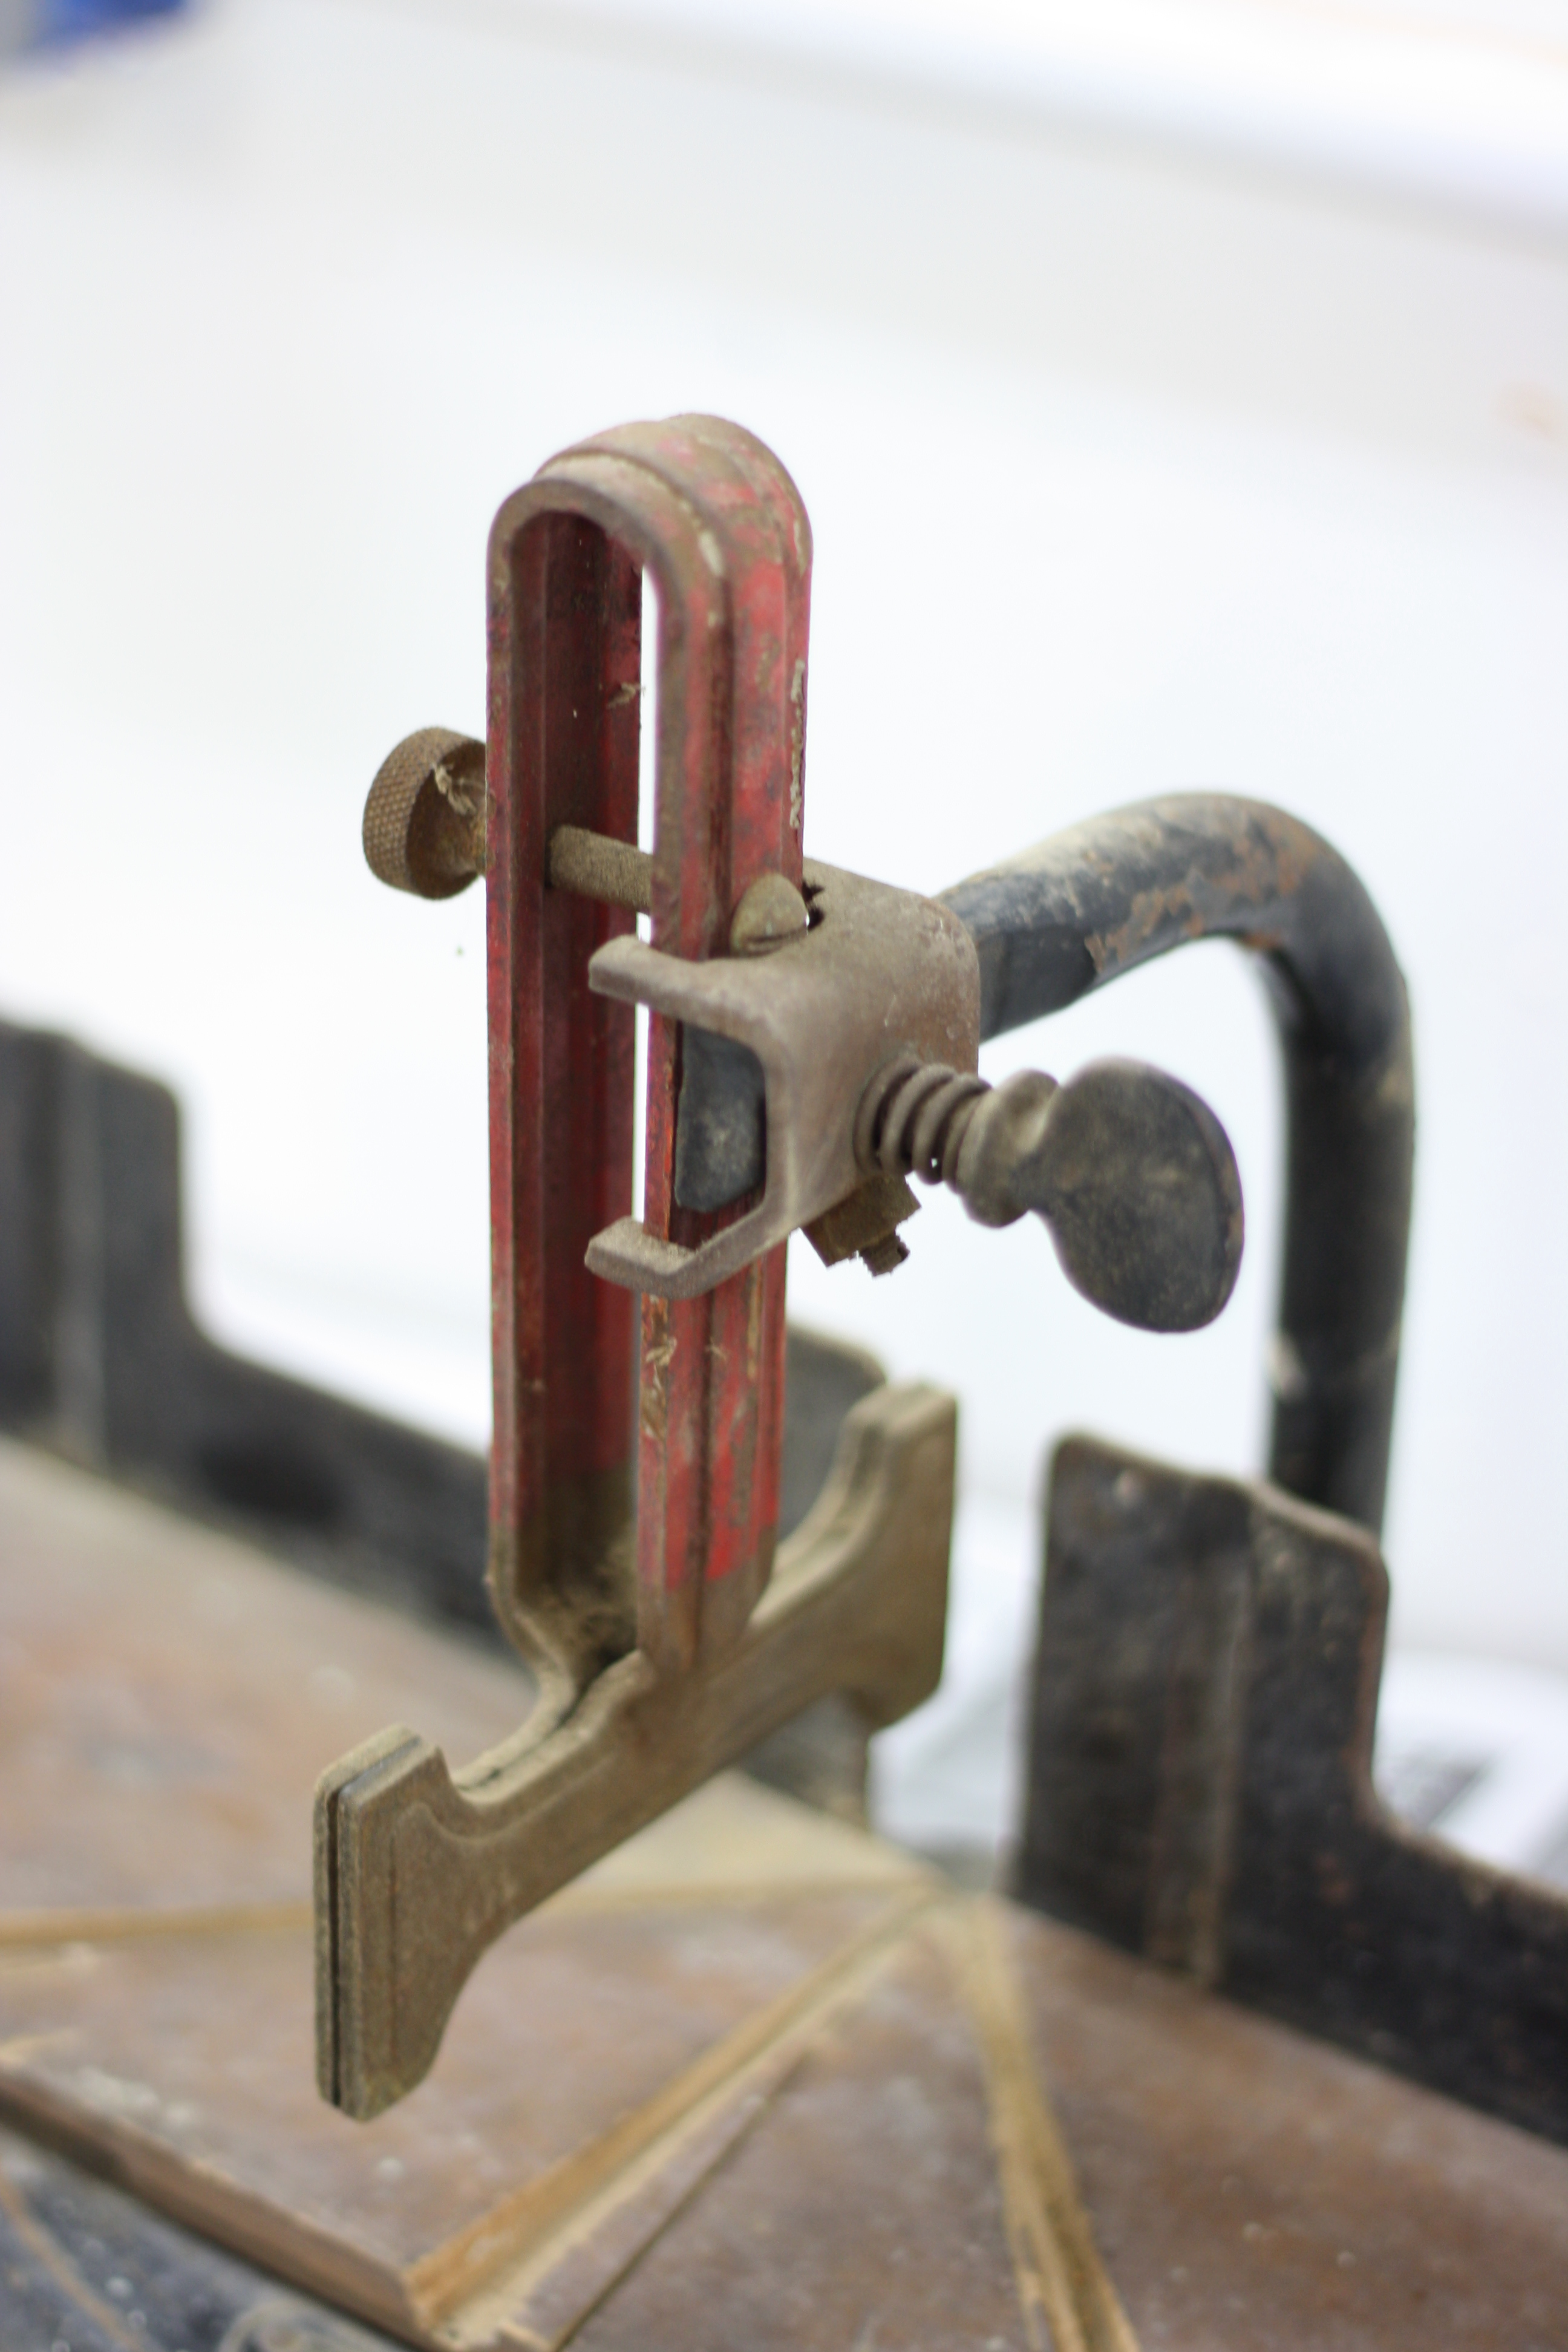
Detail Of Angle Set Mechanism
I set the saw aside and turned my attention to the miter box. As the plate in the front says, it is a Craftsman 3646 Miter Box. Apparently my Google-Fu is rusty, because I couldn’t find much at all on this model on the interwebz. It is similar in style to the Stanley 150 in that it guides the saw by clamping the blade into position. Height is adjusted by loosening the bracket at the end of the clamp arm and raising or lowering the clamping mechanism.
I have two miter boxes in the basement already, so one wonders why I needed a third one. I’ll tell you. The first one, a Stanley 358A, is the one I currently use. It is in OK condition and the saw is sharp. But it is somewhat newer (per the tote shape and medallion – I should look those up for a specific range some time) and not the most pleasing to my discerning eye (so I’m a tool snob; sue me). The other is a Millers Falls Langdon Acme Miter Box, Size 2, No. 73, with the original saw with a nice apple wood tote. That’s more my style, but it needs some restoration work before I can put it to use. My biggest hang-up with these two boxes is the hydraulic mechanism that maintains the saw height. I just don’t know what I should or shouldn’t do to clean them up and make them run more smoothly, and they both need work on this specific part.
Detail Of Saw Guide
My solution to this is a non-selfish one. Our local woodworking guild is always looking for new mini workshop ideas – things that just a few guild members can do on a Saturday and/or Sunday at a minimal cost. I figured I could donate the Stanley to the guild workshop for everyone to use and see if one of the guild members would be willing to teach a mini workshop on restoring that style of miter box. Surely there are a few guild members who have one of these that could use some tuning up!
Anyway, when I saw a miter box that was styled more like the old Stanley 150, I thought it might be a chance to get a miter box on the cheap that I could fix up on my own and put right to work.
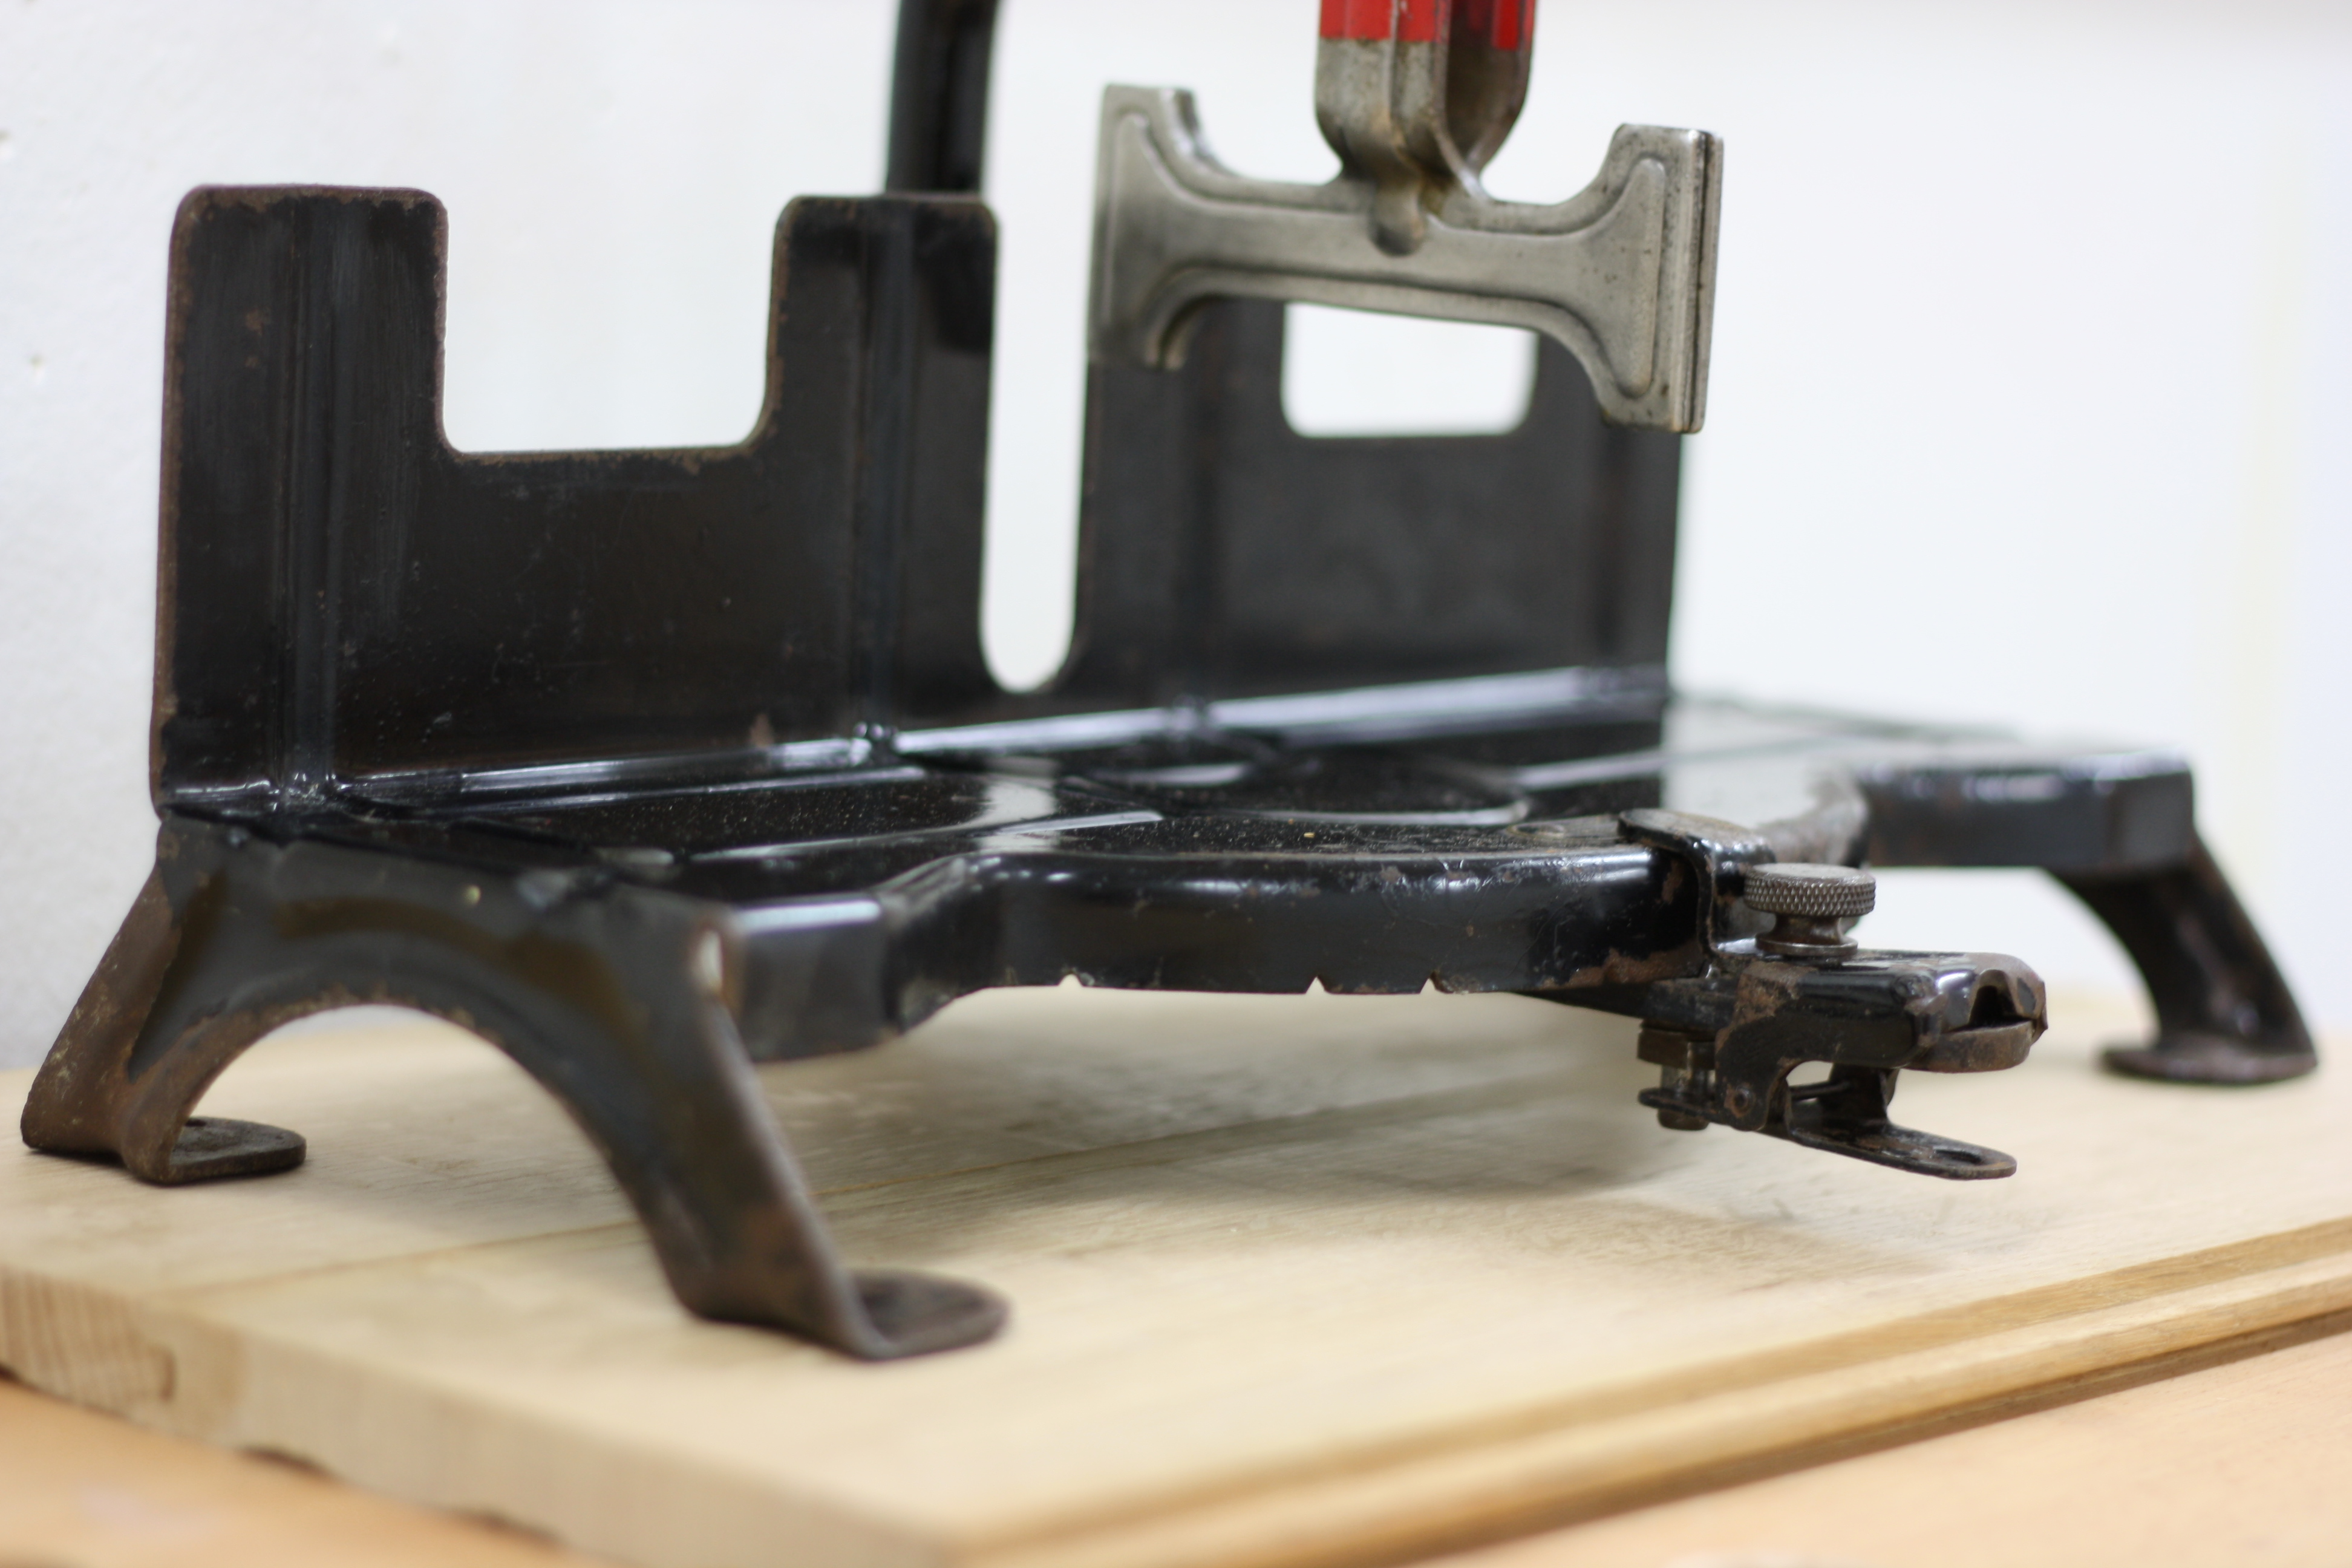
After I removed the sacrificial deck and gave it a quick once-over, I realized it really wasn’t in bad condition. Originally, I’d been thinking I would have to have it sandblasted to bare metal and then repaint it. But it had more than 85% of the japanning left on it, so I felt a gentle cleaning would be the prudent choice.
Detail Of Angle Set After Cleaning
I grabbed a cardboard flat (really, the lid to a paper box from work) and started taking pictures and dismantling the miter box, putting any small pieces in the flat. After it was mostly broken down (I left the arm that holds the saw guide attached because it worked smoothly – why mess with a good thing?), I soaked everything in degreaser and attacked it with green Scotchbright pads. Then I took a wire wheel to the bare metal parts to remove difficult grime and rust. Finally, it all (bare metal and japanned metal) got a nice coat of Renaissance Wax before re-assembly.

Detail Of Saw Guide After Cleaning
By the way… the saw was definitely not original to the box; I don’t believe this miter box came with a saw, in fact. So the old Disston backsaw is just a bonus. But that meant I needed a miter saw to go with this. This seems like a good way to spend some of the money I got from selling that Escher hone the other week…
Enter Mark Harrell, owner of Bad Axe Tool Works.
Mark is going to put together for me a vrry nice 20” Bad Axe miter saw. And, since I have discerning tool tastes and a flair for the dramatic, I have a little surprise for the tote. I don’t want to say more now, so I guess you’ll just have to wait and see. I will guarantee it is something you’ve not seen before, but I think it will look nice.
(A quick thanks to my new interfriend, Alan, over in the UK, for his help on this last part.)
Oh, and I just realized I never got the chance to get down into the shop this weekend and work up a new sacrificial board for it. I’ll try to get that done this week, once I decide which species to use. I have some nice quartersawn oak scrap a friend of mine had left over from a flooring job; I was thinking that might look nice, but it would take a little work to plane the underside to remove the grooves and make it the desired 1/2″ thickness. Or I could more easily use a small off-cut of mahogany from my last box project. It is nice to find a good use for those short pieces you have a hard time throwing away…

Miter Box After Gentle Restoration
A Polissoir Poulet No More!
 Back in September of last year, Chris Schwarz blogged about his introduction to the polissoir, a French polishing tool described by Andre Roubo in his book, “L’Art du Menuisier”, at Don Williams’ home in the mountains of Virginia. There, Don demonstrated how this relatively small bundle of broom straw can be used to burnish raw wood or, with a little more prep work, fill grain in open-pored wood. I was immediately drawn to the idea of such an environmentally friendly finishing technique, so I contacted Don to see about ordering one. Obviously Don had never dealt with the Schwarz-Effect before; he expected a few dozen people to want one and, instead, received over 500 orders. I can only imagine the look he got when he asked a local artisan broom maker to make him 500 4” sections of broom handle.
I didn’t have to imagine for very long. When my polissoir arrived two months later, I opened the package in the kitchen in front of my wife.
Wife: Oh, that’s cute! Is that a little round box or something?
Me: Er… no, it’s just a 4” section of straw broom handle.
Wife: Was it free?
Me: No… I paid for it.
Wife: O.o
Oh. I bet THAT is the look he got.
 Wednesday evening, I had an opportunity to try the technique on a quick project and thus joined the ranks of active Polissoiristas! The project was a box, believe it or not, but not one of my normal presentation boxes. This was more of an “incentive” kind of thing.
I finally decided to sell that Light Green Escher hone I’d picked up a few months ago. One of my favorite things about listing something for sale on eBay is the description (i.e. the sales pitch) I get to write. I really get into it and who knows what kinds of subjects I’ll touch on in the process. For the Escher hone, one obvious item to mention was that the stone didn’t work well for me as a woodworker, since I’d only want to take a smoothing plane up to the 12,000 grit polish and the stone is only 1 3/4” wide while my smoothing plane blade is a full 2 3/8” wide.
 One of the bidders contacted me and said, “Hey, since you’re a woodworker, why don’t you make a box for the hone?” Well, I thought about it and figured if the hone goes for what I think it is going to go for, then the least I can do is make the lucky winner a storage box for their prized possession.
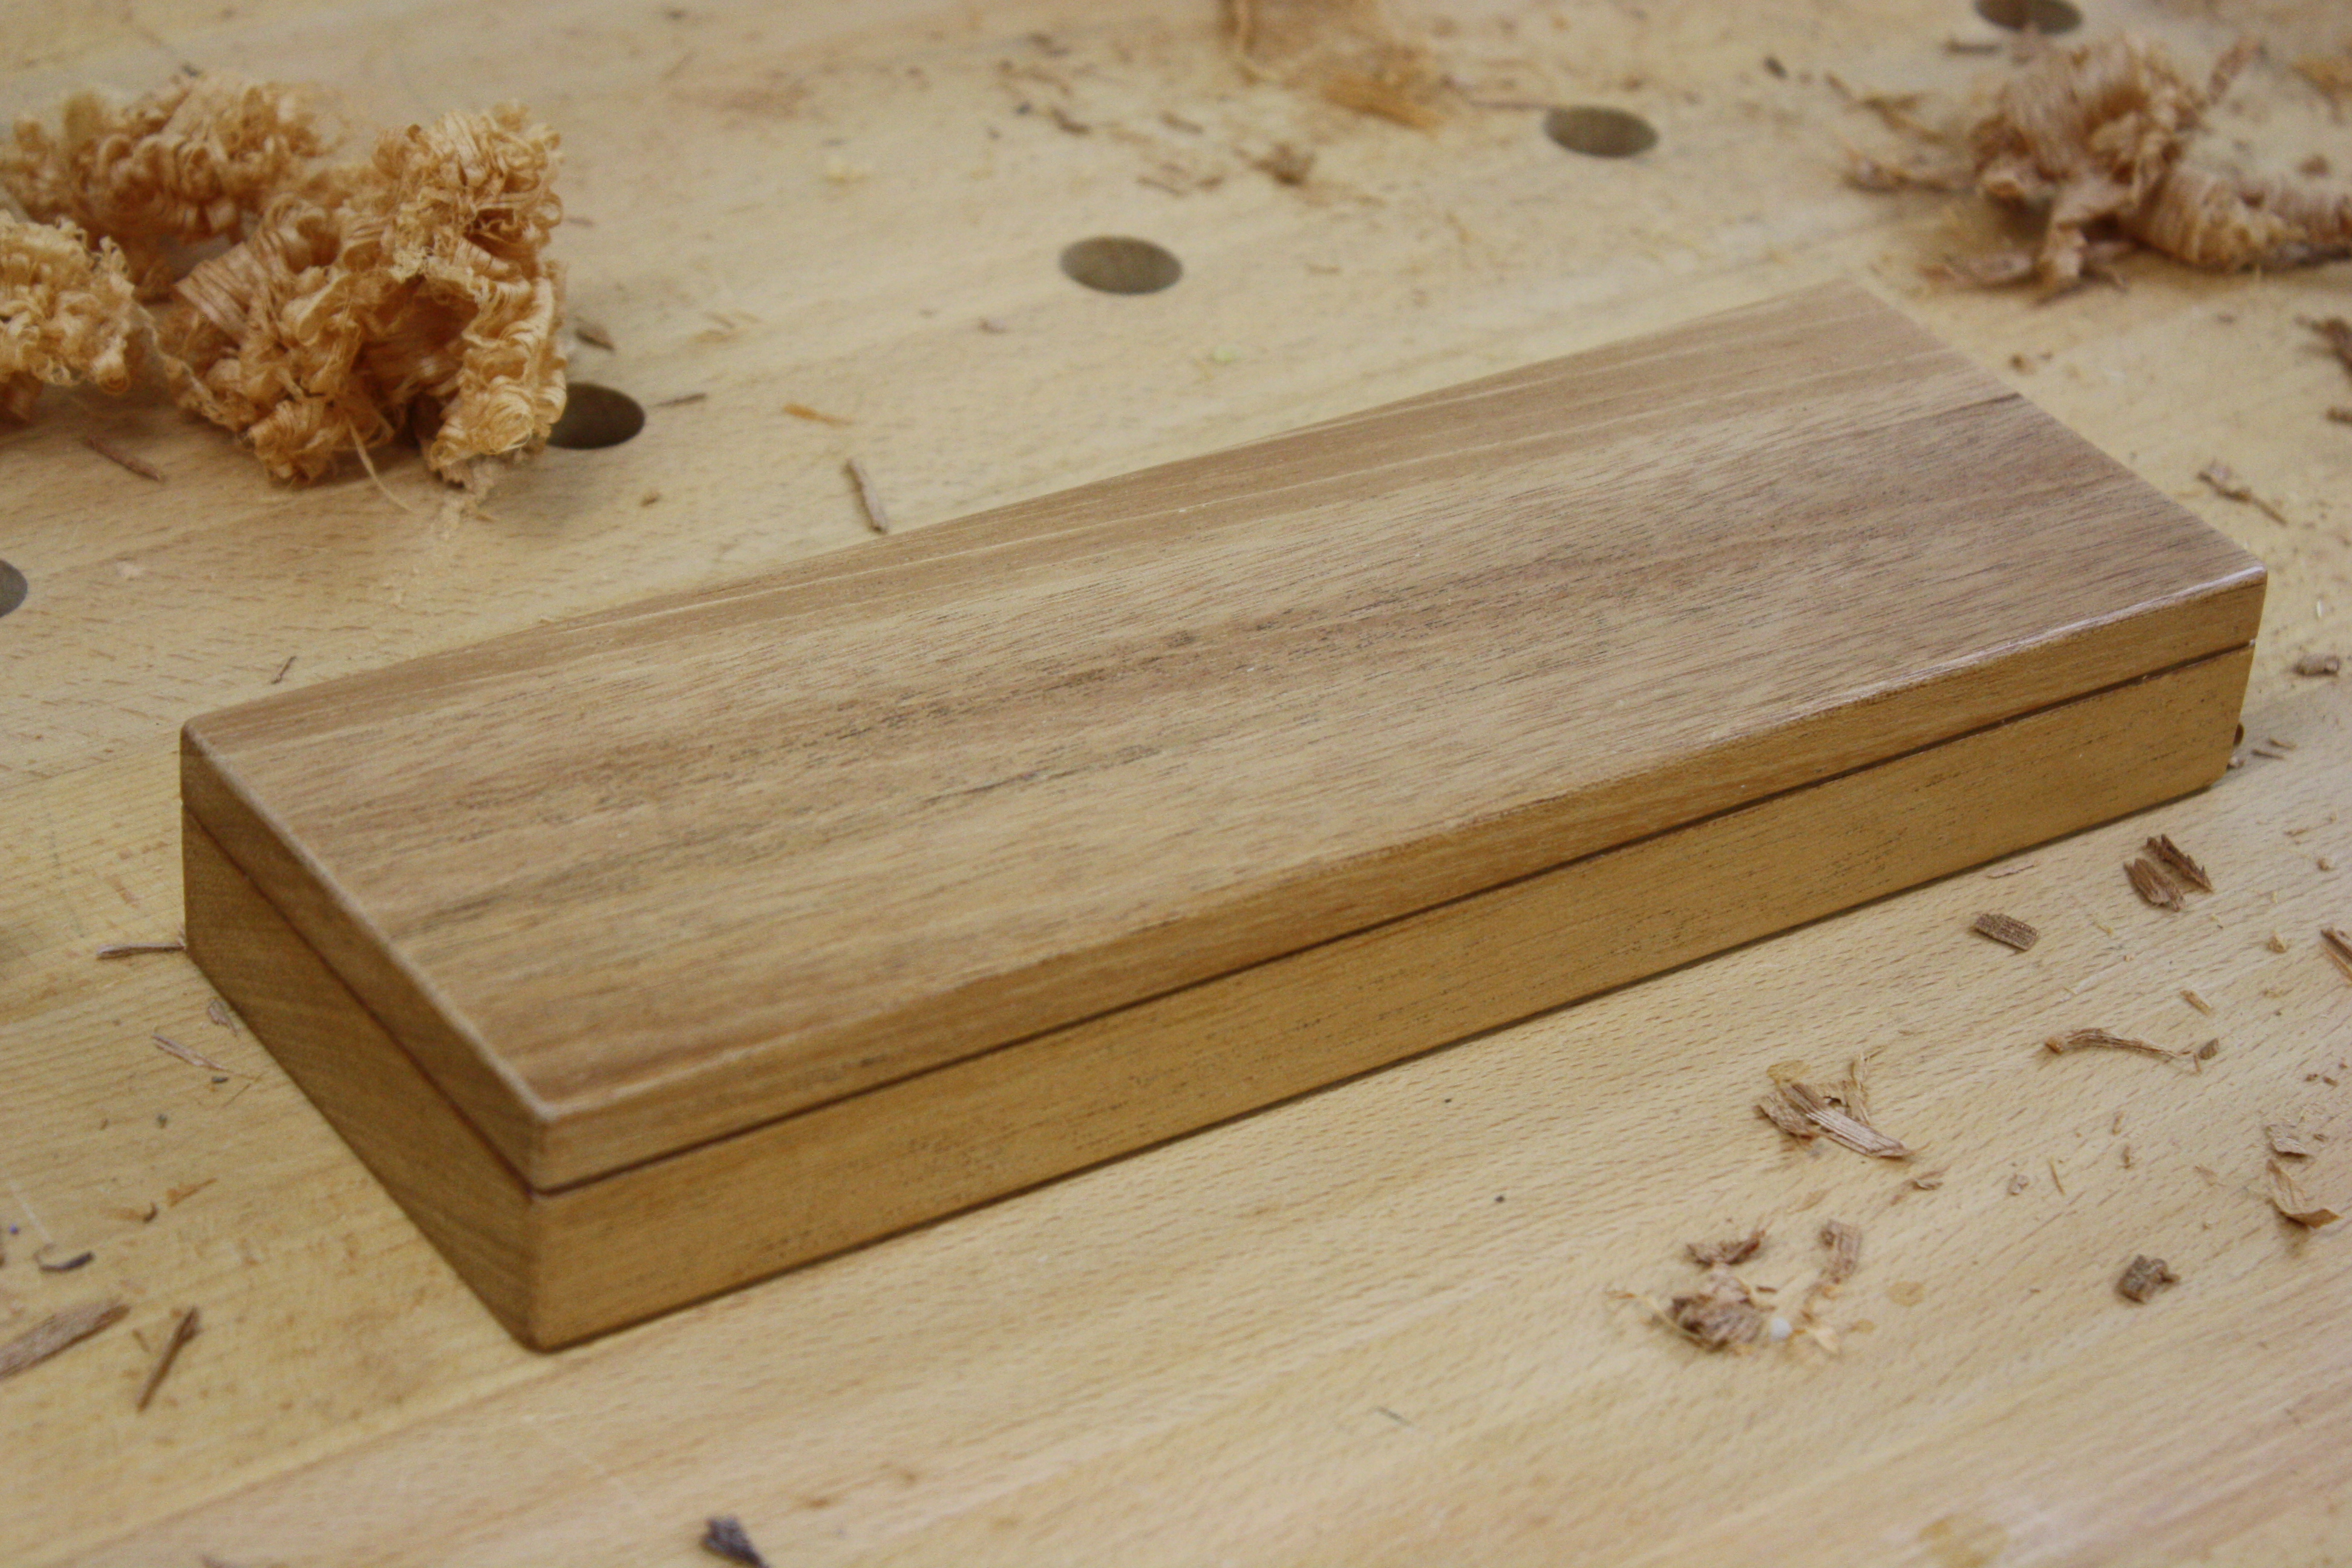
So I grabbed a few shorts of mahogany I had lying about, cut and planed them to size, and squared them up. Then I transferred a few quick measurements off the stone onto the two boards for the recess I’d put in them and took them to my drill press to hog out most of the waste. I cleaned up the edges with a sharp chisel and then used my #71 to level the bottoms nice and flat. After fitting a pair of inexpensive pressed hinges to the back, I removed them and grabbed my polissoir and a can of Renaissance wax.
 I know the technique calls for a harder wax, but this was all I had on hand at the time. I’ll pick up some bees wax in the near future, as soon as I can track down a generous bee keeper. In order to first break in my new polissoir, I grabbed a piece of scrap board, prepped the surface the same as the box surface, applied a generous amount of wax to it, then started rubbing vigorously with the polissoir. Not only did that help break it in, but it also helped me figure out what techniques worked and what didn’t work. After I felt confident enough, I used the same process on the box.
The end result? It doesn’t quite have the glossy sheen as the examples Don shows in his video, but I was pleasantly happy with what the combination of the Renaissance wax and the polissoir did to the wood. Plus, it was a fairly quick and easy finish, with no chance of runs or drips or blotching, and I don’t even have to worry about giving it time to cure before I pack it up to get shipped off to the lucky winner of a rare Escher hone.
I’m looking forward to the next project I can try my polissoir on. Although I’m happy with these first results, I also know I can get a better finish with a harder wax. But I’m also interested to hear what some of the other 499 Polissoiristas have to say about their experiences! Are you one of them? If so, chime in! Write something about it and let us know! If you have not yet used it, then grab a board and some wax and get to it! What do you have to be afraid of? Don’t be a polissoir poulet!
Upcoming Tool Auction – St. Charles, MO
If you live in the St. Louis area, you might want to block out a few hours on Saturday, February 2nd, to make your way over to the Lion’s Club in St. Charles, MO, for the 4th Annual Cabin Fever Antique Tool Auction. This auction, done by the Great Planes Trading Company, is the first in a series that contains pieces from a large collection out of Chicago, IL. There is a nice variety of bench planes, axes and hatchets, drawknives, plow planes, and rules (just listing things off from memory), among other things.
A working list of auction items, including photos, can be found HERE.
The auction takes place here:
Harvester Lion’s Club
4835 Central School Road
St. Charles, MO 63304
There is a preview early that morning, from 7 a.m. to 9:30 a.m. The auctioneers like to start selling promptly at 9:30, so plan accordingly.
Yours truly will probably be there; unfortunately, Finley has swimming lessons later in the morning, so I can’t stay for long. But I thought I’d pass the information along in case anyone else was interested in going.
Cheers,
TWK
Book Review: The New Traditional Woodworker

The New Traditional Woodworker
Book Review: The New Traditional Woodworker – From Tool Set to Skill Set to Mind Set
by Jim Tolpin
Is the hand tool focused shop just a fad? If we look ten years to the future, will we see SawStop table saws in the garage of every person who calls themselves a hobbyist woodworker? Will a deluge of antique and modern hand tools sit unsold on eBay and Craig’s List? Will corporations once again find themselves employing the hundreds of craftsmen who have left their cubical-shaped work week to try and hack it out in the trenches of the fickle hand tool world?
Or… is there something more to it? Is this really a crescendo of practically-minded people who look forward to the serenity of a quiet shop, who yearn to rub the aching muscles that result from an hour of dimensioning lumber, and who want to breathe in the scent of freshly planed wood instead of fine particles of sawdust?
I vote the latter, if for no reason other than the simple fact I cannot imagine the former! I feel the momentum of something bigger building up, and I look forward to the resulting revolution – people casting aside the daemons of technology that suck their souls out through smartphone-strained eyes. For us woodworker types, there is an obvious place to start that change in our own lives.
You might be wondering where Jim Tolpin’s book comes into play in this thought process. I’ll tell you. It is a blueprint, a path, a way for you to create a shop you can go work in at two o’clock in the morning without fear of waking your spouse or children. It isn’t a “follow these exact steps and you will find Woodworking Nirvana” kind of book. It is a guide for anyone who wants to turn their woodworking hobby into both more and less at the same time. More pleasure. Less danger. More quality time with your iPod trickling your favorite Grateful Dead concert into your ears. Less ear pain from expensive, skull-crushing hearing protection. More of an understanding of the wood with which you work. Less time worrying about measuring exact dimensions.
Section One:
After a thoughtful and mood-setting foreword, Mr. Tolpin walks his readers through the differences between a hand tool shop and a power tool shop (and the benefits of the former, if woodworking is your hobby and not your job). He covers size, layout, workbenches, saw benches, and a (relatively) brief, but comprehensive, overview of hand tools.
Section Two:
The second section of the book is devoted to shop projects. But it isn’t your typical candlebox/cutting board/cabinet list of projects. Instead, it is a series of projects that supplements your cordless environment with accessories essential to making a hand tool shop work. As you tackle each of these projects – beginning with a straightedge, a try square, winding sticks, and a planing stop – you will develop your hand tool skills and, more importantly, your confidence. By the time you’ve finished with these important shop jigs (i.e. the implements of a hand tool cheater!), that candlebox will be a breeze.
Whether you are just starting out, interested in incorporating more hand tools into your power tool shop, or want to get rid of most of your power tools completely, I think this is a great place to start.
TKW
Christmas Presence…
Welcome to 2013, fellow woodworkers and kilt wearers! By now I’m sure everyone has settled back in from their Christmas/New Year vacation? Our holiday vacation started a little rough, and two days early, when Finley was admitted into the hospital with breathing difficulties. He was finally diagnosed with RSV, which is nothing more than a common cold to you or me, but can be so much worse for toddlers and infants, especially when they are already susceptible to upper respiratory infections. There is nothing worse than seeing your child under duress. Honestly, though, I think the fact that he was tethered to a 6’ oxygen tube was more of a problem for him than the breathing treatments and the pokings and proddings by the nurses. He hated being confined to such a small space.
But we stuck with it, so he was able to leave after two days. We went home and all three of us slept for 12 hours straight. We had originally planned on leaving for Ohio (to visit the in-laws) that next day, but decided to rest up for another 24 hours before beginning the arduous three-state journey.
His recovery went much better than expected (though his sleep routine went completely out the window), so we quit the nebulizer treatments after another three days. He was even left without the nagging cough the doctor told us would linger for another four to six weeks.

He figured this part out pretty quickly…
This year, he became fully aware of some of the traditions of Christmas – namely, the one of giving and receiving presents. Ok, there was a little more focus on the receiving bit. Very quickly, it seemed the act of opening the present became more important than the actual present itself. Hopefully this is just a phase all children go through? Fortunately for him, being the only toddler on his mom’s side of the family meant a few extra rounds of presents to open. I believe this has sated him for some time. While we understand the desire of others to give him presents (as well as his desire to receive them), we really do try to focus more on the other meanings of the season aside from the gift-giving.
After several days of visiting with family and friends and eating good Amish food whenever possible, we started the journey back. Though we stopped in Dayton on the way to northeast Ohio, we decided to pass through Cincinnati on the way home. This left us with a few hours to meet up with Chris Schwarz and Megan Fitzpatrick (he says with a healthy dose of nonchalance…) at an Irish pub in downtown Cincinnati, where all the staff wore kilts and they had a long, long list of beer on-tap. My clever wife took charge of watching Finley for most of the time, which allowed me the opportunity to talk shop with the former and current Executive Editors of Popular Woodworking Magazine. (Merry Christmas, Ethan!)

Can you guess which pair of shoes is mine?
The next day, with the intention of stopping at Indianapolis for lunch, I called my friend, Jeff Skiver, to see if he and his wife were free to meet up. They were, and so we spent another two hours visiting and enjoying the true gifts of the holiday season – laughter, joy, and good friendship.
From the wonderful staff at the hospital all the way to the friends we met with on the drive home, we could feel the Christmas presence in our lives. And I was very grateful for every bit of it. It helps me recharge my batteries and prepare myself for whatever challenges the new year might bring my way. (It isn’t quite as good as a week on the beach, but it is a close second.)
I must admit, I received some Christmas presents that made me grateful, as well. I can’t wait to tackle Matt Cianci’s Build A Backsaw class in April with my new Auriou cabinetmaker’s rasp and my Gramercy rat-tail rasp, which will be perfect for shaping saw totes. My experience with rasps thus far has always been with the machine cut variety, so I’m looking forward to trying out my new hand cut ones.
I hope everyone had a blessed Christmas and a safe and happy New Year. Thank you, kind readers, for being a part of my 2012. I look forward to spending more time in the shop and more time with you on my blog as I tackle the challenges of 2013.
Now Where Did I Put My Karma? Ah, There It Is…
When it comes to my woodworking hobby, lately I’ve been trying to focus strictly on doing things that will improve the shop – building a saw bench, making hanging wall storage, sorting through tools to determine what I will keep and what I will sell, determining shop layout, locating wood for my workbench top. Up until last week, I was doing pretty good.
Then a friend of mine, Matt, put out a call for help that I couldn’t refuse. His brother, also an acquaintance of mine, has thyroid cancer. They’re taking out his thyroids later this month and then he’s going to start some fairly aggressive treatments. And he needs some financial help. Matt, being the good brother that he is, picked up the Fundraising Ball and ran with it.
Matt knows a whole lot of talented people – musicians, painters, potters, woodworkers – and thought he might be able to come up with something that involved all of them. Half of the friends who responded to his request for help are rock and metal musicians, so I think he’s going to organize a charity concert somewhere in St. Louis proper, where it would be well-attended. The other half was an eclectic group of artists and musicians who are more folksy than rock, so he was thinking about doing an art show of sorts in our home town of Washington, MO, with live folk music playing throughout the night. If properly advertised, I think that, too, could be well attended.

Ye Olde Wine Barrel
My job, obviously, is to help make some of the wares he’ll have for sale. Since Matt works at a winery (did you know the hills just 40 miles southwest of St. Louis are perfect for growing quality wine grapes?), I asked him if he would want something made from wine barrel staves. He agreed that would be a great idea and we arranged to meet so he could bring me 25 barrel staves to begin working with. He plans on having the event at some point early in 2013, like February. I guess I’m shelving some shop projects until then.
But Karma has a funny way of coming around quickly in my life, for better or for worse. This time, it was for the better. Not 24 hours later, my younger brother called me and said he needed to run into St. Louis that weekend to pick up some hardware for a bed he was making for my niece. He said he had a few hours to spare if I wanted him to stop by and help me install my workshop door!
Keeping with the whole recycled/green theme, my work shop door was a Craig’s List find, the front door off of a local 100 year old house close to the river just a few miles north of St. Charles, Mo. The seller wanted $50 for it and even offered to deliver it, since it was already in the back of his pickup truck. That was two months ago. Unfortunately, it was just the door, with no frame, so I needed a bit of expert help with installing it. Framing out doors is something my brother does for a living, in a custom cabinet shop in Union, Mo, so he seemed the most likely person to help me. But he’s a busy man, so it isn’t easy to get him up to my house for such things.

New Workshop Door
So he showed up on Saturday afternoon, we met with Matt to pick up my wine barrel staves, swung by Woodcraft to pick up his bed hardware, then headed back to my house to install the door. A few hours later, I had warm, homey privacy to my new workshop.
Because of some physical structure issues in my workshop (boxing around some duct work), I was limited in how the door could be installed. The only option was to make the door open out into the basement and make the original inside of the door go on the outside of the workshop and put the weathered side of the door facing into the workshop. The inside of the door is in good condition – I probably won’t do much to it, if I do anything at all. The outside of the door, on the other hand, is a bit… beat up. I’ll probably try to sand it down some and remove the weathered wood for some fresh tight-grained slow growth fir.

The Other Side…
Even though it will be a little extra work, I’m not complaining. My workshop now has a door! (My wife isn’t complaining either, as the door was parked on her side of the garage and she had to be careful to avoid hitting it with her car for most of two months.) Now I just need to figure out what I can make with some white oak wine barrel staves. Hit me up if you have any ideas (aside from the obvious votive candle holders)!
Just Build Something, Dammit!
After some deliberation, I decided I needed a saw bench first, in order to get some progress going on the rest of the shop rebuild. So I’m prepping the wood right now. This was originally 2″x12″x8′ material I’d hand selected and then stacked and stickered in the garage over a year ago for building a workbench. I don’t need that much of it anymore, since I’ve decided to take a different route for building the bench top and legs. In any case, it is pretty darn dry at this point, so I don’t expect a lot of wood movement. Plus, as you can see, I picked my boards with center pith (which I’ve cut around) to give me a lot of quartersawn material. Smart, eh?

Cleaning up some SYP boards
I did some wringing of hands for a while, wondering where I was going to find 1 1/2″ material for the bench (which is what the plan I’m looking at called for). Finally, I said, “Just build something, dammit!” and grabbed a board and marked out some rough measurements and went to work with a rip saw and a cross-cut saw. Then I spent an hour or two with my jack plane and a smoothing plane. End result? Four legs, two stretchers, and a top.
I’ll have to build another before I’m done. A pair of saw benches means a place where I can crosscut and rip material easily, which is a must since I’m trying to reduce tablesaw usage. It will come in handy when I’m squaring up my bench top material, which I hope to be acquiring soon in the form of some 8′ long 6″ x 6″ pine beams. The extra thickness of the top will mean two things – some really beefy joinery, if I decide to go with through-tenons, and that I’ll have to do some relief boring (about 2″) from the bottom on my bench hook holes if I want them to hold properly. And I’ll go ahead and use this material for the legs, as well, which means this thing should be pretty darn solid. That’s good, because my left foot is tired of hooking the bottom bench rail to try and keep it in place while I handplane on my current crappy bench. Although, I must admit it is building some muscles I didn’t know I had.
2013 Woodworking Calendar

2013 Woodworking Calendar
If you’re anything like me, I feel sorry for ya then you probably forgo the free, but highly bland, wall or desk calendar your office provides you around this time every year and opt for something that helps take your mind off work, even if just for a brief moment. Normally, your options aren’t that spectacular; you can torture yourself with pictures of far off destinations you will likely never visit (and, let’s be honest, won’t look like that if you DO get to it one day) or maybe you like looking at babies dressed up as unicorns and stuffed into flower pots (hey, whatever floats your boat, man). This last year, I’ve been staring at lush green landscapes and quaint brightly-coloured cottage doors on whitewashed houses, dreaming of a return to the Emerald Isle.

Chris Schwarz’s Anarchist No. 5
But now you have another option! You can torture yourself with fabulously detailed photos of woodworking tools, some of which you actually have a chance of owning! In just a little more than a month, I’ll be staring at THIS calendar from Catharine Kennedy at ToolEngraver.com. If you don’t live with your head shoved up the business end of a router, you’ve probably seen a fine example of Catharine’s work by way of Chris Schwarz’s Anarchist No. 5.
I ordered my calendar several months ago, when they were first made available. I’m excited to be able to glance over to the padded cell wall on my left and lose myself in the delightful twists and turns of wood and steel shaped by thoughtful, caring hands to work that medium we love so much.
I have no affiliation with Catharine Kennedy or ToolEngraver.com (or Chris Schwarz, for that matter). I just like looking at great pictures of fine woodworking tools. And I like supporting a small business, even if it is just through the purchase of something as small as a wall calendar.
So pick up yours today and, on January 1st, let the drooling begin!
NYPD Pipe and Drum Box, Part 4…

Hanging Out With Robert Burns
Last month, I finally finished the sgian dubh presentation box for Bill, a member of the NYPD Pipe and Drum band. The box, along with a pair of Rab Gordon sgian dubhs, was commissioned by Bill’s (great) friend, Don.
When I first received the request from Don, he indicated several details he wanted me to work into it, if at all possible. I told him I would see what I could do, but that I really worked better when I was given a certain amount of creative freedom. I also explained that it would be a design challenge to put so many details on the box without detracting from the overall appearance of it. (See? I can be diplomatic when I need to be.) Finally, I told him what kinds of costs were associated with my boxes, which can be a bit high as I use the best hardware I can get my hands on. I’m not going to spend 20 hours making a box and put some cheap $2 pressed hinges on it.
But he was a great sport. He agreed with using the best hardware possible, let go of the reigns, and said, “Have at it!” I decided to take the opportunity to work on a design idea I’d been mulling over for some time. Here is the end result:
Title: NYPD Pipe and Drum Sgian Dubh Presentation Box
Dimensions: 14″ x 6 3/4″ x 2 3/4″
Materials: Mahogany, Curly Mahogany panel, Bog Oak escutcheon, Irish National tartan lining, Brusso brass hinges, English half mortise box lock from Whitechapel Ltd.
Finish: Amber Shellac, Renaissance Wax


Joinery Detail

Details of the inside.
Critique:
Any time I finish a project, I like to sit down and take notes on what I did wrong, what I did right, what elements about the project I liked and which ones I won’t do again. I’m sure some of the cons I’ll point out aren’t noticeable to anyone but the creator of the box, but I still know they are problems, so I want to make sure and work on correcting them on future boxes. (Feel free to add any kind of constructive advice you might have; often, we spend so much time looking at something that obvious mistakes or areas of improvement are lost on us.)
Let’s get the cons out of the way first, shall we?
- For starters, I took way too long with this project. That was due to many factors, including raising a one-year-old-turned-two-year-old, a complete wreck of a workshop, and challenges with working out a new box design.
- I did way too much sanding with this project. That mostly had to do with rounding the proud box and bridle joinery.
- There were a few small sections where I wasn’t completely happy with the finish. I’m sure that is mostly due to technique and being rushed at the end. (I’m always rushed at the end, for some reason…)
- I like the photos of the box in its “natural” habitat, but I probably should have taken some proper pictures of it, as well, with the multi-angled lighting and the backdrop and what have you.
- Finally, there were a few construction issues I had, like when I accidentally rounded the wrong edges on the lid frame when it was disassembled. In order to fix it, I had to plane it a bit and that made the bridle joints uneven. I also had a few joints that were not quite as tight as I wanted them to be. What bugged me most of all about the joinery, though, was that I used the table saw to cut it all. The joinery on the next box will be done with hand tools, for better or for worse.
And now the pros…
- This box is by far the most elegant of the boxes I’ve made so far. I was very happy with the end result of the exposed box and bridle joints and the box dimensions. I will definitely make some boxes in the future that use this technique.
- I loved the combination of mahogany and curly mahogany with the little splash of bog oak. I want to start doing more with my bog oak escutcheons, though. I have some ideas jotted down – I just need to start putting them into the projects.
- That half mortise lock installation was tight! I love it when I end up with nice crisp lines and a well-fitted lock.
Overall, I’m very happy with this box. My wife told me this was her favourite box so far, as well. I’ll have to keep that in mind when I start working on a box for her.
Brace Yourselves For The Revolution…

“Raking” leaves with Finley.
On Saturday, my wife and I finished up some of the remaining outdoor chores for the fall season. The first project was to rake up the last of the leaves from the sweet gum and the hard maple trees. The little one always makes such things take longer (driving his dump truck through the piles of leaves, helping us out with his own rake, taking my rake to use as a light saber, etc.) but he also makes them more fun.
Another project was to drain the garden hoses, which we were using to water the recently aerated and overseeded lawn, and bring them inside the garage for the winter. (The worst thing about raking leaves after having the lawn aerated is that it looks like there is dog poop everywhere. Am I right?) And that brought up a project I’ve somehow managed to miss or avoid for about three years now.
Back before Finley was born, maybe even before my wife was pregnant with him, I picked up two hose holders from Lee Valley. But you would be hard pressed to find out from me how well they work, because I never got around to putting them up! It just seemed like when I had the time to do it, we didn’t have the wall space cleared in the garage. And when I had the wall space cleared in the garage, I forgot to go out and hang the hose holders.
But the planets must have been in alignment on Saturday – I had the wall space AND I had the time (possibly more importantly, I had the inclination). So I went down to the basement, grabbed a drill bit, a handful of wood screws, and my Panasonic cordless 12v drill; I figured I’d have it done in no time. The nice thing about that Panasonic is the drill runs fine until the battery dies – it doesn’t progressively get weaker and weaker, it just stops. Unfortunately, I was only half way into drilling the first hole when it stopped.
[Insert exasperating sigh]
That stupid drill doesn’t seem to be holding its charge anymore after sitting for a little while (I last used it about three weeks ago). I know I put it away with a full charge on the battery. No big deal, though. That’s what spare batteries are for, right? So I went back downstairs, grabbed the backup battery, popped it in, and tried to continue.
Nope. It was as dead as the first. That one also had a full charge on it when I put the drill away a few weeks ago. Grrr.
[Insert second exasperating sigh]

Cordless Drill: 0
Brace: 6
So I plodded downstairs to plug in the battery charger, my mind trying to figure out how to not lose my inclination in the 30 minutes it would take to charge a battery, when I walked past the one section of my old tool storage that isn’t mucked up with trying to move into the new shop. That happens to be the section where my braces are hanging.
“Psh,” I said to myself, “I’m done with this cordless drill crap.” I grabbed my 8” brace, went upstairs, chucked the drill bit in it, and had six holes marked and drilled out in under a minute. Then I exchanged the drill bit for an extended driver bit and had the two hose holders mounted in another 60 seconds.
And the hand tool revolution edges yet another power tool out the door…

