Ailsa Craig Box Update…
(And now for a long overdue update on the Ailsa Craig box…)
After letting the boards I’d ripped down rest for a bit in the shop, I cut them to length and width and squared the ends in preparation for dovetails. Because it’s been so long since I’ve cut dovetails, and because marks are hard enough to see in walnut, much less the black void of bog oak, I decided to use the blue tape trick. This is the first time I’ve tried it and, I have to say, it really made the task a lot easier.

I will forever mark my waste.

Always a joy to use the sash saw I made myself in a Matt Cianci class.

Using the Knew Concepts saw isn’t too bad, either!
I got to use my new dovetail marking board…
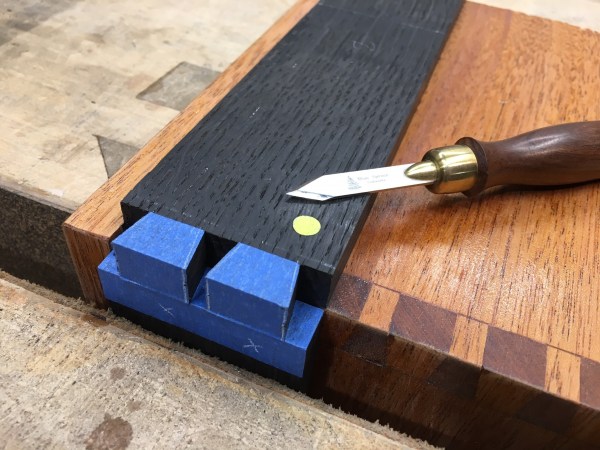
That dovetail marking board came in handy pretty quickly! And my Blue Spruce marking knife always comes in handy…
I also used a David Barron trick, which is to put little colored sticker dots on the matching corners of the boards. Like the blue tape trick, this one worked amazingly well and I was able to keep all of the boards oriented properly at barely a glance.

Colourful, innit?
And… they actually went together quite well, especially considering how hard this wood is. Compared to the air-dried walnut I’ve been working with lately, kiln-dried 5,000 year old bog oak works very much like ebony. In other words, chopping out my dovetails was a bit difficult, even after clearing away most of the waste with a coping saw.

Waste? No, I’m pretty sure I didn’t throw those offcuts away…

Are they air tight? No, but considering how few dovetails I’ve actually cut, and considering how difficult this wood is to work, I’m quite chuffed with these results!
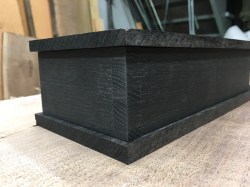
I need to figure out the base and the lid still, but I thought I’d lay them out for some dimensions. I think I’ll probably plane a roundover or bullnose on the top edge of the base. Because I’m not going to hinge the lid, I’ll likely need to plane a rebate on the bottom of the top board to create a lip. This will allow the underside of the lid to fit into the box securely.

After a bit of “clean-up”, they look even better!

Boy, I don’t have a whole lot of wiggle room for the base. But that just means I won’t have to rebate too much to fit the lid, either.
Hopefully we’ll have some continuous warmer weather here in the Midwest soon. My shop has been sitting at about 52 degrees Fahrenheit, which isn’t terribly conducive for shop activity. I have several projects that are in progress and I’d really love to be able to finish them up.
I’d also like to try and update the blog a little more! Will work on that, as well. Apologies, gentle readers.
TKW


Is that the replacement handle that Lee Valley sells for the Knew Concepts saws? The box looks good!
LikeLike
No, this is the one sold by…. oh dang it. Can’t remember their name. Has the word Elk in it?? They work with Knew Concepts and shared a booth with them at the first Handworks. They brought ALL of their saws and saw handles they had in stock and Knew Concepts only brought some silly small number and sold out in the first two hours. This was the last one the other guys had. I can try to find the name later when I get home.
LikeLike
Elkhead Tools is the company, Brett.
http://www.elkheadtools.com/saw_handles.html
I don’t believe I paid their website price, though. Maybe they were running a sale because of Handworks? Or maybe it’s because it was the last one and actually a sample one they brought to shows and decided to sell it to me because they and Knew Concepts were both otherwise out.
LikeLike
Goodness! The care and skill required, really amazing.
LikeLiked by 1 person
“Because I’m not going to hinge the lid, I’ll likely need to plane a rebate on the bottom of the top board to create a lip.”
I have done this several times using a plow plane or combination plane. Take care to get it level all around, and sneak up on the width of the rebate so the top fits snugly. (This is one instance where I’ve thought a left-hand plow might be a worthy investment.)
LikeLike
I was thinking I’d just use my Stanley 78 to rebate it. But I’ll definitely sneak up on it as you suggested.
LikeLike
So how many times did you have to sharpen while chopping out the waste?
LikeLike
I went in with a fresh sharpen and honed a few times with a strop, but didn’t end up having to sharpen after the first.
LikeLike
It looks really good! I look forward to seeing it’s progress.
LikeLike
I look forward to making it progress!
LikeLiked by 1 person