Studio D Conference Table, Part 4 – Butterfly Inlays
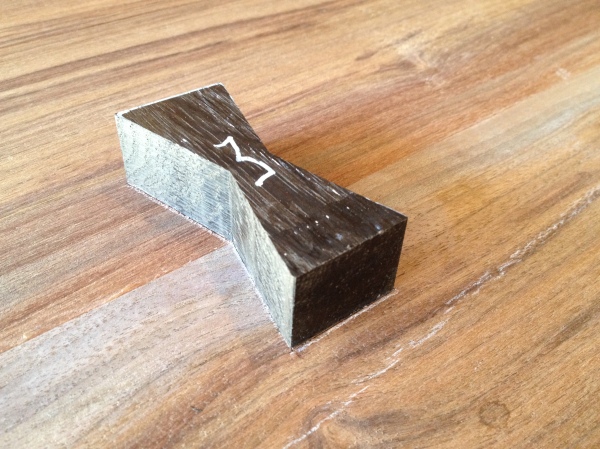
The joinery is tight and I know I used enough glue and clamping pressure, but… it never hurts to add a little extra insurance. So before I moved on to preparing the top for finish, I added five more bog oak butterfly inlays along the seam where I joined the two planks.
Normally, I do my inlays by hand. I like the detail and precision and the presence required for such work. It is one of the woodworking techniques I love doing the most, whether it is an escutcheon or a butterfly key or a semiprecious cabochon in the lid of a box.
As I mentioned in Part 3 of this series, the bog oak is sourced from a company called Adamson and Low, out of the UK. Hamish and Nicola have been supplying me with bog oak for a while now; it is the best, both in structural integrity and in colour, I’ve ever found. And they will work with you to get the size/cut you need, if you require something specific. If you ever want to use bog oak for a project, I highly recommend them.
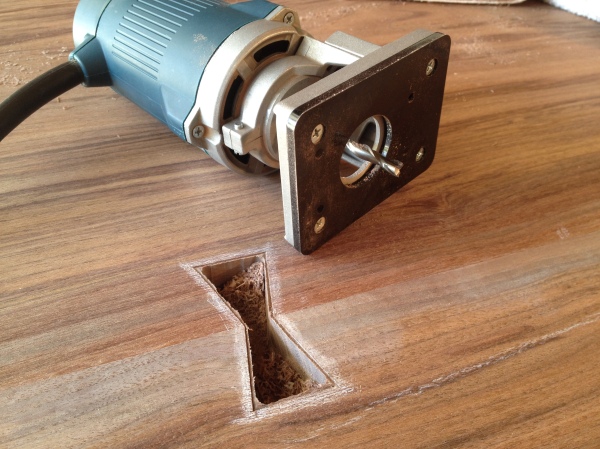
These keys are a full ¾” thick. Because of that, I decided to speed up the process of waste removal with my small Bosch palm router, one of the few hand tools with tails I still own, and a ¼” spiral upcut bit. I also used a powered drill for the initial waste removal since I still need to clean up most of my brace bits.
For a slight change of pace, I’m going to let the pictures do much of the talking…

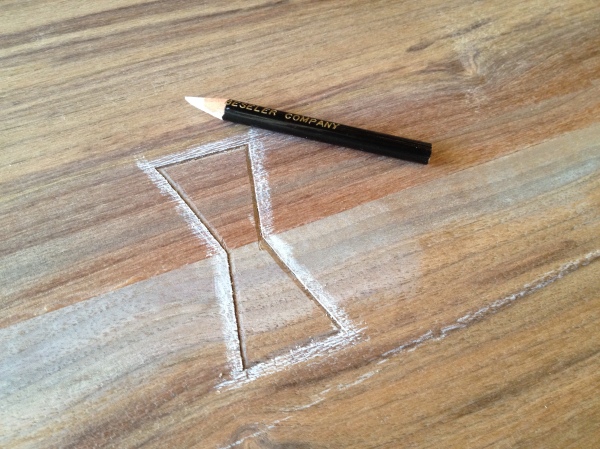
Trace the outline of the butterfly with a marking knife. Then use a putty knife to slowly and safely pry up the inlay. Remove the carpet tape.

Similar to when making a saw cut, use a paring chisel to take out a small wedge along the inside of the outline. I think this helps to preserve a clean outline.

Since I’m using a palm router for the bulk of the remaining waste removal, I wanted to create a spot to drop the bit in.

I did all of these at the same time; that way, I could get back to listening to music as quickly as possible.

A flush cut saw removes whatever is left sticking up. BONUS: I ended up with 8 small butterfly inlays I can use in a future project!

If you are going to save your bog oak dust for tinctures and ointments, be sure and properly prepare the blade of your flush cut saw before use. In the second-to-last inlay, I had a minor chisel bruise along the near left edge and a small gap on the near end. After finish, neither was noticeable.
In order to avoid making the table look like a big zipper, I didn’t want to space the butterfly inlays out evenly along the entire length.
Though it might not look like it, there is actual method to how I positioned them. I started at the far end, laying out some thin hardboard templates of the inlays so I could figure out the best placement. I decided to place one 5” from the far end of the inner live edge. To balance that, I put the farthest butterfly 5” from the end of the board. That left a space of 12.5” between them.
I mirrored that layout on the near end – 5” of space, butterfly inlay, 12.5” of space, butterfly inlay. For the middle butterfly, I measured out 5” from the near end of the inner live edge. Since that black bog oak inlay would be highlighted by the sapwood, it was the most important one to do as cleanly as possible.

I like the contrast between the center butterfly, highlighted in sapwood, and the butterflies in the knots, which you almost don’t even know are there.
The end result is, I think, a good layout. While you might not see the composition when you look at it, your brain probably does, and it lets you know it is a pleasing aesthetic feature. And I know I have five additional aids in making sure the seam between those two planks will always stay nice and tight.


Hey Ethan, congratulations, what a beautiful job!
LikeLike
Thank you!
LikeLike
Ethan,
My wife and I started talking last night about a walnut slab kitchen island in our current remodel project. Since you’ve just completed this project, I’d like to get your opinion on doing such a thing. It’ll be roughly 4’X12′. Did you completely fill all your cracks with epoxy? what did you finish your top with?
LikeLike
Jeremy,
First thing I would say is that sourcing the wood is going to be the hardest part. As a standard, most wood – including slabs – is cut to 8′ lengths. So you’ll have a bit of a harder time trying to source 12′ long slabs, especially in walnut, unless you work with a sawyer and get something cut specifically for yourself.
Second, a 4′ wide slab is going to be rare, especially in a 12′ long walnut slab, so I’d plan on joining two slabs for it. I talk about layout of the tops in one of the earlier posts about the conference table.
I did fill all of the cracks with epoxy. I glued all of the butterflies in with epoxy, as well.
The finish I used was Waterlox. I’m just doing a final proofread of my next blog post, which will cover the finish I used and why I used it. So instead of repeating it here, just keep an eye out for the next update later today.
If you want, we can chat more about it via e-mail. Just send me a message – ethansincox@gmail.com – and I can go into more details about some things and help you with a strategy.
Ethan
LikeLike
Looks great. What brand of flush cut saw is that?
LikeLike
I bought it from Lee Valley about… 10 years ago? Seems like they don’t have the exact same one in stock with the bubinga handle anymore, though.
This might be the closest one to it. Maybe they just changed the handle…
http://www.leevalley.com/us/wood/page.aspx?p=69373&cat=1,42884
LikeLike