A Gathering Of Drills…
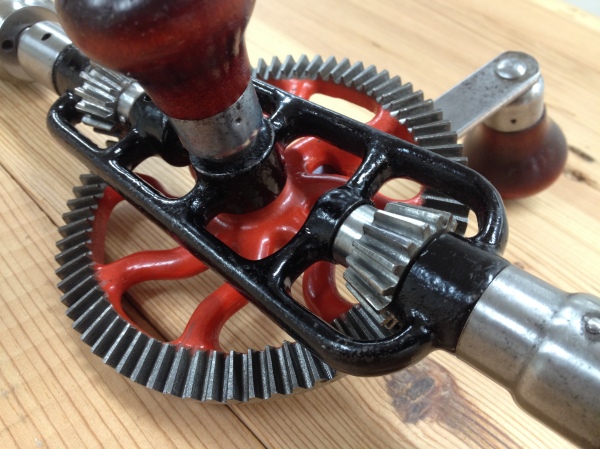
Anyone who has been following me on Instagram already knows this, but I’ve been on a hand drill restoration kick for the last week or so. Thus far, they have all been what I call “soft” restorations. That means all I’m doing is breaking them down (in most cases leaving the pinions intact), scrubbing raw metal parts (where there is no paint or chrome) with my coarse, medium, and fine Sandflex hand blocks, lightly scrubbing the painted, chromed, and finished wood parts with 0000 steel wool and Kramer’s Antique Restorer, cleaning any knurling and the teeth of the gears and pinions with my Dremel and a small wire wheel attachment, adding 3-in-1 oil to oil holes on the main shaft, and generally removing 100+ years of dirt and grease and grime.
What I’m not doing is using a wire wheel or sandblasting the gears and frames to get them down to bare metal so that I can repaint them. I’m not sanding the finish off the wood and re-staining and applying a new coat of finish. I’m not even disassembling the chucks (yet) to give them a complete overhaul. I do not want to try and make them look like brand new versions of the tool; I want them to show you the life they’ve lived thus far. But I want them to be clean. I want them to run smoothly. I want them to make holes again!
In most cases, the drills don’t NEED to be stripped down to bare metal and repainted. This is because I am very selective in the tools I buy. I don’t go to an estate sale and buy every hand tool I see that looks old. For one thing, I don’t buy tools I don’t need. I don’t buy old tools just because they are there. A, I don’t want to collect tools; I want to use tools. B, if I have good quality user tools sitting on a shelf in my basement when I don’t need them, then that means those tools can’t be in someone else’s shelf being put to good use…
Anyway, these drills don’t need to be stripped down because I tried to find drills that had much of their paint intact.
None of these soft restorations were photo-documented for me to write up a detailed blog post. My plan was to get a few cleaned up and figure out what I’m doing and then tackle my 1914 Millers Falls No2 with the intention of doing a proper write-up. It is a more desirable version of the common No2, with the elongated crank handle and the guide bearing. It is one of the very few tools I’ve lucked upon at one of the local antique malls, where I usually just fine wrenches and screwdrivers and moulding planes (without the blades, of course).
I know it might seem presumptive of me, but as soon as Finley started showing an interest in working down in the shop with me, I quietly began assembling a small set of tools for him. So not all of these hand drills are mine; I’m not a collector! But… believe it or not, I’m having a lot of fun with them. After I’ve practiced on my own, I might consider picking up a few here and there and cleaning them up to sell or give away to friends or family.
The first one I started on was Finley’s No2. It is one of the newer drills I have, being made some time after 1938. But it probably isn’t much newer than that – the guy I bought it from said his grandpa used it and then his dad used it. His love is motocross bikes and he figured he wasn’t ever going to use it, so he thought he would put it in the hands of someone who would. He was excited to hear I was going to clean it up and give it to my son to use in the workshop.
Any time I get a tool from someone who lets me have it for a good price because they know I’m not going to fix it up and sell it, I like to send them pictures of it after it has been restored. He was surprised I actually followed through with my promise to do so (who follows through on their promises anymore, right?) and was floored with how great it looked and worked once I was done. Finley was pretty excited, too.
This was the one drill where I did remove the upper pinion. It wasn’t spinning nearly as well as it should have been, so I picked up a hammer and a drift pin and removed the pin holding the handle in place. And I found I had to remove another pin to get the threaded shaft out to get to the pinion. That was all very nerve-wracking, but after I spent a moment cleaning up the pins, they slid right back into place during re-assembly once I had the pinion working. Now I feel quite confident in doing that again.
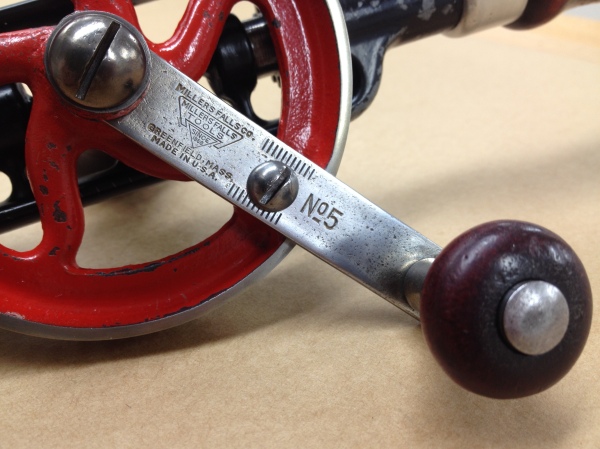
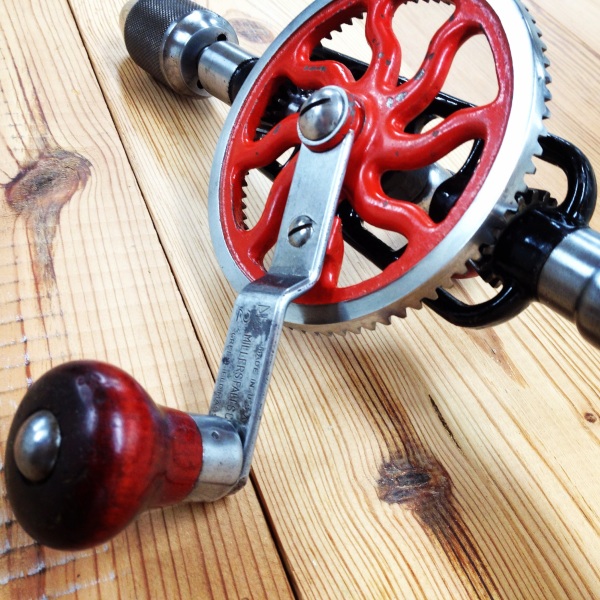
Then I worked on my Millers Falls No5. It is another “newer” hand drill (1935 or so). It had some damage to the back of the handle, but, as I said, I left it alone and just focused on making sure it worked properly.
The last one I worked on was a Millers Falls No3. I was a little confused at first when I tried to date it using the information on the Old Tool Heaven website. It had the tear drop side handle from the earliest period, but it had a newer chuck, the newest logo, and the gear was painted red. Then I realized one of the previous owners probably just lost the side handle and replaced it with something that fit. When I looked at it more closely, I realized the side handle is probably rosewood, which means it came off of an older MF No5. (If anyone out there has an older No5 that is missing the detachable rosewood teardrop-shaped side handle and has an unbearable desire to locate one to make their drill 100% original, let me know; maybe we can work something out.)
This one was a little different from the other two because I quickly realized most of the chrome was still there! So after cleaning it up with 0000 steel wool and Kramer’s, I pulled out the German metal polish and an old sock and made the old sock black with tarnish.
I took some pre-restoration pictures of the No2 I’m going to document…
Before I do that, though, I might work through one or two more I happen to have but probably won’t keep – they will either be sold or given away. Or I’ll trade up and get rid of my No5; I guess it depends on which one I like the most.
I can see how some guys get addicted to buying old tools. I’m glad I don’t quite have that problem – I seem to be addicted to cleaning old tools up so they can be put back to work. I really DO have a few woodworking projects in various stages of completion. I’ll try to bring those to focus in the near future.
TKW


I have also started on a small set of tools for my young son. You might want to look for a Millers Falls No.4D. These are much smaller drills that were made for school aged children. It is almost half the size of a Millers Falls No.5.
LikeLike
Right now he’s using the 3 and really likes it. He hasn’t used it since I cleaned it up, though; I’m interested to see how it works for him now.
LikeLike
Nice job on the restores. They come in handy when drilling with tiny drill bits.
LikeLike
I’ve been using them for a few years now and really love them – much more than using a corded or battery-powered drill. I just finally got around to cleaning them up is all.
TKW
LikeLike
Nice job with the “soft restorations”. A lot of guys try to make their old tools look brand new; I like your approach better.
LikeLike
Thanks! I don’t want to knock the work those guys do – I enjoy seeing what those drills looked like when they were brand new. It’s just a matter of preference. As Wiktor once said, “My tool, my restoration.”
Thanks for the comment!
TKW
LikeLike
After not finding any for a long time at what seemed a fair price, I ended up winning 2 on eBay yesterday: a 2-01, and a 5. Looking forward to getting them and doing my own clean up work, so this post was rather timely, and I look forward to the documentation on the No. 2.
LikeLike
Excellent news! I think a lot of tool finding seems to be like that, for some reason – you go a long while without seeing anything worth buying and then suddenly everything pops up at once.
Or maybe that’s just how it is for some of us.
In any case, I’ll be starting on the MF No2 soon, so stay tuned!
LikeLike
I picked up an old Miller Falls model 77A (enclosed pinion) and the chuck was stuck on the shaft. It appears that the chuck is not the correct size for the MF shaft. I thought I would clean up the threads on both sides of the drill and chuck, but I find that the chuck is somewhere between a 5/16 and 3/8 fine thread. Might you have an insight on what size chuck I should be looking for? Any assistance is greatly appreciated.
LikeLike
Um, sorry, I wouldn’t know anything beyond what they have on the Type Study pages.
LikeLike