My Contribution To The Perpetual Woodworking Project (Part 2)
That last blog entry was a lot of writing, so I’ll try to keep this mostly images.
I spent a few hours down in the basement last night, working on the Millers Falls No. 9 Smoothing Plane…
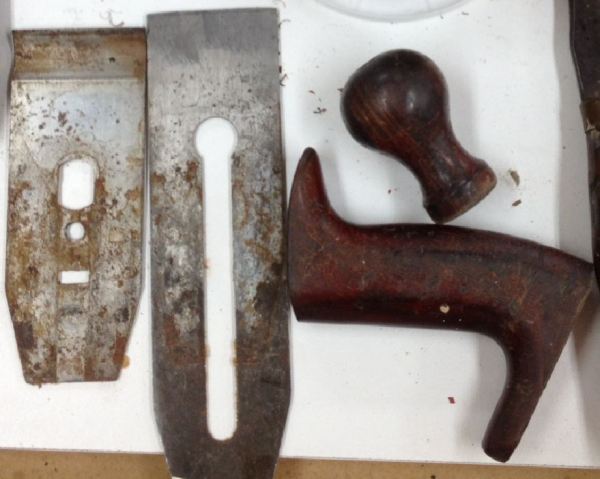
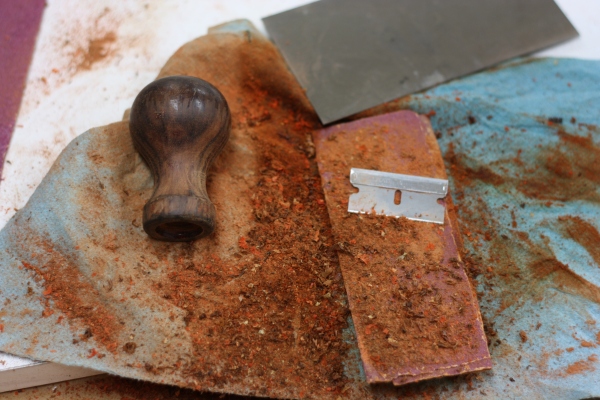
Oh. My. Goodness. I can tell you now why I’ll never collect or pick up another Type 4 Millers Fall handplane. That orange varnish is horrible. I thought about trying to just leave it, but if you’ll notice in the pre-restoration detailed image, there is a distinct line across the tote near the base. Or maybe you won’t; it’s kind of a crappy picture. In any case, I think it is a break. It didn’t look like it went all the way through, but I needed to examine it more closely to see what needed to be done about it. That meant removing the varnish. Not knowing exactly what it was they used, I first tried lacquer thinner and denatured alcohol, to no effect. I didn’t really think it would work, but… one has to hope, right? I thought I had some green paint stripper laying around. Apparently I didn’t. That meant removing the tacky (as in tasteless, not sticky) orange varnish the hard way – scraping and sanding.
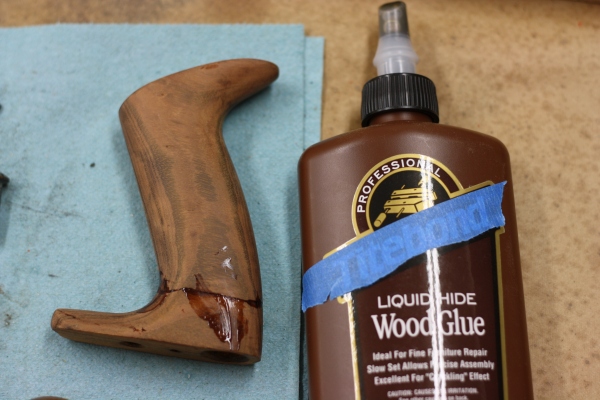
When it comes to removing orange varnish, “MF” has a whole other meaning. But I finally prevailed. Because I didn’t have much time left in the evening, and I didn’t have any weird angled jigs for gluing up totes, I decided to go with Titebond Hide Glue, holding it in place myself until the glue set. I’ll scrape off any residual glue before I put a few light coats of shellac on the tote.
I decided to do something easy before quitting for the night, so I tackled the small bits.
After soaking for a few hours in mineral spirits, the small screws and bits cleaned up rather easily. I use a Dremel with a small wire wheel on it to clean crud out of threads and such. I noticed the metal tab that holds the frog adjusting screw was originally blued, so, being the bluing expert that I am, I decided to re-blue it! I’m not yet happy with the final polish on the lever cap, so I’m going to give that one more round of polishing.
Tonight I’ll try to tackle the frog and plane body. Based on the amount of plane shavings I found packed UNDER the frog when I disassembled it, I have a feeling I’m going to be filing a bit to get the frog to seat well. (More to come…)


Hello Ethan,
It’s all going very well and I look forward to the finished item.
Happy wood working,
Alan.
LikeLike
Thanks, Alan! The tote was frustrating. But wasn’t as frustrating as trying to figure out images on my WordPress! Can’t seem to get images to load side-by-side. I’m sure it’s something simple I’m missing…
LikeLike
I’ve been slowly but surely restoring a Stanley type 11 jointer. I have it working just fine, now I’m trying to get it to look really pretty. I found myself using wd40 and brasso. The wd40 worked okay, the brasso did a nice job with the polishing. Seeing what you are going through with the tote I feel your pain. My tote is intact, but I’ve tried everything to strip it without a whole lot of luck. I may have to go your route, sandpaper and a razor. Good luck! And just so you don’t feel bad, I’m having all kinds of problems uploading photos on wordpress as well. It’s at the point where I only put up a few because it’s such a hassle.
Bill
LikeLike
The razor did OK in a few tight places, but I mostly used a heavy card scraper (the grey rectangle behind the razor in the picture) with an aggressive hook on it. That worked much better and faster.
If you find yourself with a spare $20 laying around, you might consider buying a small bottle of the Jax Brass and Copper Cleaner. It works in about two seconds, no rubbing or scrubbing or anything. Easy peasy. I got mine from Metal… metaliffar. Met… From here:
http://store.metalliferous.com/products.asp?dept=1551
For the photos, I just decided to enlarge them to full width. Looks better that way, I think.
LikeLike
your job is giving good results …
his attention to the wooden is little wonder ….
Restored a Staley Baley No. 5, but I went more radical in the process …
Congratulations.
Hotz
LikeLike
Why hide the Titebond name. There are what, only two brands available?
LikeLike
That was pure sarcasm right there.
You shouldn’t take most things I do very seriously.
TKW
LikeLike